Gradually rising temperature

Disclaimer: Links on this page pointing to Amazon, eBay and other sites may include affiliate code. If you click them and make a purchase, we may earn a small commission.

OP
OP
B-Co Kid

B-Co Kid

Member
Joined
Oct 14, 2010
Messages
235
Reaction score
8
Quick question in need of a quick answer. I'm at the parts yard, but the only year mark 8 they have is a 1997. Their computer says 1993-1996 are the same, 1997 and up are different. Will the 1997 work (cfm's, amps, etc)?

 
OP
OP
B-Co Kid

B-Co Kid

Member
Joined
Oct 14, 2010
Messages
235
Reaction score
8
Elec fan upgrade from a mark VIII. Will a 1997 work?


Seabronc

New member
Joined
May 22, 2004
Messages
7,315
Reaction score
35
Location
North of NYC
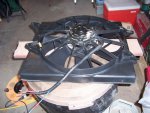
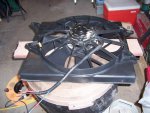
If it is off a 4.6L engine then I would expect it to work  that is the size engine I took mine from.  Be sure to take as much of the harness wire as possible for the hookup in the Bronco.  I will cover the fabrication I did and hookup later.  I'll see if I can get the specs on the 97 fan ASAP.

 
Last edited by a moderator:

miesk5

96 Bronco 5.0
Staff member
Moderator
Joined
Oct 18, 2005
Messages
9,078
Reaction score
1,037
Location
Floating in the Pacific
yo,

OK,

Buy it.

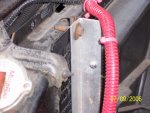
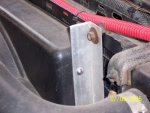
Installation, Lincoln in an 87; "... had to trim just a bit off the right upper edge to fit under the top rad hose. I wired it to a simple on/off toggle switch- no rheostat yet...I decided to install a electric fan because I spend alot of time in creeks and would like to turn it off when I'm in deep. I stopped at a local junk yard and the owner who I know well let me pick around for a bit (I have a lot of other projects too). Feeling very much under the weather from partying a little too late the night before, mistakenly grabbed a fan from a Contential rather than the recommended Taurus or Mark VIII. Got back home, installed it in about 30min and works fantastic. I had to trim just a bit off the right upper edge to fit under the top rad hose. I wired it to a simple on/off toggle switch- no reostat yet.

After a full day of driving in 80* weather, I noticed- 90% of the time, I do not need the e-fan running at all unless I am sitting in traffic. Even after running it pretty hard. My temp reaches 190*, thermo opens, and it never gets above 195* before cooling. Even tho I am using just one bracket on top, the bottom of the fan sits nice and tight on the radiator core support against the radiator and it does not move around at all. I will probably zip tie it just for giggles.

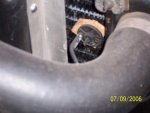
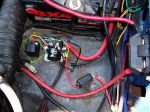
Here are some photos. Quality isn't too good and don't give me grief about the wiring. I am replacing it with proper wire tomorrow but I needed to get the truck running so used scrap wire including speaker wire...

Installation, Lincoln Mark VIII in a 93
Source: by Froggmann (Ken P) at http://web.archive.org/web/20090408065220/http://www.froggmann.com/Bronco/Tech/fan2.htm

had heard of the Lincoln Mark VIII fan conversion as far back as 4 years ago when I converted over to E-fans initially. But back then the fan just by itself was at close to $100 in local junkyards. And that was if you could find it. In doing my background research mostly through FSB I found that the fan in the Lincoln is also the same fan that is found in the Thunderbird and Cougar in the 4.6L version of those cars. So after sourcing a free non-damaged radiator I decided to take the plunge and "upgrade" to a "Mark 8" fan. I then looked up on ebay and found a fan that looked to be in great condition for only 45 bucks with shipping which was quite a suprise, especially since local junk yards won't let them go for under $60.

Installation, Lincoln Mark VIII in an 89 5.8 (SOLD, but Brian is keeping his info available
Source: by Brian S at http://web.archive.org/web/20101101221958/http://www.fullsizebronco.com/bronco/tech/fan/

http://web.archive.org/web/20101101221958/http://www.fullsizebronco.com/bronco/tech/fan/

The mechanically driven fan that was used on most older vehicles has some real advantages. It's simple, draws a high volume of air in most conditions, requires no maintenance, and is very unlikely to have problems. However, it also has some flaws, in that it robs power from the engine, turns whether necessary or not even with a thermal clutch, can not be completely stopped for certain circumstances, and does not draw enough air at idle. An electric fan also has good and bad points; while more complex (thus providing more opportunity for problems), an electric fan will draw a full volume of air at idle, can be completely shut off to keep from throwing water around the engine compartment, and does not draw power directly from the engine, although an alternator that is up to the task must be used. For me, the positives were enough to make the switch.

I chose to use a fan from a Lincoln Mark VIII. This fan draws somewhere around 4000-4500 CFM; in comparison, Flex-alite's Black Magic fan draws around 2800 CFM; Permacool's high end fan claims a draw around 2950. This fan has some fairly significant power requirements. It draws on the order of 33A continuous, and can spike over 100A at startup. I previously upgraded my alternator so this is not a concern.

Parts List
 

Lincoln Mark VIII fan

Reservoir

40A relay

40A slo-blo fuse

diode, 1000piv, 2.5A

30A relay x2

adjustable temperature sensor

project box

SPST switch

40" aluminum angle, 1"x1"x1/16"

misc nuts & bolts, connectors, 10ga and 14ga wire, epoxy


Additional writeups
MarkVIII_Fan

For severe cooling needs, the electric fan from the Lincoln Mark VIII provides the greatest airflow.  The part number is F8LH 8C607 AA and is available from Houston Performance for $149.00 plus shipping (as of 09/2002).  This is a brand new Ford Motorcraft part and has a fan diameter of 18" and a uniquely shaped fan blade.   For comparison, the Flex-a-Lite has 16" diameter blades.   Of course blade pitch, shape and speed all contribute to air velocity, but the Mark VIII has a 25% increase in surface area.

NOTE:  The Lincoln Mark VIII fan will draw continuous currents of [email protected] & [email protected], and has a starting current in excess of 100A!  You will definitely need to upgrade your alternator to a 3G-130A!

Will this Fan Fit?

The dimensions of this fan are 22"W x 18.5"H x 6.25"D.  

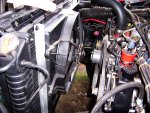
Mark VIII Fan Install
 

Seabronc

New member
Joined
May 22, 2004
Messages
7,315
Reaction score
35
Location
North of NYC
I do not recommend wiring to a toggle switch.  It is too prone to forgetting to turn on or you will have it on when you don't need to.

If you click on my pictures at supermotors, and look at the electric fan installation, you will see how I did mine.  There seem to be a lot of pictures missing from the above links.  better yet here is a direct lnk to the electric fan pictures.  I have more that I did not post there, If you are interested.  http://www.supermotors.net/registry/212/30394

 
Last edited by a moderator:
OP
OP
B-Co Kid

B-Co Kid

Member
Joined
Oct 14, 2010
Messages
235
Reaction score
8
Thanks guys. I got. It looks pretty much the same as yours seabronc. There is about 2.5 inches on each side of the radiator that is not covered when I test fit the fan. That seems to be the case in your pic also seabronc. Where did you get the hardware to fabricate the mounting bracket? Im sorry to say, but I'm sure I'll have more questions when it comes to the wiring of this doohickey..


Seabronc

New member
Joined
May 22, 2004
Messages
7,315
Reaction score
35
Location
North of NYC
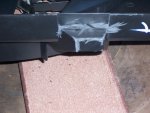
Not a problem.  I got the aluminum angle iron at home depot.  Also you will need about 8 1/2 inch bolts plus washers and nuts to attach the angle iron, plus a couple to attach the angle iron to the radiator mount frame.  

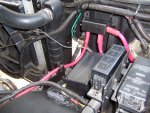
Here are a couple of pictures to start.  Ignore the cable routing, I cleaned that up after these were taken.

Bronco modifications 050a.jpg

100_3690.jpg

100_3691.jpg

100_3692.jpg

100_3720.jpg

Copy of schematic.gif

EastCoastNationals 218.jpg

EastCoastNationals 219.jpg

Lincoln Mark VIII Fan.jpg


Seabronc

New member
Joined
May 22, 2004
Messages
7,315
Reaction score
35
Location
North of NYC
I didn't bolt the bottom of the fan bracket since it fit perfectly into the bottom of the radiator mount.   

Also from your comment about fit, you sound like you already have the A/C radiator which I would expect if the truck previously had A/C.

100_3689.jpg

 
Last edited by a moderator:
OP
OP
B-Co Kid

B-Co Kid

Member
Joined
Oct 14, 2010
Messages
235
Reaction score
8
Junkyard Electric Fan : Parts List

Fan 3.8L Taurus $25

Imperial Controller PN: 3647 $36

Imperial Mount Kit PN: 226201 $6

Bosch 150amp Relay PN: 0 332 002 156 $30

Freewheeling Diode PN: 1N5408 $5

This was the parts list I got from the ford muscle write up. Aside for the mounting hardware, will I need anything else??

 
OP
OP
B-Co Kid

B-Co Kid

Member
Joined
Oct 14, 2010
Messages
235
Reaction score
8
From my research, the 1997 model only came in 4.6. So yes..


Seabronc

New member
Joined
May 22, 2004
Messages
7,315
Reaction score
35
Location
North of NYC
Junkyard Electric Fan : Parts List

Fan 3.8L Taurus $25

Imperial Controller PN: 3647 $36

Imperial Mount Kit PN: 226201 $6

Bosch 150amp Relay PN: 0 332 002 156 $30

Freewheeling Diode PN: 1N5408 $5

This was the parts list I got from the ford muscle write up. Aside for the mounting hardware, will I need anything else??
OK, 4.6L for our purposes.  

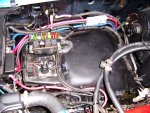
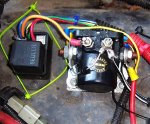
I mounted my relays directly on to the wheel well and used a hobby box from Radio Shack as a weather cover.  Used the other half for mounting my indicator and over-ride switch in that little pocket just to the right of the steering column.

The HD relay can be as low as 80 amp continuous, it is also called a wheel chair relay.  The current draw is 100 amps for about 1 second as the fan starts and then settles back to about 32 amps.  

You should also be able to get the diode from Radio Shack.  It is needed to prevent voltage spikes in your system when the fan shuts off.  If you look at the picture of the two relays you will see it across the output of the fan relay to ground.  The relay from imperial is not heavy enough for the fan current, it is only used to control the larger fan relay.

Also, if you can't find one of those diodes, I'm sure I have a couple of them.

Modifications 025.jpg

Bronco modifications 044.jpg

100_3721.jpg

 
Last edited by a moderator:
OP
OP
B-Co Kid

B-Co Kid

Member
Joined
Oct 14, 2010
Messages
235
Reaction score
8
Im confused, If i get the heavy duty 80 amp bosch/tyco relay (seen below), will i also have to get the solenoid looking relay, or Will the bosch relay replace the relay that comes with the imperial fan controller kit and the solenoid looking relay wont be necessary?

0 332 002 156b.png


Seabronc

New member
Joined
May 22, 2004
Messages
7,315
Reaction score
35
Location
North of NYC
Im confused, If i get the heavy duty 80 amp bosch/tyco relay (seen below), will i also have to get the solenoid looking relay, or Will the bosch relay replace the relay that comes with the imperial fan controller kit and the solenoid looking relay wont be necessary?
The 80 amp bosch/tyco relay can be used in place of the solenoid looking relay I used.  They are just different in shape.  The relay on the imperial fan control is used to control the heavy duty relay.  If you look on the bottom of the Bosch relay you will see some numbers ie. 30 & 87, 86 % 85, those are industry standard numbers for relay connections.  The schematic shows yo which wires to hook to what.

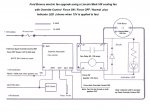
Do you know how to read the schematic?

Copy of schematic.gif


Seabronc

New member
Joined
May 22, 2004
Messages
7,315
Reaction score
35
Location
North of NYC
By now, you may have noticed that the fan has 3 wires.  That is because the Mark VIII has two speed control.  In this case we are only using the high speed function.

In order to prevent confusion for the moment you can just hook up the control as shown in the schematic.  That will run your fan automatically.   If you want to be able have manual override control, then the question is what amount of override control do you want.  The simplest is to be able to "Force the fan on".  That only takes a toggle switch.  If you want to be able to force the fan off then you need a 3 function switch ON/OFF/Automatic.

An indicator to let you know if the fan has 12V applied to it simply requires wiring a 12V LED across the diode.

I suggest that you do the diode and at least the "Force ON" function.  If the fan fails to run, the LED is a quick way to isolate between the Control and the Fan. If the Imperial control fails, the "Force ON" function can be used to bypass the control.  

I will give you the wiring changes depending on what you want to do.

 
Last edited by a moderator:
OP
OP
B-Co Kid

B-Co Kid

Member
Joined
Oct 14, 2010
Messages
235
Reaction score
8
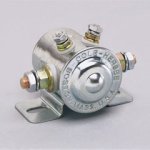
Im not much of a wire diagram kinda guy, but it seems fairly straight forward.  I opted for a cole hersee 85A relay seen below and hayden fan controller.  Im havent decided on the toggle switch, but if i do install one, it will be the on/off/auto.  The only thing left is the mounting hardware.  I plan on tackling this project this weekend..

24059.jpg


Seabronc

New member
Joined
May 22, 2004
Messages
7,315
Reaction score
35
Location
North of NYC
Im not much of a wire diagram kinda guy, but it seems fairly straight forward.  I opted for a cole hersee 85A relay seen below and hayden fan controller.  Im havent decided on the toggle switch, but if i do install one, it will be the on/off/auto.  The only thing left is the mounting hardware.  I plan on tackling this project this weekend..
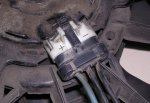
The only thing you will need to do is determine which wire is the high speed winding on the Fan.  I  have seen two different plug arrangements, one with two black and a blue wire, and one with a blue, brown, and black. The center connector on the plug is the low speed.  Cap off the center black/brown wire and use the outside black (-) and blue (+).

:)>-

Don't forget to use the diode.

Mark VIII plug_lg.jpg

 
Last edited by a moderator:

Seabronc

New member
Joined
May 22, 2004
Messages
7,315
Reaction score
35
Location
North of NYC
OK, I just modified one of the diagrams that shows how the control and fan are wired for Force ON / Force OFF / NORMAL.  You can do this with a DP ON / OFF / ON toggle switch.  I'll add the switch wiring Diagram later today I hope, just got to get it drawn and scanned in.  You will need to make up a wire harness to run  wires from the dash to the control.  Don't clip any wires on the control until you are sure the fan functions properly.  I suggest doing the basic setup and test it before adding Override control from the dash switch.

:)>-

Any Questions

#1 Diagram with out Override, #2 Diagram with modification

Fan Control Mod3a.jpg


Members online

Forum statistics

Threads
22,647
Messages
136,846
Members
25,348
Latest member
guilhermeknob
Top