1993 Bronco XLT Front End Rebuild - Auto-Locking Hubs

Disclaimer: Links on this page pointing to Amazon, eBay and other sites may include affiliate code. If you click them and make a purchase, we may earn a small commission.

OP
OP
Whipsaw

Whipsaw

Member
Joined
Nov 26, 2016
Messages
57
Reaction score
45
Upon closer inspection of the back side of the steering knuckle is the 6mm 12 pt. bolt I've read about. No such sockets to be found retails, so I ordered a S&K Made in USA 12 pt metric set, arrives Wednesday. Will be soaking with all manner of penetrating oils in the meantime. :D Extraction will most likely involve a propane torch. 🔥
 
OP
OP
Whipsaw

Whipsaw

Member
Joined
Nov 26, 2016
Messages
57
Reaction score
45
My 12pt Metric socket set arrived, I heated and soaked the crap out of the ABS sensor bolt and the head rounded off and now the socket slips. Now I'm trying to find the size of the SAE 6 pt socket to hammer on and try again. It will probably have to be drilled out and tapped for a new bolt. :rolleyes:

While the ABS sensor bolt was soaking, I went after the bearings, they will be replaced. Check out the picture, the outer bearings (cleaned) are discolored (overheated), the inner are outright damaged - galling, metal flakes visible. Thatsa no good!
 

Attachments

  • 93-Bronco-L-F-Bearings.jpg
    93-Bronco-L-F-Bearings.jpg
    283.4 KB · Views: 2
OP
OP
Whipsaw

Whipsaw

Member
Joined
Nov 26, 2016
Messages
57
Reaction score
45
The ABS Sensor Shield is defeated! The drilling out of the bolt was about 50% on, but did go through the steering knuckle, not ideal but salvageable. 15 min with a hammer, drift and channel locks I was able to remove the ABS Sensor shield. The sensor itself required a destructive removal, drilling out the center then pushing it out the back with the drift. Sleeve is still in the steering knuckle, for now. The last picture shows the culprit, drilled half through, and the associated wreckage from the sensor.
 

Attachments

  • 93-Beonco-Dest-ABS-Removal-1.jpg
    93-Beonco-Dest-ABS-Removal-1.jpg
    341.4 KB · Views: 2
  • 93-Beonco-Dest-ABS-Removal-2.jpg
    93-Beonco-Dest-ABS-Removal-2.jpg
    459.4 KB · Views: 2
  • 93-Beonco-Dest-ABS-Removal-3.jpg
    93-Beonco-Dest-ABS-Removal-3.jpg
    283.6 KB · Views: 2
  • 93-Beonco-Dest-ABS-Removal-4.jpg
    93-Beonco-Dest-ABS-Removal-4.jpg
    666.1 KB · Views: 1
OP
OP
Whipsaw

Whipsaw

Member
Joined
Nov 26, 2016
Messages
57
Reaction score
45
I purchased the Dana 44 spindle puller from Toms Offroad (https://tomsoffroad.com/parts/dana-30-44-spindle-removal-tool/), essentially they welded a spindle nut to a piece of pipe, then welded a large nut on the back of the pipe (which happens to be the same thread as the slide hammer... hmmmmmm). You can either run a bolt against the axle to get the spindle off, which I deemed unnecessary potentially putting damaging stress on the differential, or attach a slide hammer, which I did. Hasn't budged yet, want to be sure the spindle threads hold up okay. Applying heat and penetrating oils... 2 pm is the hottest part of the day in my driveway, so I came inside to make an update to the '93 Bronco Dana 44 Breakdown Massacree, with pictures. You can find all the rust you want under that '93 Bronco. It's a '93, all original cr@p, all stuck hard and breaking my back! You can find all the rust you want... 🎸😁
 

Attachments

  • 93-Bronco-Spindle-Puller-Slide-Hammer.jpg
    93-Bronco-Spindle-Puller-Slide-Hammer.jpg
    383.7 KB · Views: 2
OP
OP
Whipsaw

Whipsaw

Member
Joined
Nov 26, 2016
Messages
57
Reaction score
45
Spindle threads are in good shape after an hour of pounding with the slide hammer, PB Blaster appears to be soaking into the edge of the fl@nge more readily than before, with the smallest amount of movement at this point. Stopped for the day and cleaned up for next week. I subconsciously started soaking the ball joint nuts with PB Blaster and have now decided to replace the ball joints while I'm in this deep, have the tools and parts. This is called 'scope creep,' or maybe just thinking this through a little bit more.

Note: the website seems to decide some words are dirty and replaces them with *****, in order to overcome this I have replaced the 'a' with an '@.'

Also, there should be a universal owners maintenance manual step to break down the entire front end on a new vehicle after 5 years of ownership in order to apply anti-seize lubricant and help out with future maintenance efforts.
 
Last edited:

Tiha

Well-known member
Staff member
Moderator
Joined
Jul 22, 2020
Messages
1,077
Reaction score
1,094
Location
Midwest
I totally agree on anti sieze. That stuff is great.

Nice work on the abs sensor, that little shield/block piece seems like it is usually cracked or broken when you get the front end apart.
 
OP
OP
Whipsaw

Whipsaw

Member
Joined
Nov 26, 2016
Messages
57
Reaction score
45
Broncograveyard.com has the ABS sensor shields, will be replacing the one I had to drill out. For removal of the ABS sensor shield with a seized 6mm bolt, drill or grind off the bolt head and push it through the steering knuckle from the back, then go after the stuck bolt.

 
OP
OP
Whipsaw

Whipsaw

Member
Joined
Nov 26, 2016
Messages
57
Reaction score
45
Both steering knuckles are removed, wire wheeled, painted gloss black, awaiting new ball joints to be pressed in.

Note - See pic of the unpainted steering knuckle and the end where the tie rod connects. Cool painting tip: Machined surfaces can be covered with masking tape, leave the ends of the tape free, take a small hammer and tap along the edge, this will cut the masking tape and leave a clean edge for painting. Works great.
93-Bronco-Steering-Knuckle.jpg
Outer U-joints, left and right, replaced, axle shafts also wire wheeled and painted (Rustoleum Rusty Metal Primer and gloss gray paint). Had to drill through the lower ball joint nut on both sides (see pic), the left side nut removed indicates that penetrating oils don't penetrate so good. Prepping the square TTB axles for paint, gloss black.
93-Bronco-Left-Lower-ball-joint-nut.jpg93-Bronco-Rt-Lower-ball-joint-stem.jpg
Someone on another post was making alignment pegs for re-mounting the differential, did the same - got the right size bolts (x2) plus another 1/2 in in length. Cut off the head and ground down the bolt end to the inner diameter of the threads, then cut a slot for a screwdriver. They'll ***** in from the front of the axle and the 'pegs' protrude out the back to catch the diff when it goes back on. Thanks for the great tip!

Ordering all new tie rods, the ends are tired and the parts are relatively cheap on Rockauto, just have to wait on delivery. Assembly will continue otherwise. Dropping the differential tomorrow!
 
OP
OP
Whipsaw

Whipsaw

Member
Joined
Nov 26, 2016
Messages
57
Reaction score
45
Q: The holes at the axle beam ends for the lower ball joint posts on both sides have horizontal scoring, is this common?

------------------------
Totally agree, this is a big job; 4th weekend running (this one 4 days w/Columbus Day!)
----------
If tackling the Dana 44 differential, watch this video (This would be a Dana 50, but otherwise its the same set up):


At time 2:10 I didn't do that; 2:20 didn't do that either :-/ 2:55 did do that!

Pay close attention to the part about leaving a side bolt in until ready to bring the carrier down. I placed a floor jack below the diff, raised to the height of the bottom of the diff, then removed all the bolts thinking the RTV would hold until I got around the back to pull it down. Nope, the RTV lasted about 12 seconds and the diff dropped off the axle beam - right into the cradle on the floor jack. Stupid and lucky. Leave in one of the side bolts!

93-Bropnco-Floor-jack-diff-catch.jpg
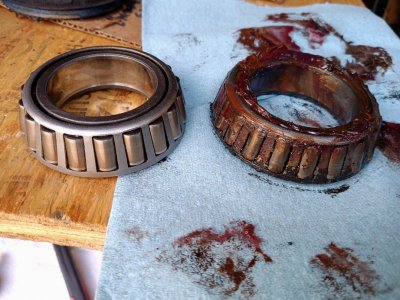
Moved the unit to a table, pulled the axle shaft clip (two screwdrivers to push off the shaft, then rotate and remove with needle nose pliers) and removed the right inner axle. Cleaned and painted the diff carrier (left the vent tube in place), replaced the seals, flushed out the internals with almost a full a can of brake cleaner, then sprayed with WD-40 before any moisture could attack the metal. There was a good bit of residue in the bottom of the carrier. Everything looked good though.

Replaced the U-joint on the inner axle shaft (Non-Greasable Spicer Life DANA 5760X - also at the wheels). Painted the axle shafts gray. Installation is the reverse of removal, as they say. The axle clip took some pressure to re-install, I used the handle end of a pair of clippers that was coated in rubber so I could press it into place and not have the tool slip.

93-Bronco-Axle-Clip.jpg

93-Bronco-Dana-44-going-in.jpg


Went with a LubeLocker gasket (also have one on my Jeep XJ-highly recommended). (y)

93-Bronco-Dana-44-Lubelocker.jpg

The alignment pin idea failed miserably, muscling the diff into position knocked out the pins and dropped the gasket out of place. 😣

93-Bronco-Diff-Alignment-pin-fail.jpg

93-Bronco-Diff-Hold-Bolt-Gasket-Slip.jpg

I managed to get one side bolt in to hold the diff, then fiddled and adjusted for an hour to get the gasket back in place.

Then I was able put all the bolts in by hand, nice and smooth, torqued it up and added 80W-90 Valvoline Gear Oil - which immediately ran out of the left axle hole - Doh! Wiped that up, no other leaks - Victory! :cool: Of course, I knocked off one of the drive shaft U-Joint cups and had to find all the little pin bearings, clean and reassemble. :rolleyes:

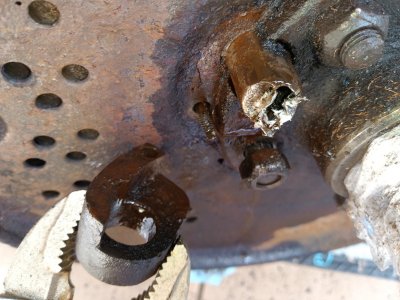
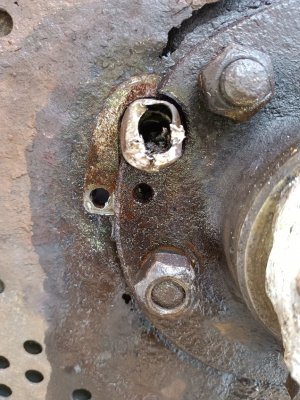
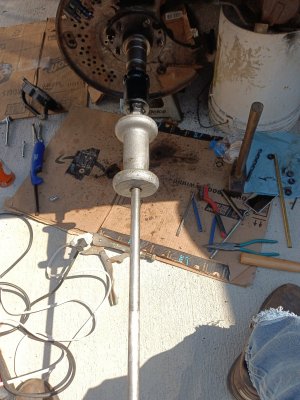
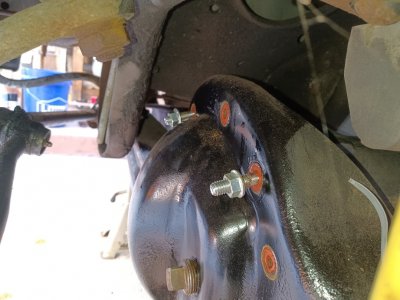
Pressed the new ball joints into the steering knuckles, next up are the spindle rebuilds and hub bearing replacements.

I just hope this bucket holds up until I get the wheels back on!
Bucket-holds-up.jpg
 

Attachments

  • 93-Bronco-Diff-Alignment-pin-fail.jpg
    93-Bronco-Diff-Alignment-pin-fail.jpg
    205.7 KB · Views: 0
  • 93-Bronco-Diff-Alignment-pin-fail.jpg
    93-Bronco-Diff-Alignment-pin-fail.jpg
    205.7 KB · Views: 0

Members online

No members online now.

Latest posts

Forum statistics

Threads
22,610
Messages
136,600
Members
25,246
Latest member
Srm1313
Top