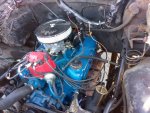
yo AKeisler,
WELCOME!
It may be a problem finding any VACUUM Diagram for this conversion; this diagram is for the former EFI configuration; Vacuum Line Routing Diagram in a 88 5.0

Source: by Jem270
Closest carbed diagram is Vacuum Line Routing Diagram in a 88 460
Source: by Dustin S (Dustball, Mellow Yellow, Mr. Laser Boy) at
http://web.archive.org/web/20150325125333/http://ylobronc.users.superford.org/documents/460vacuumdiagram.jpg
Let us know what components in this diagram that you need to identify
EFI Swap to Carburetor; "...It's actually a pretty simple swap. Basically all of the computer/sensor stuff can be scrapped. You won't need any of it. What you will need...a carb (obviously), a new intake manifold, a new distributor, an ignition control box (like an MSD or Mallory box...I've had good luck with MSD 6A boxes so long as they're not exposed to significant heat), and a carb fuel pump. The EFI pump is way too strong for a carb so you'll need something like a Holley carb electric pump. The ignition stuff is pretty straight forward, but for a working tach you'll need to find the tach wire in the ignition wiring harness and attach it to the positive side of your coil. I know in Mustangs this wire was green with a yellow tracer. It may be the same in your Bronco, but it's good to double check. For a carb I would use something like a Holley 600cfm double pumper or a slightly smaller Carter carb. I had a 625cfm Carter on my Mustang before I switched over to a turbo'ed EFI setup and it was a little too much for the motor. One point worth stating is that if you have an automatic transmission that has overdrive (like an AOD), you'll need an adapter for the TV linkage on the transmission since AODs never came on carbed motors. One is (or at least used to be) available for Holley carbs through Sacramento Mustang, but they retail for just under $100. If you have a 3 speed like a C4 then all you'll need to do is make sure the carb has a kickdown linkage. Mind you I got my old Carter to work with my AOD...but I think that was just sheer luck. Hope this helps...let me know if there's anything else I can clear up for you..."
Source: by Steve at en.allexperts.com
EFI Swap to Carburetor
Source: by BLADE262US, Seabronc & Justshootme84
http://broncozone.com/topic/21208-efi-to-carbhelp/page__gopid__111080&
Vacuum Leak Test, Carburetor Models; "...First, use a mechanic's stethoscope (just the hose, no steel probe) to try to localize the leak with the engine running. Check the carb base, body, hoses, or what have you. Turn the engine off, then use a small spray bottle of extra-soapy water to spray the suspected area with a moderate amount of water. Next, find a manifold vacuum port (the brake servo booster hose for example) to apply a small amount of shop air. Apply just enough air pressure to get the soap to bubble. We don't want to ruin any check valves or anything. Seal the carburetor throat(s), then watch for the bubbles. You'll find the precise location of your leak..."
Source: by niehoff
See my a Vacuum leak test Acronyms & gauge pic
http://broncozone.com/topic/23994-90-58l-getting-continuous-code-33-and-running-code-44/
Post #20
But again most are for EFI engines.
Also check HVAC components and hoses under hood esp the vac Hose to Air control valve under the hood; passenger side corner of firewall; it is alum type device as shown;
http://i38.photobucket.com/albums/e147/johnmcd348/Bronco%20Vacuum%20Fix/IMG_3429Small.jpg
http://i38.photobucket.com/albums/e147/johnmcd348/Bronco%20Vacuum%20Fix/IMG_3426Small.jpg
by JohnMcD
and under dash; "...ALL of our trucks have vacuum motors for the distribution doors, EXCEPT 87-early 88. Only those 2 years used a cable going to a compound lever for the distribution doors. ALL use vacuum for the recirc motor & ALL use cable for the temperature blend door..."
Source: by Steve
Vacuum Line Harness Pic in 80-96; "...80-96 similar, except 87-early 88 w/factory air; The 80-86 vacuum tank is a plastic ball on the R wheelwell..."

Source: by Steve
==========
Top, Camper -> Removal
"...78-91 Broncos use 4 short bolts (8mm head, 6x1.00x40mm) on each bedrail & 5 long bolts (8mm head, 6x1.00x70mm) in the upper sections. All bolts thread into U-nuts, except the 2 upper corners & the 2 rear corners which use captive nut plates. The bedrail bolts each use a clip stamped "L" or "R", but the rearmost bolts use the opposite clip. The clips for the B-pillar bolts are not marked, but the smaller tab goes down. 92-96 Broncos use 5 short bolts (tamper T-40 head, 8x1.25x30mm) on each bedrail & 5 long bolts (tamper T-40 head, 8x1.25x60mm) in the upper sections. All bolts thread into U-nuts, except the 2 upper corners & the 4 rear corners which use captive nut plates. The bedrail bolts each use a clip stamped "L" or "R", except the rearmost bolts. The clips for the B-pillar bolts are not marked, but the smaller tab goes down. There are also nut plates in 4 of the camper shell bolt holes: the 2 rearmost, and the 2 outboard at the top of the cab. They're just a heavy plate (1/4"?) with a threaded hole...."
Source: by Steve
Removal w/Tool List in an 86
Source: by Sixlitre (Malcolm H, Eddie Bauer) at
http://www.supermotors.net/registry/4970/19630
Figure that original fasteners have been replaced; check Home Depot or a yard Queen
Lift, one man in a 90
Source: by 90Beater (Topher, Chris) at
http://bronco.tophersworld.com/writeup_top_lift.htm
for parts, see our Sponsor; Jeff's Bronco Graveyard, a.k.a. "The Graveyard,"
http://shop.broncograveyard.com/1980-96-Ford-Truck_Bronco/departments/20/
=========
tailgate
push your tailgate in on driver's side and try again a few times; often the Striker Bolt/Bushings are worn;; Watch out for the Dorman HELP brand stuff now....the driver/passenger door striker kit w/ bushings, 38445 are no good..bushing diameter is way off and striker frame is off as well....it will bolt-in, but aligning it for a no-rattle fit is a waste of time and possible damage to passenger or driver. the Dorman HELP tail gate striker bushings pn 38424 are a good fit & the door bushings driver/passenger bushings are incl. in this kit & fit better than the 38445 part! Made from urethane thermoplastic. assortment contains 2 each of the following sizes: 1/2" I.D. x 5/8" and 1/2" I.D. x 1"; or get them from a Ford dealer for more $ but better quality
Source: by miesk5 at Ford Bronco Zone Forums
Troubleshooting Synopsis; "...The tail gate circuit is pretty easy to resolve with a meter. Attached is a diagram of the circuit. Note that there are two fuses which you may have already found out. One powers the dash switch which is powered only when the key is in RUN or ACC. The other powers the tail gate switch and that line is hot at all times. If the motor is definitely good, (which can be verified by using a set of jumper leads directly to the motor connector). Once it is verified that the motor works then the common problems are: 1. The Latch Safety switch in the left side latch, This is often a problem when the tail gate fails from both switches.(you can pull the connector and jumper it out, which many people leave permanently jumpers out). The problem can be as easy as the latch needs adjustment. So if the jumper makes it work then either leave it jumped, adjust the latching stud for a tighter fit, or replace the latch switch if testing indicates it is bad. The function of the switch is to make sure the tail gate is latched before putting the window up. I like it bypassed because it makes it easy to get the window out of the way when working inside the tail gate. I think I'm smart enough to put the window back down before closing the tail gate . The only suggestion if leaving it jumped is to support the window if it is in the up position with the tail gate down. Else it could be broken by someone leaning on it. 2. The ground return for the tail gate switch uses the same two lines the dash switch does, (the grounding point is under the dash. The dash switch changes the function of the two leads running to the tail gate window motor by grounding one and putting 12V on the other. The tail gate switch uses the two leads for the ground connection, (it requires the dash switch to be in the neutral position in order to work). Depending on the year of the truck there are 2 or 3 connectors involved that often get corroded, sometimes to the point that the wires break off the connector. In your truck, there is on connector behind the left tail light, the next common failing connector is the one on the left side of the rear frame crossover member, (it is gray, if you can still see the color, and just under and behind the bumper). So to make it short, if you can operate the motor with a set of jumper leads and the window goes up and down that way, then the problem is a connection or the Latch Safety Switch. If you can't get the tail gate open to work on it, crawl in the back and remove the tail gate panel and find the motor leads attached along the bottom edge of the opening. Disconnect them and use a long set of leads or another battery in the back with you to test the motor. Once the window is down you can open the gate to make it more comfortable to work on the problem. In the diagram you will see a black with white striped wire that goes to the tail gate key switch, you should have 12V there at all times. To get at it, you will need the window in the up position. The other two leads, (with the dash switch in the center position) should indicate that they are grounded when doing a continuity check of them). You can also check the entire path from dash switch to the tail gate key switch by using a meter and probing the wires the purple with light green stripe and the dark green with light green stripe. Have someone (with the key in RUN or ACC) moving the Dash switch from UP to Down while you check those leads for 12V. If you don't get 12V then the problem is in a connector between the two switches or a broken wire (a broken wire would most likely be where they transition between the body and tail gate due to constant flexing). The procedure would be; 12V missing on one of the wires, move back to the connector behind the tail light (missing there), move to the connector on the cross member (missing there) move back to the connectors in front, until you find where you have 12V on the line you are probing. Once you find 12V the problem is between the last point probed and where you find 12V..."
Source: by Seabronc (Rosie, Fred W) at
http://broncozone.com/topic/7671-tailgate-window-switch/
"...If the glass is clear of the shell, but you can't open the t/g, remove the inside access panel & pull these 2 rods inward. Either unclip them from the center mechanism, or pull them like bow strings to release each latch. Make sure the glass isnt so high that it engages the campers groove, or it could break. If it wont come down, unbolt the slides from the glass, or the motor from the regulator to lower the glass..." Miesk5 Note, the bars are referred to as the Latch Rods in most diagrams

"...The Bronco tailgate window circuit is a common (Ford) polarity-reversing circuit with 2 switches. Each switch has its own power feed; the dash switch through the ignition switch (key-on only) and the tailgate key switch from the battery (always hot). The dash switch normally holds both motor wires to ground, and the key switch normally holds the motor wires to the dash switch wires. When either is operated, it sends one of the wires hot, powering the motor (assuming the latch switch is closed). When operated the other way, the polarity is reversed, reversing the motor's direction. Neither switch is a "master" because neither will work if the other is in the opposite position..."
Source: by Steve83
Source: by Steve
http://www.supermotors.net/registry/media/160767
see
http://broncozone.com/topic/20836-rear-tailgate-wont-open/
As for the other issues; I think some should be posted separately; let's see what others here suggest.
