86 Bronco ii - Rust Repair

Disclaimer: Links on this page pointing to Amazon, eBay and other sites may include affiliate code. If you click them and make a purchase, we may earn a small commission.

ABE

New member
Joined
Sep 10, 2023
Messages
2
Reaction score
3
Location
CA
First timer here, Hi !

Picked up this B2 last year and drove it home with a busted shifter and broken peddle assembly, unbelievable. All is fixed now, this thing fires up like a new $100k One with push start. LoL.
Now i need to tackle some rust, pics attached. I have a MIG welder but need some direction as ive never welded.
Has anyone completed this type of sheet metal refurbish? pics attached. Any advise or referrals would be much appreciated. Passed CA smog first go! Ready to give the world more B-ii
Thank you!
 

Attachments

  • 9426AD8E-F7A5-4B2B-A74F-02BE071E7C19.jpeg
    9426AD8E-F7A5-4B2B-A74F-02BE071E7C19.jpeg
    287.1 KB · Views: 8
  • D3EC04F2-D3AC-42A4-8CA4-D9CB225CCC0E.jpeg
    D3EC04F2-D3AC-42A4-8CA4-D9CB225CCC0E.jpeg
    274.5 KB · Views: 6
  • A07FD88B-B6B0-4CC5-9F2D-234F3DB34CAD.jpeg
    A07FD88B-B6B0-4CC5-9F2D-234F3DB34CAD.jpeg
    282.2 KB · Views: 7
Last edited:

miesk5

96 Bronco 5.0
Staff member
Moderator
Joined
Oct 18, 2005
Messages
9,071
Reaction score
1,019
Location
Floating in the Pacific
Yo ABE,
Hopefully, other members can assist you soon.
For now;
From Ford:
"Section 01-01: Underbody
1996 F-150, F-250, F-350, F-Super Duty and Bronco Workshop Manual​
ADJUSTMENTS

Welding​

ani_caut.gif CAUTION: Disconnect the negative battery cable before using any electrical welding equipment.

Perform all welding using Rotunda MIG Wire Feed Welder 164-R3665 or equivalent, and welding wire meeting AWS-E-70S specifications or equivalent.

When performing oxyacetylene welding or brazing, protect the adjacent areas with heat insulation compound.

Because more extensive panel deformation results from oxyacetylene welding than from MIG welding or spot welding, perform sectional welding using MIG welding or spot welding equipment only.

Perform spot welding operations in locations that are inaccessible with spot welding tongs using the hole weld method. Drill or punch 5mm (0.2 inch) holes in one side of the ****** and weld and add filler material.

Varying factors determine plate thickness, panel design, cross-sectionals and sizes, joining method, welding method, and welding locations during manufacturing. To apply the most suitable repair method, therefore, it is most important to completely understand the body design, concept, and construction.

It is essential that repair welds, particularly on load-bearing parts or parts contributing to the strength of the assembly, are equivalent to the originals in size, type, and strength.

Steel Components, Low-Alloy

  1. ani_caut.gif CAUTION: Disconnect the negative battery cable before using any electric welding equipment.
    Because of associated high heat buildup, do not use oxyacetylene when welding high-tensile or high-strength, low-alloy steel components. Use spot, MIG or arc welding. During MIG or arc welding, use a temperature-indicating crayon to make sure that the temperature does not exceed 750°C (1400°F).
  1. Replace spot-welded components by spot welding where possible. If spot welding equipment is not available, or if the location is not accessible, puddle weld the panels.
  1. Use MIG welding rather than conventional arc welding when welding high-strength, high-tensile, or conventional mild steel. Use 0.8mm or 0.9mm (.031-inch or .035-inch) diameter wire and conform to Classification AWS A5. 18-69, E70S-6 or E70S-4. MIG welding is also known as GMAW (Gas Metal Arc Welding).
  1. Perform conventional arc welding using 2.5mm (.098-inch) diameter rods conforming to Classification AS 1552-1973, E4841 or AWS A5. 1-78, E7014.
When cutting salvage or repairable components, use a grinding disc, air chisel, or metal cutting saw.

All welding should be done with a Rotunda MIG Wire Feed Welder 164-R3665 or equivalent, with welding wire meeting AWS-E-70S Specification."


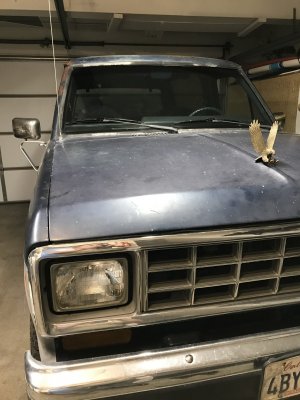
Mickaila's Big Bronco Build:
MIG welder
"For my Lincoln Electric, this is the perfect setting for sheet metal work---with 35 CFM of Ar/CO2.
35388-43a5e2146b4764602d132710c8be9db3.jpg
82 XLT Lariat, 351W, C6, NP208, 4.56:1, 37x13.5s, all sheet metal is now replaced!
As with most, I am tired of paying someone to do a patch panel on the quarter panels, complaining about my tailgate, and using fender flares to hide my rust on the front fenders. As such, I am replacing them.

I started with a full site search, which revealed many useful threads:
1. Body work in general: http://fullsizebronco.com/forum/showthread.php?t=84272
http://www.fullsizebronco.com/forum/showthread.php?t=123743&page=4
http://www.fullsizebronco.com/forum/showthread.php?t=90256&highlight=rear+quarters+sixlitre&page=2
2. Quarter panel replacement: http://www.supermotors.net/vehicles/registry/4970/19605
3. Flag mount mirrors: http://www.supermotors.net/vehicles/registry/2742/12641
4. Tailgate knowledge: http://www.supermotors.net/vehicles/registry/2742/12689
5. Door alignment: http://www.fullsizebronco.com/forum/showthread.php?t=87752
5.5 Hood, Door and Fender alignment: http://www.hotrodders.com/forum/aligning-hood-139169.html?highlight=hood+alignment
6. Paint questions: http://www.fullsizebronco.com/forum/showthread.php?t=143778
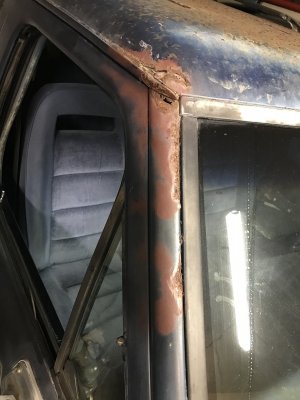
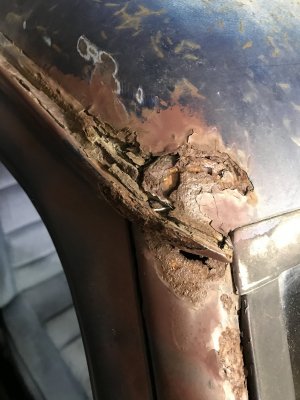
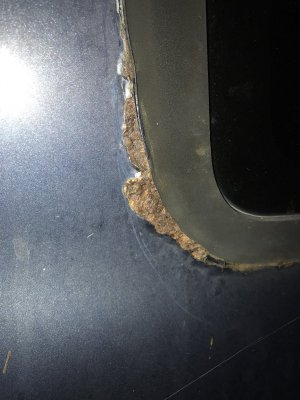
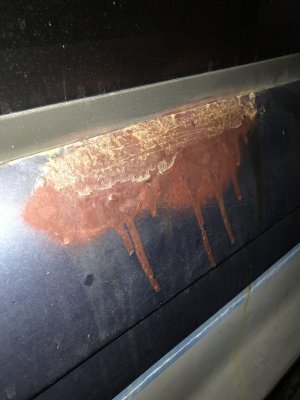
Before shots:

This was after taking off the bushwhacker flares--I wonder if the rust here was exacerbated by the flares or if it was just natural course?
4109-d10ec747cbd7ad40e343e28f47895d02.jpg


In the process of removing:

Some spot welds put up a better fight then others :}
4295-e860e5642254c7e5ddf3fc12cb8ee6cf.jpg

My A-pillar turned out to not be connected by anything more then seam sealer--facilitating this step. I did however have to use the angle grinder to connect the dots
4264-5951c4b256f66599ac683c12fdebfc36.jpg


After Driver's quarter was removed:

If you look real close you can see the electrical connector that causes the dome light to fail
4187-1dbf87d330229fc7ddfc6a7ec0f84965.jpg

Obviously, I will be replacing this inner wheel tub--an advantage of having as much rust as i did, is that i didn't have to drill out any spot welds to the fender--just the ones for the inner tub
4211-ae1fc4b051be8da63052ca54f29c031b.jpg

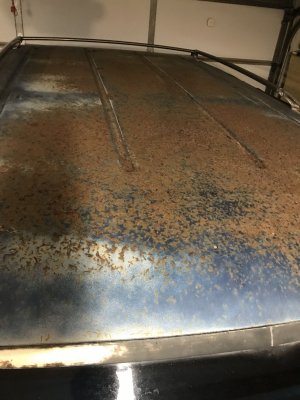
After grinding / sanding / sweating the rust off:

There is a spot or two of underbody coating left, but the majority of the metal is bare. It is just an odd angle that makes this appear not fully sanded
4162-82585ec0296d5fc83b475a699228d3b2.jpg

After painting with 3 coats of POR 15

I still have a few spots of body work to do in this shot---just covering up the fresh bare metal:
4138-c4cda1e848f55d6562311636e5a41f6b.jpg

Where we go one, we go all."
 

L\Bronco

Well-known member
Joined
Feb 28, 2022
Messages
747
Reaction score
808
Location
A.B. Canada
Hey Abe, welcome to the zone!
Congrats on the Bronco11 !!
I love the eagle hood ornament!!
Hard to see on the picts, is the roof area the only rust?
Thats an ambitious spot to learn on. (Its about 3 layers thick around there and I dont think anyone is re-popping that area as yet.
I’m sure you will get lots of advice from the members on this one.
I have done my fair share of rust repair. There are 2 schools here, the “replace everything guy” in which case you strip it down to the shell, have it dipped or media blasted and go to town with new parts. And the “fab everything guy” where you surgically insert new hand crafted pieces.
I live in between these 2worlds.
For that roof repair, I would scour a few wrecking/salvage yards and see if you can get a front corner from a clean ranger/ Bronco11 body (a few inches past the rust) and disassemble it (drilling all of the spot welds and such)
You dont want to cut into the skeleton of your cab if you dont have to as this is structure and requires a slightly different approach)
Once its apart, you will see whats inside yours and you can do the same there.
I think, judging by the picts you will need to go in a couple layers at least.
Plus the complex curves and angles of the roof skin will be very difficult to recreate.
That would get you started and then you jump the hurdles as they appear.
Also, I’d get some extra scrap body panel to practice spot weld removal and welding on thin sheet metal as well.
Hope this helps
Good luck with it!
Cheers!70251865271__92BC7C5E-8F5A-4AC6-A95E-BED305E70BEF.jpeg70251864531__FD8D1F41-8608-4CE4-95C6-D407BF0F0226.jpeg
These are of my wifes firebird.
(You cant get the bit I needed, so I salvaged off of a crashed, non rusty one.
 
Last edited:
OP
OP
ABE

ABE

New member
Joined
Sep 10, 2023
Messages
2
Reaction score
3
Location
CA
Hey Abe, welcome to the zone!
Congrats on the Bronco11 !!
I love the eagle hood ornament!!
Hard to see on the picts, is the roof area the only rust?
Thats an ambitious spot to learn on. (Its about 3 layers thick around there and I dont think anyone is re-popping that area as yet.
I’m sure you will get lots of advice from the members on this one.
I have done my fair share of rust repair. There are 2 schools here, the “replace everything guy” in which case you strip it down to the shell, have it dipped or media blasted and go to town with new parts. And the “fab everything guy” where you surgically insert new hand crafted pieces.
I live in between these 2worlds.
For that roof repair, I would scour a few wrecking/salvage yards and see if you can get a front corner from a clean ranger/ Bronco11 body (a few inches past the rust) and disassemble it (drilling all of the spot welds and such)
You dont want to cut into the skeleton of your cab if you dont have to as this is structure and requires a slightly different approach)
Once its apart, you will see whats inside yours and you can do the same there.
I think, judging by the picts you will need to go in a couple layers at least.
Plus the complex curves and angles of the roof skin will be very difficult to recreate.
That would get you started and then you jump the hurdles as they appear.
Also, I’d get some extra scrap body panel to practice spot weld removal and welding on thin sheet metal as well.
Hope this helps
Good luck with it!
Cheers!View attachment 31688View attachment 31689
These are of my wifes firebird.
(You cant get the bit I needed, so I salvaged off of a crashed, non rusty one.
Hi L, thank you for your insight! Yah that eagle is from an old flag pole. Sourcing some scrap yards is definitely my go to now… theres other rust of course but didn’t want to complain haha. Passenger floor pan is gone, driver side has started to rust. Some small sections around back windows. See pics
 

Attachments

  • 145B6346-046E-4C6E-B568-4505AA16A2DA.jpeg
    145B6346-046E-4C6E-B568-4505AA16A2DA.jpeg
    406.6 KB · Views: 2
  • A8522A59-89C8-4B0A-819E-89811C76E293.jpeg
    A8522A59-89C8-4B0A-819E-89811C76E293.jpeg
    300.1 KB · Views: 3
  • 056250AB-66E1-406E-85BB-1435A5D41465.jpeg
    056250AB-66E1-406E-85BB-1435A5D41465.jpeg
    299.1 KB · Views: 3

L\Bronco

Well-known member
Joined
Feb 28, 2022
Messages
747
Reaction score
808
Location
A.B. Canada
Yah that eagle is from an old flag pole.
I love it!!
Start with the floor pan, you should be able to buy new re-pops. (Front is the same as ranger)
Cant see it and good practice.
They make some good rust fighting chemicals now too, my go to is Rust Mort. Make sure to use it outside. The fumes are very nasty!
But it works pretty well.
Work your way up to the roof, its not an easy one, but, everything can be fixed!
Cheers
 

Tiha

Well-known member
Staff member
Moderator
Joined
Jul 22, 2020
Messages
995
Reaction score
1,031
Location
Midwest
To fix that A pillar and roof corner you are probably going to have to pull the windshield. I would bet there is some rot under there.

Those are pieces you can't buy online. Gonna have to make your own.

There are a couple places online that sell light sheet metal for this type of repair. Also Menards, if you have on near by has small sheets. Grab a pair of tin snips and get to work.

Will have to sand blast the other areas, or at leas hit them with a wire brush to see how bad the are. If there are pin holes you gotta replace or weld it up.

No pin holes you can treat it and fill it.
 

paul rondelli

Active member
Joined
Mar 18, 2021
Messages
134
Reaction score
127
Location
Atlanta
Start with shaping some clay

Then move to shaping metal

Body work is definitely an Art form.

I do see a few on the Upull yards. Check them out first ..... or look for a doner from Arizona.... to use as a parts car.

For a few thousand for a rust free parts car ... it will save you hundreds of hours of fabrication.

I can guarantee there are a few B2's out there that cannot pass Ca emissions and are sitting idle.
 
  • Like
Reactions: ABE

johnnyreb

Well-known member
Joined
Feb 23, 2021
Messages
2,428
Reaction score
1,071
Location
West Virginia
First timer here, Hi !

Picked up this B2 last year and drove it home with a busted shifter and broken peddle assembly, unbelievable. All is fixed now, this thing fires up like a new $100k One with push start. LoL.
Now i need to tackle some rust, pics attached. I have a MIG welder but need some direction as ive never welded.
Has anyone completed this type of sheet metal refurbish? pics attached. Any advise or referrals would be much appreciated. Passed CA smog first go! Ready to give the world more B-ii
Thank you!
Welcome to the club. You,ll find people that will help you hear.
 
  • Like
Reactions: ABE

Members online

No members online now.

Latest posts

Forum statistics

Threads
22,521
Messages
135,985
Members
25,126
Latest member
Lana Kane
Top