'90 5.8L getting continuous code 33 and running code 44

Disclaimer: Links on this page pointing to Amazon, eBay and other sites may include affiliate code. If you click them and make a purchase, we may earn a small commission.

James Kiehl

New member
Joined
Aug 25, 2013
Messages
16
Reaction score
0
Hey all,

New member. Thanks for having me. I have a 90 5.8 L that has failed Colorado emissions on carbon monoxide levels.

Already Replaced:

Plugs

Plug wires

Air filter

Pcv filter

PVC valve

MAP sensor

Oxygen sensor

EGR valve position sensor

IAC unit

As of now, codes generated:

KOEO - 11 - passed

Continuous - 33 EGR valve not opening

Running - 44 secondary air inoperative

My brain is locking up, so I could use a bit of help if you can.

Thanks,

Jim


miesk5

96 Bronco 5.0
Staff member
Moderator
Joined
Oct 18, 2005
Messages
9,078
Reaction score
1,036
Location
Floating in the Pacific
yo JAMES,

WELCOME!

CM KOER

- 33 EGR valve not opening

DTC 33 is triggered when the EVP sensor is not closing;

Testing & Operation; "...The EGR Valve Position (EVP) sensor monitors the position of the EGR valve pintle. The EVP sensor converts the mechanical movement of the pintle into an electrical voltage signal which is relayed to the PCM. The EVP sensor is a linear potentiometer in which resistance varies with the EGR valve pintle movement.

Voltage is fed to the EVP by the signal return circuit. As the EGR is opened the EVP directs more voltage to the EEC and less down the voltage reference circuit. The EVP sensor provides the PCM with information on EGR flow and EGR system failures. The EVP should read between 0.24 and 0.67 volts at idle with a closed EGR valve..." read more

Source: by Ryan M (Fireguy50) at http://web.archive.org/web/20130912124008/http://www.oldfuelinjection.com/?p=35

excerpts;

Damaged EVP sensor

•Corroded or dirty connector

•Damaged EGR valve

•Faulty Vacuum system

•Broken wire in harness

•Grounded harness

•Damaged Computer

I know you did the vac leak test, but pull vac hose off @ EVP - I pull em off and use the straw sucking test; one finger over one end; and... ya get the idea?

Testing & Operation; "...The EGR Valve Position (EVP) sensor monitors the position of the EGR valve pintle. The EVP sensor converts the mechanical movement of the pintle into an electrical voltage signal which is relayed to the PCM. The EVP sensor is a linear potentiometer in which resistance varies with the EGR valve pintle movement.Voltage is fed to the EVP by the signal return circuit. As the EGR is opened the EVP directs more voltage to the EEC and less down the voltage reference circuit. The EVP sensor provides the PCM with information on EGR flow and EGR system failures. The EVP should read between 0.24 and 0.67 volts at idle with a closed EGR valve..." read more Source: by Ryan M (Fireguy50) at http://oldfuelinjection.com/?p=35

EVP is light gray & attached to the top of the EGR Valve

EVP PIC by Waltman change-oil-pan-gasket-and-valve-cover-gasket-024.jpg

CM KOER

DTC 44 Thermactor Air Injection system inoperative (Right side).

DTC 44 (KOER); Right Thermactor Inoperative; "...I had a similar issue that turned out to be the vacuum line to the Thermactor Air Bypass Valve. No CEL, just a code; 1. First check that the two vacuum lines are connected to the Vacuum Reservoir (coffee can) and the resevoir is in good repair with no leaks on the bottom. Frequently the can leaks or the vacuum lines are accidentally knocked off. Check the vacuum hose to the bottom of the Bypass Valve. Check the vacuum hose to the Diverter Valve. Check the vacuum hoses to the TAB/TAD Solenoids. Then check your TAB/TAD Solenoids. These are common easy to miss problems. Once these are ruled out all that is left is: Thermactor Air Supply Hoses. One-way Check Valves. Main TAB/TAD Valves..."

Source: by Seattle FSB (SeattleFSB) at http://fullsizebronco.com/forum/showthread.php?t=168505

DTC 44 (KOER) - Right Thermactor Inoperative - The thermactor system injects air into the exhaust ports in the heads downstream from the valves. Air is supplied from the smog pump through tubing and the TAD/TAB valves to a copper pipe between the heads on the firewall side of the engine, and ultimately to the exhaust passages. If your smog pump is disabled, or your disconnected the tubing or blocked the thermactor holes in the back of the heads, or if the TAD/TAB valves are bad, you will get these codes. My car has all of this stuff removed and used TFS Track Heat heads (with no thermactor provision), and naturally pulls these codes.

Source: by Matthew

DTC 44 (KOER); Right Thermactor Inoperative; "...indicates a Thermactor Air System leak which could be anywhere from the smog pump up front to include EGR solenoiids over on the right inside fender liner and all the way to the back of the engine which is what you see in the photos. There is also a smog tube that runs along the passenger side engine below the valve cover which runs to the back of the FI plenum up to a Air Bypass Valve (plastic) crossing over to the cross-over tube (exhaust) which is connected to that and the CAT, check valve and tube below. the Thermactor system is designed to capture spent gases and ultimatley send them down to the CAT to burn off etc.If you look closely you'll see the chek valve and CO tube is pipe threaded, use some anti-seize and don't over tighten and when putting the valve on the tube, you don't need a gasket for the CO tube ends but rather just use some bearing grease which melts and forms a nice gasket seal.....this is a tip from Steve83; gaskets burn off and go away after a while and you're back with another vacuum leak etc..."

Source: by JKossarides ("The Bronco", Jean) at http://fullsizebronco.com/forum/showthread.php?t=150013

DTC 44 Problems in the Thermactor Air Control system. Check vacuum lines, air pump, diverter valve, and solenoids.

Source: by miesk5

 
Last edited by a moderator:
OP
OP
J

James Kiehl

New member
Joined
Aug 25, 2013
Messages
16
Reaction score
0
Whew, thanks a lot. I think I will do a full vacuum check first, seems like both codes could be caused by that issue.

Thanks. Will update with progress, if I have any!

 
OP
OP
J

James Kiehl

New member
Joined
Aug 25, 2013
Messages
16
Reaction score
0
I am working to get the tools to test the vacuum lines, but in the meantime, here is a scan of my latest emissions fail, if anyone cares to have a look.

Thanks!

Jim

Page 1

Page 2

 
Last edited by a moderator:
OP
OP
J

James Kiehl

New member
Joined
Aug 25, 2013
Messages
16
Reaction score
0
Ok, I'm back. New EGR valve, new vacuum test gauge in hand.

I am now pulling:

KOEO -34

Continuous - 11 (pass)

Running - 34

I have done a vacuum check on the ported vacuum line.

No vacuum at idle - correct.

Increase RPM to 3500 - problem (I think). Vacuum increases until about 3100 RPM, then cuts out. Very repeatable.

Why would the vacuum drop out early?

Going to check the temp switch next, and the vacuum line. Any other suggestions?

 
OP
OP
J

James Kiehl

New member
Joined
Aug 25, 2013
Messages
16
Reaction score
0
yep, i can pull a vacuum with the test rig, but the solenoid is not allowing it under operation. it is really perplexing. Here are the two specific issues i have right now:

The EGR position sensor (or EVP) harness should show a Vref of 4-5 volts. I am showing between 1 and 2 volts. I tested the TPS harness for the Vref voltage and also got between 1 and two volts. i checked continuity to the EEC harness (60 pin connector) for those leads and everything seemed to check out, so i guess the Vref is truly low.

My EGR solenoid was not holding vacuum on the input side, so i purchased a new one - same problem, purchased a second new one - same problem (right out of the box). Either i am not understanding the test procedure (disconnect the electrical lead and vacuum hoses and apply vacuum to the inlet port) or i happened to get two defective solenoids in a row. whatever the case, i can no longer even get the vacuum up to 3100 RPM that i was seeing in my previous post, there is no vacuum generated at all)

Other points: the input (manifold) vacuum to the EGR solenoid registers above 10 inHg, so the supply is working, but the solenoid itself does not seem to be allowing the vacuum to be transferred to the input port on the EGR valve itself.

Thanks for any insight, i'm going to battle the Vref at this point.

 
Last edited by a moderator:

BroncoJoe19

Active member
Joined
Dec 26, 2007
Messages
2,093
Reaction score
17
Location
New Jersey
Sorry... I have a mental block when it comes to the EGR.

Regarding the low Vref, You might want to check a couple of grounds.

Particularly from the battery to the frame and engine, look for a ground strap to the body, check the two small ones to the upper radiator support (one on the left, and one on the right) and the one to the EEC/PCM near the driver's side hood hinge.

 
OP
OP
J

James Kiehl

New member
Joined
Aug 25, 2013
Messages
16
Reaction score
0
Ok, looks like the battery to frame ground is beat up and corroded, time to replace that. The two that you mention that go to the radiator might be mounted to the same stud that the battery ground is mounted, on my truck. Checking the one by the hinge, also. Thanks. Will report back.


Seabronc

New member
Joined
May 22, 2004
Messages
7,315
Reaction score
35
Location
North of NYC
Important grounds are

1. Battery to frame and engine block 

2. intake manifold to fire wall

3. Head light ground to the inner fender (one on each side near the head light)

4. Hood ground (mainly for preventing ignitionnoise in thr radio)

5. Undre dash ground (usually to the right of the gas pedal)

etc.

Start with those.

:)>-

 
OP
OP
J

James Kiehl

New member
Joined
Aug 25, 2013
Messages
16
Reaction score
0
Ok, sounds good, for some reason I had the solenoid operation and test mixed up in my head. Thanks.

I'm still struggling with the Vref signal at less than 2V. It should be 5V, and now I'm suspecting that the ERC-IV module itself might have a faulty component (capacitor failure, perhaps) that is preventing the system from having 5V. The EGR position sensor voltage is provided by the TPS harness, so if the TPS can't show the proper position, the solenoid doesn't open, the EGR pintile never moves, the voltage never changes from zero, and the feedback loop doesn't work.

Anyone have some insight on removing and examine, repairing, or replacing the EEC-IV module?

Thanks for the help so far!

 
OP
OP
J

James Kiehl

New member
Joined
Aug 25, 2013
Messages
16
Reaction score
0
Update: checked all grounds except one. Could not find a ground next to the gas pedal.

They were decent, but I cleaned them all and replaced the battery (-) to chassis wire.

I still think the ref is not bring properly provided by the PCM module.


miesk5

96 Bronco 5.0
Staff member
Moderator
Joined
Oct 18, 2005
Messages
9,078
Reaction score
1,036
Location
Floating in the Pacific
yo.

by Joel

To check that the VREF (reference voltage) generated by the PCM power supply is good, meter between pin 26 of the PCM and a good frame ground.

You can do the "wiggle" test on the harness to make sure there are no weak or loose connections between the sensor connector and the PCM.

EEC IV Connector Pin Depiction Pic and LEGEND by Ryan M (Fireguy50)  miesk5

http://broncozone.com/topic/23573-pulled-codes/

EGR VALVE POSITION SENSOR Testing & Operation
Source: by Tomco Inc. tomco-inc.com

1988-1991 TPS Wire Colors
VREF - Orange/White
 

Oartial VRED Voltage could be a bad capacitor.

Capacitor Repair in a 90 5.8
Source: by seedpress (dolittle) at Ford Bronco Zone Forums

Ground; Location Diagram, Engine Area in a 90; G102, G105, G107, G108

Source: by Seattle FSB (SeattleFSB) at SuperMotors.net

Location in Engine Bay Diagram in a 90 5.0 & 5.8 Page 2; G100, G104
Source: by Seattle FSB (SeattleFSB) at SuperMotors.net Location in Engine Bay pics: G100 @ LH front of engine compartment on upper radiator support-in front of WS washer/Coolant overflow tank; G101 front of fender apron-between starter relay & headlight; G200 behind RH kick panel; G103 (battery to engine) Lower RH front of engine; Same as Bronco in a 95 F Series
Source: by Ford via subford (Bill K) at photobucket Location in Frame Rail Diagram in a 90; G 101, G401
Source: by Seattle FSB (SeattleFSB) at SuperMotors.net Location in Full Body Diagram in a 90; G500
Source: by Seattle FSB (SeattleFSB) at SuperMotors.net
G201, G205 Location Diagram, Behind Dash in a 90
Source: by Seattle FSB (SeattleFSB) at SuperMotors.net

Locations in a 90 from 1990 Bronco EVTM; G100 LH side of Radiator support G101 RH side of Radiator support G102 RH side of Radiator support G103 LH rear side of engine, near knock sensor G104 LH rear side of engine compartment, near electronic engine control (EEC) module, on the left fender close to the firewall G105 LH Side of engine G106 RH fender apron, near voltage regulator G107 RH fender apron, at starter relay G108 RH fender apron, at voltage regulator G109 RH fender apron G201 LH rear side of I/P (looking at the diagram it is at the bottom of the driver's side dash assembly. Screwed to the bottom edge, just to the left of the steering column. It is the ground for the instrument cluster) G202 Behind RH cowl panel G203 RH rear side of radiator support G204 On steering column G205 Behind Center of I/P (Dash), near speed control amplifier G400 LH side of cargo area, near rear light assembly G401 Below LH side of cargo area, near crossmember G500 Inside driver's door, near left door speaker
Source: by ironmanisanemic

Locations in a 90 from 90 Bronco EVTM; "...G100 LH side of Radiator support; G101 RH side of Radiator support; G102 RH side of Radiator support; G103 LH rear side of engine near knock sensor; G104 LH rear side of engine compartment, near electronic engine control (EEC) module, on the left fender close to the firewall; G105 LH Side of engine; G106 RH fender apron, near voltage regulator; G107 RH fender apron, at starter relay; G108 RH fender apron, at voltage regulator; G109 RH fender apron; G201 LH rear side of I/P (looking at the diagram it is at the bottom of the driver's side dash assembly. Screwed to the bottom edge, just to the left of the steering column. It is the ground for the instrument cluster); G202 Behind RH cowl panel; G203 RH rear side of radiator support; G204 On steering column; G205 Behind Center of I/P (Dash); near speed control amplifier; G400 LH side of cargo area; near rear light assembly; G401 Below LH side of cargo area; near crossmember; G500 Inside driver's door; near left door speaker"
Source: by BroncoJoe19 (Joe) at Ford Bronco Zone Forums

 
OP
OP
J

James Kiehl

New member
Joined
Aug 25, 2013
Messages
16
Reaction score
0
All right, thanks. I pulled the PCM module, I don't see any visible signs of damage. Anyone got a circuit diagram?

 
OP
OP
J

James Kiehl

New member
Joined
Aug 25, 2013
Messages
16
Reaction score
0
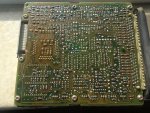
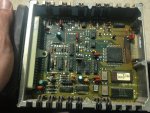
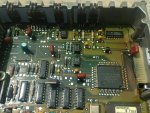
Guys, here are a couple of photos of the board. I only see some discoloration in the upper right of pic #2, closer shot on pic #3. Nothing obvious. Any help on checking the Vref +5 signal? Pin 26, but I can't trace it beyond the first 'hop' to the first component from pin 26.(it's visible on the bottom, same as pic#1)

image.jpg

image.jpg

image.jpg

 
OP
OP
J

James Kiehl

New member
Joined
Aug 25, 2013
Messages
16
Reaction score
0
OK, new EEC module in place. Vref at 5V. Still pulling these codes:

KOEO/Stored/Continuous

34/34/34 and 65

I cant figure out why that 34 code (overvoltage) could be happening. ALl the circuits seem to check out. Baffled.

Thanks for any insight. I have the links above for Code 34, but i don't know if i've come across any for the continuous 65, so any help is appreciated.

 
Last edited by a moderator:

miesk5

96 Bronco 5.0
Staff member
Moderator
Joined
Oct 18, 2005
Messages
9,078
Reaction score
1,036
Location
Floating in the Pacific
yo,

 DTC 34 in Key On Engine Off (KOEO) or Engine Running (KOER) Self-Test indicates that the EGR valve and/or EGR Valve Position (EVP) sensor may not be fully seated in the closed position. The EVP sensor voltage is greater than the closed limit voltage of 0.67 volt. Because of the preload on the installed EVP sensor, it is very difficult to determine whether the EGR valve is seated or the EVP sensor is in contact with the EGR valve stem.

Possible causes:
Poor continuity in EVP sensor harness.
Non-seated EGR valve.
Damaged EGR valve.
Damaged EVP sensor.
Damaged EVR solenoid.
Damaged Powertrain Control Module (PCM).

EVP sensor is/was high – EVR

EGR Vacuum Regulator (EVR) Solenoid - 9J459
TESTING by TOMCO http://www.tomco-inc.com/Tech_Tips/ttt32.pdf

Testing & Diagram; "...EVR Testing: vacuum should vent from the green line on a good valve NOT energized. When energized, vacuum should hold from the black to the green. Resistance across the terminals should be 20-70 ohms..."

evrtest.jpg

EVR Location pic in a 90 5.8

http://www.supermotors.net/getfile/848247/fullsize/tab-tad-evr-coil2a.jpg
Source: by SeattleFSB (Seattle FSB)

The EGR Vacuum Regulator (EVR) solenoid is an electromagnetic device which controls vacuum output to the EGR valve. An electric current in the coil induces a magnetic field in the armature which pulls on a disk closing the vent to atmosphere. The Powertrain Control Module (PCM) outputs a duty cycle to the EVR which regulates the vacuum level to the EGR valve. As the duty cycle is increased, so is the vacuum signal to the EGR valve. The vacuum source is manifold vacuum.

evrtest.jpg 


Testing; "...Remove the EVR solenoid; Attempt to lightly blow air into the EVR solenoid. If air blows through the solenoid, replace the solenoid with a new one. If air does not pass freely through the solenoid, continue with the test. Apply battery voltage (approximately 1 volts) and a ground to the EVR solenoid electrical terminals. Attempt to lightly blow air, once again, through the solenoid. If air does not pass through the solenoid, replace the solenoid with a new one. If air does not flow through the solenoid, the solenoid is OK..." (under license from Delmar Publishers, comb of Chilton/Nichols/Delmar & Haynes); some may be incorrect, as reported by Seabronc, thanks Seabronc! NEW SITE URL!!! MUST REGISTER TO VIEW; select year, make, model, engine size and go to appropriate section
Source: by Chilton via Autozone

DTC 31, 32. 33. 34. 35. 38 or 84; EGR Valve Position (EVP) Sensor & EGR Vacuum Regulator Solenoid (EVR) Testing
Source: by Dustin S (Dustball, Mellow Yellow, Mr. Laser Boy) http://ylobronc.users.superford.org/documents/egr/

I believe you can skip this portion and test the EGR Vacuum Regulator (EVR); also called EGR Vacuum Solenoid

 
Last edited by a moderator:
OP
OP
J

James Kiehl

New member
Joined
Aug 25, 2013
Messages
16
Reaction score
0
OK, thanks for all the help. I have done the diagnostics suggested and came up with this situation:

Vref  = 5V, looks good (bought new EEC unit)

EVP resistance range - ~4700 ohms (fully extended) to ~400 ohms (fully compressed) (This is a brand new unit)

EGR valve - brand new, presumably seating properly

EGR solenoid - brand new, functionality checks out

Circuit checks out OK to EVP

Circuit checks out to EGR solenoid (voltage at 10.5V+, as it should be)

When i perform the EGR solenoid vacuum test, the manual says to rev the engine to about 3500 RPM and watch the vacuum increase. When i do this, i can get the vacuum to increase as the RPMs increase, but only to about 2700RPM or so, then it drops off back to zero when i go higher. I'm pretty sure this would theoretically be consistent with the reason that i am failing emissions in the first place, high CO at high RPM, if i understand the operation properly.

It seems to me as if the system is almost working, but i can't figure out what sort of failure mode would cause the EGR to drop off in operation like it is doing. That behavior, combined with the error code 34 as a voltage out of range, makes me think that there is some kind of offset happening inadvertently, but i cant figure out where. Any ideas would be most appreciated, and thanks for the help so far.

 
Last edited by a moderator:

Members online

Latest posts

Forum statistics

Threads
22,626
Messages
136,732
Members
25,289
Latest member
Maroldeadjub
Top