I had a recent problem where my power steering suddenly got sloppy & I knew that I had a ball joint that was going out. I got under my rig & looked around and noticed that all of the steering linkage was pretty well shot, as it was still the original (or at least I think it was, I had never replaced any of it in the 15 years I have owned this truck) tie rod & drag link. So with that, I decided now was the best time to go ahead with a replacement of all 4 ball joints, , front end bushings, all steering linkage, track bar riser, rebuilding of my power steering box, & coil spring replacement. All in all, this whole project took longer than I would have liked, but the end result is well worth the down time & wait.
For my power steering box, I have a 73-75 Bronco PS box, I had it converted to a short throw (6.x to 4.x lock to lock) box. It is a little more sensitive, but comparable to my wife's '03 Dodge Durango, but much better. I sent it off to West Texas Off Road for a complete rebuild. Their price was great ($140 for the rebuild & $150 for the upgraded steering throw) and the box is extremely tight & smooth. I sent it off on a Monday morning & except for a 1 day delay with UPS, it took 10 business days for the complete round trip. Their actual turn around time was 2 days on my box. I would highly recommend them to anyone who is looking to have their steering box (manual or power) rebuilt.
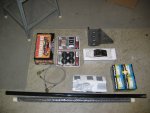
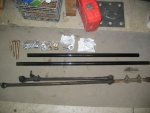
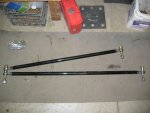
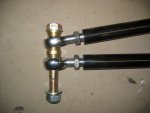
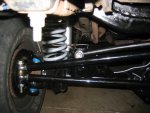
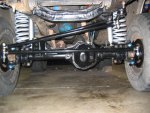
The Stone Crusher Steering (SCS) system is an extremely stout system. They use 1.25" DOM tubing for the tie rod & drag link. It probably weighs a good 10-15 lbs more than the stock linkage. They also utilize heim joint rod ends rather than a ball joint end that is OEM on EBs. Another major difference between this & stock is that the drag link does not connect directly to the tie rod on the passenger side, but rather it extends all the way over to the knuckle. They do sell a mounting saddle to be able to connect the two in stock fashion, but after talkig with Anthony Terry of SCS, I chose to go the route that they designed it.
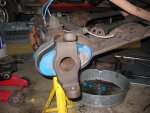
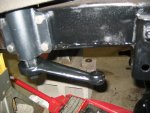
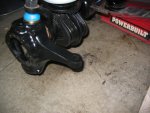
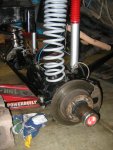
So once I had all my parts & pieces that I needed to do the front end work, I was able to start the tear down. Jack the front end up off of the ground & make sure you are able to move the tires from lock to lock. The first thing that I did before actual replacement was get a good solid measurement of the distance between the tires. I measured the inner part of the front tire in front of & behind the axle tube, which mine was 49.75" on both sides. SCS recommends doing this so that you can get your toe in/out correct after you get everything back together. Their directions are detailed enough and show you where to measure at. So, I disassembled both front hubs & took them all the way down to the axle tube because I needed to replace a ball joint. At this time, I went the extra & replaced all four joints. Because they are a press fit, I had NAPA do this, and for the $12/joint, it is worth it to just have it done. Once the new ball joints were pressed in, I had to drill out the steering knuckle for the SCS. The knuckles are originally tapered for the tie rod ends, so I used the recommended 3/4" drill bit to do the job. You also have to drill out the pitman arm as it too is tapered.
Once everything is drilled out, re-assembly can begin. Now is also a good time to replace both inner & outer wheel bearings because everything is already broken apart. For what I did, I replaced all of the front bushings (C-bushings, radius arm bushings & track bar bushings), coils, brake lines to the frame, shocks, steering box & brake pads, I had to further disassemble things. You can drill out the knuckles & pitman arm on the vehicle, but it makes it a bit more difficult. For this, I am going to foregoe the reassemble of the radius arms & coils, etc. and just jump back to the installation of the SCS.
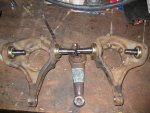
So that you have an idea of how things are going to go, I would lay them out & put them together off of the vehicle & then assemble after you know what goes where. I went with a "knuckle over" setup for better ground clearance. It gives about 3" of clearance over the OEM steering linkage. By doing this, it also aleviates the requirement of a drop pitman arm for most lift kits. On a side note, the coils I went with are Cage 5.5" lifts but I don't have a drop pitman arm instead opting for a track bar riser. You will have to either use a drop track bar bracket (on the frame) or track bar riser (on the axle) in order to get your axle centered correctly with that high of a lift. If you are using a lift of 3.5" or less, you won't need either bracket.
Once I had everything mounted in place, I completely screwed the heim joints all the way down into the new tie rods. They also come with nuts to lock the bar in place once final adjustment has been determined. Again, here is where the directions are good, because it does tell you how to adjust your toe in/out. You will turn the tie rod to get your tire placement correct & then turn the drag link to the correct position for the steering box. Once you have both the drag link & tie rod adjusted correctly, drill a hole through the bottom lock nut on each mounting point for the provided cotter pins. These are required as with any steering link.
The actual disassembly & drilling of the knuckles/pitman arm takes longer than the installation & adjustment.
As of right now, I have driven this for about 100 miles now & it is smoother than original, has less bump steer & I was able to get rid of my steering stabilizer. You can install a stabilizer shock if you want, using the original hardware, but in my opinion, it isn't worth the extra $50 for the shock. I also plan on having it professionally aligned just so that I am sure things are correct.
If anyone would like to know more about this set up, please feel free to post here or to PM me with any questions. The pictures are also showing up in reverse order, so the last picture should have been the first one


Last edited by a moderator:
