Speedo calibration ?

Disclaimer: Links on this page pointing to Amazon, eBay and other sites may include affiliate code. If you click them and make a purchase, we may earn a small commission.

Icculus

New member
Joined
Jun 18, 2017
Messages
9
Reaction score
0
So I've read and watched YouTube vids. I have 33" inch tires on my 96 bronco and it was shifting quite hard 1-2nd then hard at open throttle. The needle shook alittle bit over 55 mph and ABS Light is on. I went to the website for my tires and the spec info stated that it has a revolutions per mile of 639. I reprogrammed The computer and put it 643 due to the tire leveling out alittle under speed.

Transmission is now smooth as butter but my speedometer is off I'd estimate 10-20 mph when over 45mph.

What is up with this? What am I missing?


miesk5

96 Bronco 5.0
Staff member
Moderator
Joined
Oct 18, 2005
Messages
9,078
Reaction score
1,037
Location
Floating in the Pacific
Yo,

Ensure tires are @ same psi as shown on driver side door jamb label, such as 35 PSI as shown in this label on a 96 Bronco 5.8 by MKITGO2;

imgp4775.jpg

Measure cold tire inflation pressure after the vehicle has been parked for three hours or has been driven less than 5 km (3 miles).

...

Recal @ 636

HOW TO RECALIBRATE THE SPEEDOMETER ON 92-96 FORD F-SERIES AND BRONCO By Benjamin Ratterree:

1. Check whether the conversion constant in the speedometer is correct with the following procedure:

Press and hold the RESET button on the front of the speedometer while turning the key to RUN.
Release the RESET button. The pointer will prove out and some codes will appear on the odometer display. If an "E" is on the left side of the display, the module is programmed for English display mode and should have English graphics (mph). A lower case "o" signifies an overseas (metric) graphics (kph). Verify the graphics and display modes agree. (The number appearing after the type is the microprocessor revision level and is not used in this test.)
Rress and release the RESET button again. The conversion constant and the word CAL will be shown on the odometer display.
Check the conversion constant shown on the odometer display with the chart below and verify the correct constant is entered.
Turn off the key to exit this test.
2. Reprogram speed conversion constant using the following procedure:

Locate the dealer mode programming enable single-terminal connector. The connector is located at the bottom of the instrument panel below the center of the glove box. On all vehicles, the dealer mode enable wire is Circuit #567 (LB/Y).
Insert metal clip in service wire panel connector. Clip other end to vehicle ground while the key is in the OFF position.
Turn key to RUN (not crank) position while holding down the trip odometer RESET button on speedometer. Release RESET button.
Speedometer will prove out (sweep across dial and back). The English/Metric and revision levels will be displayed. The last number of the display is the dealer mode programming lockout count. This count shows the number of allowable conversion constant changes remaining. When the count is zero (0), no additional changes can be made to this instrument cluster. If a conversion constant change is required, a service instrument cluster must be ordered. Refer to this section for ordering information.
Press and release RESET button again and PSOM conversion constant (without the decimal point) followed by the word CAL.
Press and release the odometer SELECT button as many times as necessary to change conversion constant to the correct value.

NOTE: Pressing and releasing the RESET button to lock in the new Conversion Constant reduces the number of times the PSOM can be reprogrammed by one count. The module can only be reprogrammed six times. If you change your mind and want to go back to the old conversion constant, turn the ignition switch off before you lock in the new constant.
When the correct new value is displayed in odometer window, press and release the RESET button to lock in the new conversion constant.
Turn the key off and remove the ground wire. Verify proper speedometer operation.

To find conversion constants for tires with 15 inch rims that are not listed in chart, above multiply the revolutions per mile (at 45mph) of your tire times .0135. For 16 inch rims multiply by .015. The revs/mile can be found at your tire manufacturers web site. There are slight variations in revs/mile per tire manufacturers, but using one like the popular BFG A/T (see below) will get you very close.
Example: BFG AT 33x12.50R15LT/C
Revs/mile= 636
636 rev/mile X .0135 = 8.59
8.59 would be your conversion constant
Here is a listing of popular oversize BFG All-Terrain tires with conversion constants:

Tire Size Revs/mile (at 45mph) Conversion Constant
30x9.50R15LT/C 705 9.52
31x10.50R15LT/C 677 9.14
32x11.50R15LT/C 656 8.86
33x12.50R15LT/C 636 8.59
35x12.50R15LT/C 599 8.09
[SIZE=14.4px]To find sizes needed; go to [/SIZE]http://www.tirerack.com
[SIZE=14.4px]select [/SIZE][SIZE=14.4px]Tire[/SIZE]
[SIZE=14.4px]by size[/SIZE]
[SIZE=14.4px]example;[/SIZE]

BF Goodrich[SIZE=14.4px] All-Terrain T/A KO Size: 33X12.5R15[/SIZE]

[SIZE=14.4px]Revs Per Mile = 636 [/SIZE]
[SIZE=14.4px]etc. [/SIZE]
My new BFGoodrich T/A KO 33x12.5x15's have a rev/mile on the TireRack website of 636 rev/mile. 

so.....636x108/8000=859.....
 
..
 
If you can't find a spec (be sure to check the mfr.'s site), set your air pressure , find ~30' of straight, flat, empty pavement, mark a rear tire AND the ground, & roll it exactly one full rev. Be sure to stop with the mark on the tire exactly dead-center of the contact patch, just like with the first mark. Then measure from the mark on the ground to the mark on the tire in inches (you'll need a 10' or 12' tape & an assistant).

RevsPerMile = 63360 / InchesPerRev

So if you went 113.5 inches in one rev, that's 558 RevsPerMile


[SIZE=14.4px]PSOM can only be re-programmed six times, but there is a device for sale [/SIZE]

The mfr's published revs/mi is the average over the tire's tread wear life, so it's the most accurate.

 
Last edited by a moderator:

miesk5

96 Bronco 5.0
Staff member
Moderator
Joined
Oct 18, 2005
Messages
9,078
Reaction score
1,037
Location
Floating in the Pacific
Yo,

ABS Light is on;

[SIZE=34.2507px]Do this [/SIZE]4WABS Self Test & Test Connector Diagram, Component Locations, DTCs, 93-96;  "...The 4WABS TEST Connector is red; located at the left-hand side (driver's side) of the engine compartment and marked ANTI-LOCK TEST; 

Light Flash Technique;

1. Note: If 12V test light is not available, the amber ABS warning light also flashes during this test. Locate test connector in the engine compartment and install 12V test light between Pins C and E. 

2. With the igniton off, jumper Pin E to B. 

3. Turn key to RUN position. 

4. Remove jumper between Pins E and B after 5 seconds. 

5. Count light flashes of test light or amber ABS warning light..." read more @ 

http://www.supermotors.net/registry/media/255501_1

 miesk5 Note; for all Resistance tests, battery needs to be disconnected; remove Negative cable at battery.

4WABS Self Test Connector pic in a 95 (near driver's side hood hinge) 

selftest.jpg
Source: by s8c2 (the wagon)

...

Are you comfortable with electrical testing using wiring diagrams and a meter?  The troubleshooting gets involved.

A code may lead to your needle shaking.

Is the CEL on while driving?

 
OP
OP
I

Icculus

New member
Joined
Jun 18, 2017
Messages
9
Reaction score
0
I can wiggle my way through electrical. Just got home and will read and attempt the test when I wake up this afternoon. I really appreciate the responses. I did all the maintenance on my motorcycle including valve adjustments etc, cars are a little intimidating for me.

 
OP
OP
I

Icculus

New member
Joined
Jun 18, 2017
Messages
9
Reaction score
0
also so let me make sure we are on the same page. Using the information above....I shouldn't have entered 643 as my new number into the computer?????!

Here is a listing of popular oversize BFG All-Terrain tires with conversion constants:

Tire Size Revs/mile (at 45mph) Conversion Constant

30x9.50R15LT/C 705 9.52

31x10.50R15LT/C 677 9.14

32x11.50R15LT/C 656 8.86

33x12.50R15LT/C 636 8.59

35x12.50R15LT/C 599 8.09

To find sizes needed; go to http://www.tirerack.com

select Tire

by size

example;

BF Goodrich All-Terrain T/A KO Size: 33X12.5R15

Revs Per Mile = 636

etc.

My new BFGoodrich T/A KO 33x12.5x15's have a rev/mile on the TireRack website of 636 rev/mile.

so.....636x108/8000=859..

I should have entered 859 instead of 643?????

I don't know where the x108/8000 comes from.


miesk5

96 Bronco 5.0
Staff member
Moderator
Joined
Oct 18, 2005
Messages
9,078
Reaction score
1,037
Location
Floating in the Pacific
Yo,
"should have entered 859 instead of 643?" [SIZE=23.9997px]Yes[/SIZE]
 
Example: BFG AT 33x12.50R15LT/C
Revs/mile= 636
636 rev/mile X .0135 = 8.59
 
Sorry for the delay, this site is killing me.  After I type part of a reply, the screen refreshes and all the typed words disappear.

Then I had to clean up a spammers mess. 
8.59 would be your conversion constant
 
OP
OP
I

Icculus

New member
Joined
Jun 18, 2017
Messages
9
Reaction score
0
Awesome. Put in the new conversion constant and the only hard shift I had was wide open throttle. Awesome guys I really appreciate the help. Now to get to the ABS light this weekend.

 
OP
OP
I

Icculus

New member
Joined
Jun 18, 2017
Messages
9
Reaction score
0
My name is Wes. I'll check that code this weekend I imagine.

I'll be on here quite a bit as I'm new to the Bronco and to cars. Have been working on motorcycle for a decade but cars are def a whole different beast.


miesk5

96 Bronco 5.0
Staff member
Moderator
Joined
Oct 18, 2005
Messages
9,078
Reaction score
1,037
Location
Floating in the Pacific
Yo Wes,

Ok, will log in here a few times each day.  I usually am off-line after 7 pm edst each day.

here are some Links for you;
96 Bronco-F-Series Workshop Manual (PARTIAL) by FORD via
http://www.diesel-da...stj/stjleft.htm

96 is same as most earlier years especially 92-96, except for:
92 through 95 uses the Electronic Engine Control, version Four (EEC-IV, aka On Board Diagnostics (OBD-I)) engine management computer
96 uses the OBD-II (EEC-V) engine management computer;
4WABS (93-96);
RABS (87-92);
Air Bag (94-96);
3 ***** Automatic Locking Hubs (Built from May 95 through 96); Spark Plug Wire Routing & Firing Order (The firing order for 1987-1993 5.0Ls is 1-5-4-2-6-3-7-8. The firing order for 1994- 96 5.0Ls & all 5.8Ls is 1-3-7-2-6-5-4-8.);
R134a in 94-96;
2-piece Spindle Rolling Diaphragm Seal (RDS) used on 5/95 to 96 Broncos & F Series 1/2-ton 4WD;
Mass Air Flow in 95 5.8 California models and in all 96s, other years used Manifold Absolute Pressure Sensor (MAP).
96 5.8 do not have the Air Injection (AIR), Secondary Air Injection; Pump (Smog Pump), Thermactor Air Bypass (TAB) & Thermactor Air Diverter (TAD) Solenoids; Diverter, Check & Bypass Valves, Cross-Over Tube, etc. But 96 5.0 does have the system.
The 96, Vapor Management Valve (VMV) replaces the canister purge valve (CanP valve) used in EEC IV. But manual still shows CanP valve probably because it was a late addition to the 96 production line.
The Speed Control Deactivation Switch (SCDS) in a 93 Bronco is located on the driver side frame rail, but in 94 through 96 it is on the master cylinder.
Still researching other differences.

96 Bronco Owners Guide by Hiller Ford
http://www.hillerfor...rd/96bronco.pdf

96 Bronco Dealer Brochure by Ford via me at
http://www.supermoto...ry/media/877777


Wiring Diagrams (not all systems shown) in 86-current and Technical Service Bulletins (TSBs) for 80 to Current
http://www.revbase.com/BBBMOTOR/

 Speed (aka Cruise) Control Recall in 94-96; check with VIN at dealer or on-line @ For; this recall has a life of its own and still undergoing changes; deals w/speed control deactivtation switch mounted on master cylinder; fires have been reported. 

be well!

Al

 
OP
OP
I

Icculus

New member
Joined
Jun 18, 2017
Messages
9
Reaction score
0
Speedo seems good to go. After two days no hard shifting and my speedo is accurate.

My thermo gauge stays on the cold, I did disconnect it and did the ground test, it moved to even colder when I turned the ignition.

Gonna check the instrument cluster tomorrow to see if there is a bad connection.

 
OP
OP
I

Icculus

New member
Joined
Jun 18, 2017
Messages
9
Reaction score
0
I looked at the schematic and want to test the sender. But have no idea where to put my voltmeter to get those readings???

Also is there a direct after market replacement that has one wire I could just hook to the thermometer and install the gauge in my cabin?


miesk5

96 Bronco 5.0
Staff member
Moderator
Joined
Oct 18, 2005
Messages
9,078
Reaction score
1,037
Location
Floating in the Pacific
Yo,

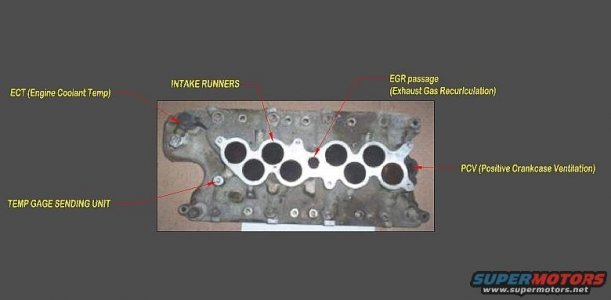
Remove sender;

Place + lead on the threaded pin where the wire atraches.

&

- lead on the body of the sensor where it screws into the intake manifold.st for ohms

Sender location diagram by Gacknar;

GT-40%20lower%20intake.jpg

...

Re your "Also is there a direct after market replacement that has one wire I could just hook to the thermometer and install the gauge in my cabin? "

If you meant tbe temp gauge,

yes;

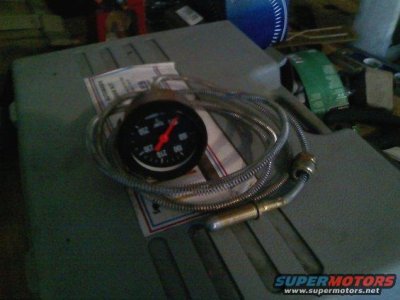
VDO Temperature Gauge Installation by jfritts

l[SIZE=1em]Menu[/SIZE]
[SIZE=14.4px]I finally got tired of guessing how hot my truck was running with the stock guage. I knew it sucked and i thought [/SIZE]


I picked up this guage at autozone for $15 and it worked pretty well until my VDO guage came in from summit racing. 
guage.jpg

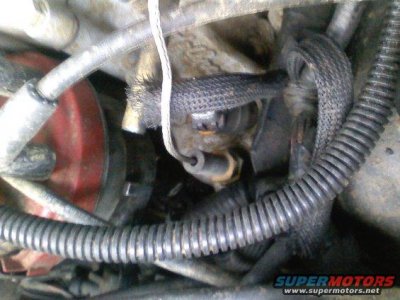
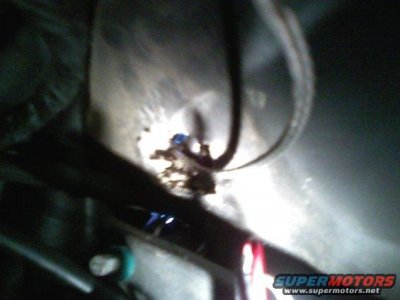
First locate your temperature sending unit on the top of ur manifold. mine was right behind the distributor and just pull straight up to remove the wire connected to it. use your socket to remove the sending unit.
121709153000.jpg

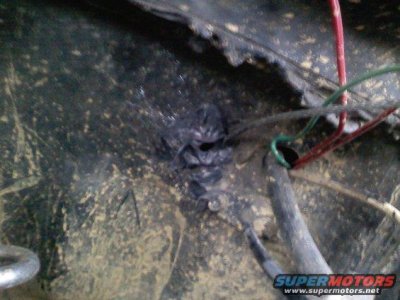
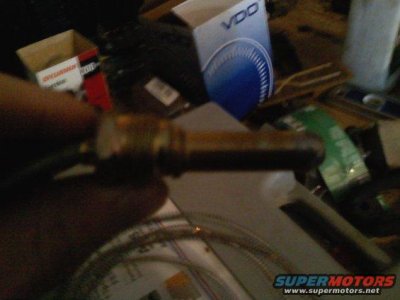
Drill a hole in your firewall from the inside large enough for the new sending unit to pass thru. cut out a hole in the insulation inside the cab as well
121709153200.jpg
121709153300.jpg
miesk5 note, or use the firewall clutch blank to drill through.  [SIZE=14.4px]I ran wiring through that [/SIZE]clutch[SIZE=14.4px] blank plate and used left-over grommets, etc. to seal.[/SIZE]
wol_error.gif
 
   
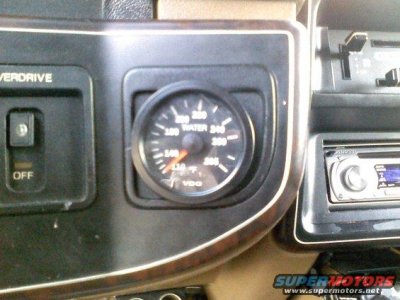
Locate where you want to install your guage. I chose the spare panel on my dash. Use the hole saw drill bit that is just a hair smaller than your guage to get a good fit and so it is secure. I did this with a 3/8ths drill bit and a box cutter.
121709153700.jpg

Run the sending unit and connected line thru the hole in the dash, down and thru the hole in the firewall and then connect it to the manifold. 
121709154301.jpg

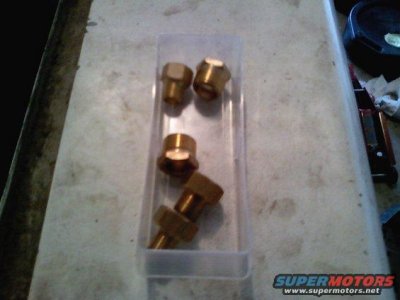
My temp guage came with 5 different pipe fitting adapters. You might need one to make sure the sending unit fits into the manifold. 
121709154400.jpg

Use a silicone gasket sealer or some form of caulk to plug the hole in the firewall to keep water from getting in the cab.

Push your temp guage into the hole in the dash and sit back and enjoy your success.
121709153800.jpg


miesk5

96 Bronco 5.0
Staff member
Moderator
Joined
Oct 18, 2005
Messages
9,078
Reaction score
1,037
Location
Floating in the Pacific
Yo,

My reply was rejected because one photo was not allowed, but the ******* programming didn't specify which photo it was!

wol_error.gif


 I ran wiring through that oval clutch blank plate and used left-over grommets, & high temp white sealant. to seal. Mentioned white to help point to the wire.

Ok, error #3.. not allowed to use the photo!

See it here


Members online

Forum statistics

Threads
22,664
Messages
136,897
Members
25,362
Latest member
Wihill
Top