yo Return To Glory,
WELCOME!!
For any kind of swap, I have a bunch of Swap LINKs in my site @
http://www.broncolinks.com/index.php?index=541
Such as;
5.0 to 460 Swap in an 88
Source: by Dustin S @
http://ylobronc.users.superford.org/460/index.html
5.0 to 5.8 Swap in a 90
Source: by Bob K (RLKBOB) at
http://www.supermotors.net/registry/4605/17017
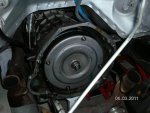
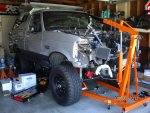
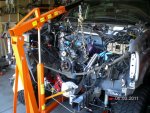
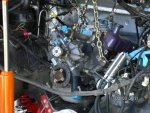
5.0 to 460 EFI Swap in an 89; I put a 1994 EFI 460 and the E4OD transmission it came with in my 89 Bronco. The Bronco came with an EFI 302 with AOD transmission and BW 13-56 T-case. The motor was supposed to go into a 1994 F-350 but the chassis was pulled off the assembly line for a QA inspection. Since the engine and transmission were already together, and the next truck on the assembly line wasn't an F-350, they dropped the engine/transmission onto a pallet, shipped it to Leanard Vasholtz of Pikes Peak Hillclimb fame (he races Bronco's up Pikes Peak every July 4) and I bought it from him for $4k. I used my original BW 13-56 t-case because it was the t-case they were using behind that combo in 1994, and it was a bolt on. Never had a problem with it and it has been beat to death offroad, towing, etc. Your best bet is to either find a complete donor vehicle from which to take all the parts out of, or check into your local FORD dealer and see if they have the EFI 460's for sale as a crate motor. I had to buy the ECM (460 computer), chassis wiring harness from a 1994 F-350 and splice it to the existing 1989 harness to get everything to work properly. The engine comes with a harness on it which includes all the wiring for the engine sensors. It connects to a weather tight plug that then connects the engine harness to the ECM. It's kind of modular. Same goes for the E4OD. It has a harness which is for the transmission and t-case sensors and it connects to a plug that then connects the transmission to the ECM. These can be seen if you look under the hood near the black plastic fuse box that sits on the wheel well on the drivers side. To make everything easier, I also bought the FORD EFI manual, the HELM wiring Schematics for both the 1994 and 1989 model year light trucks, and the HELM service manuals for the 1994 Light Trucks. The wiring schematics have all the circuit ID's and color codes for both model years, and most of them match exactly. All I did was splice the 1994 underhood harness to the 1989 harness where it meets the firewall. It's a lot of work, believe me. Took me 2 days to drop in the motor and transmission and 7 weekends to wire it all! I used L&L motor mounts, custom fabricated the shift linkage for the E4OD because it is a cable operated shifter and my 89's was a bell crank style. I had to fabricate a custom t-case mount support and cross member, and mounted the transmission to it also. I had to buy a 4 core Big Block radiator which was a bolt in, and added 2, B&M Transmission Coolers. I had to buy a remote oil filter kit from Transdapt because the stock filter hits the frame cross-member. The 460 air cleaner mounts in the same exact location as a stock 91 would. I ended up buying a K&N Filtercharger kit and it mounts in the same place also. If you find that getting all the parts is too hard, you might seriously consider a late model 460, build it mildly and then run the Holley EFI system on it to gain the EFI advantages. IMHO, carbs went the way of the Dinosaur. I'll never own another carb'd truck again. I use mine more offroad than 90% of the 4WD's out there and EFI is the way to go hands down, end of story, period... Keep in mind, the stock FORD EFI system on the 460 is Speed Density and it won't run on anything but a stock 460. You can get away with a K&N Filter, plugs, headers and plug wires, but just about any other mod to the engine i.e.: cam, heads, intake, etc. would cause the air flow into the engine to be out of the calculated ranges burnt into their PROM of the ECM, so it would attempt to run at the end of this scale and that's it... It might work, it might not. If the system were the Mass Air type, typically found on Mustangs and the newer trucks, the engine can be modified and the ECM can handle it. If you are looking to run a cam, or anything other than pretty much box stock, go the Holley EFI route... It works, is simple to install compared to a FORD EFI system swap, and offers all the benefits of EFI without nearly the cost and aggravation."
Source: by Steve D at
http://ford.off-road.com/trucks-4x4/tech/converting-a-bronco-to-big-block-power-18947.html
etc.
and in my V8 section @
http://www.broncolinks.com/index.php?index=182
351W Removal & Rebuild Instructions & pics in an 84 351W
Source: by Michael G at
http://www.angelfire.com/ok5/84bronco/engine.html
357 (351W) Installation in an 89
Source: by Tim C (TnTbronco2, Trail Truck, Street Truck, Crazed, Broke, OoG) at
http://www.supermotors.net/clubs/superford/vehicles/registry/1725/14615
357 (351W) Installation Finishing in an 89
Source: by Tim C (TnTbronco2, Trail Truck, Street Truck, Crazed, Broke, OoG) at
http://www.supermotors.net/clubs/superford/vehicles/registry/1725/14625
Installation Tips
Source: by fordcobraengines.com @
http://www.fordcobraengines.com/installation.asp
SAFETY IS THE NUMBER 1 PRIORITY & THIS YOUR RESPONSIBILITY
Always have Work Area organized, Well Ventilated & properly Lit.
1 START BY DISCONNECTING YOUR BATTERY CABLES AND REMOVING BATTERY FROM YOUR VEHICLE, THIS ELIMINATES ANY POSSIBILITY OF SHORTING OUT ANY WIRES.
2 DISCONNECT FUEL LINES AS NECESSARY AND IMMEDIATELY CAP OFF. A WELL KNOWN METHOD IS TO INSERT A BOLT IN THE RUBBER FUEL LINE AND INSTALL A MINI CLAMP TO SEAL OFF LEAKING FUEL. USE EXTRA CAUTION ON FUEL INJECTED SYSTEMS, THE PRESSURE CAN BE 10 TIMES THE PRESSURE OF A CARBURETED SYSTEM. NEVER USE A DROP LIGHT WHEN WORKING NEAR GASOLINE OR FUMES, IF THE DROP LIGHT FALLS AND THE BULB BREAKS THE GLOWING FILAMENT CAN IGNITE THE GAS OR FUMES CAUSING AND INSTANT FIRE.
3 NEVER DISCONNECT ANY AIR CONDITION LINES ! THEY HAVE HIGH PRESSURE REFRIGERANT WHICH CAN CAUSE SEVERE BURNS OR EYE DAMAGE. IF THE AIR CONDITION COMPRESSOR MUST BE REMOVED LEAVE LINES ON COMPRESSOR, UNBOLT WITH THE LINES ATTACHED AND TIE COMPRESSOR UP OUT OF THE WAY WITH A PIECE OF ROPE TO THE INSIDE FENDER.
4 REMOVE HOOD BEING CAREFUL WITH HOOD SPRINGS AND HINGES MANY FINGERS HAVE BEEN LOST HERE. BEFORE LOOSENING HINGE BOLTS SCRIBE THEIR LOCATION FOR EASIER HOOD ALIGNMENT WHEN REINSTALLING HOOD.
5 TAG ANY WIRES AND VACUUM LINES FOR PROPER LOCATION ON REASSEMBLY.
6 KEEP ALL TOOLS CLEAN, AND USE PROPER SIZE SOCKETS.
7 USE SMALL PLASTIC BAGS AND A MAGIC MARKER TO PROPERLY IDENTIFY BOLTS THAT YOU TAKE OFF SO THEY CAN BE INSTALLED CORRECTLY IN THE PROPER LOCATION UPON REASSEMBLY.
8 ANY PARTS REMOVED SHOULD BE INSPECTED FOR WEAR OR FLAWS. KEEP A LIST OF NEW PARTS TO BE ORDERED.
9 WHEN IT TIME TO JACK UP YOUR VEHICLE TO DISCONNECT UNDER THE VEHICLE YOU WILL NEED THE FOLLOWING—A JACK THAT HAS THE PROPER CAPACITY TO LIFT THE VEHICLE, JACK STANDS THAT HAVE THE PROPER CAPACITY TO SUPPORT THE VEHICLE ---- NEVER GO UNDER A VEHICLE THAT IS ONLY HELD UP BY A JACK. THE BEST WAY IS TO START OUT ON LEVEL SOLID GROUND CEMENT IS BEST, LIFT THE VEHICLE WITH THE JACK AT THE PROPER LIFTING POINTS THEN PROPERLY SET THE JACK STAND AND LOWER THE VEHICLE ON TO STAND. ONCE VEHICLE IS SAFELY LIFTED AND SECURED THEN USE A CREEPER TO GO UNDER IT. YOU WILL NEED SAFETY GLASSES BECAUSE ANYTHING YOU DISCONNECT UNDER VEHICLE WILL HAVE A LOT OF RUST AND ROAD DIRT ON IT.
10 MANY MECHANICS WILL TRY TO REMOVE THE ENGINE AND TRANSMISSION AS AN ASSEMBLY, THIS IS A JUDGMENT CALL. IF POSSIBLE IT MAY BE EASIER TO LINE UP THE TRANS & ENGINE WHEN IT IS OUT OF THE CHASSIS AS AN ASSEMBLY. BUT BE SURE THAT THE HOIST YOU’RE USING IS CAPABLE OF THE COMBINED WEIGHT OF ENGINE AND TRANSMISSION ASSEMBLY. IF YOU CHOOSE TO LEAVE THE TRANSMISSION IN THE CHASSIS, THEN PROPERLY SUPPORT IT BEFORE REMOVING ENGINE. BE SURE TO USE COMMON SENSE AT THIS POINT, YOU’LL BE LIFTING A LOT OF WEIGHT SO NEVER WORK UNDER AN ENGINE THAT IS UP IN THE AIR, LOWER IT FIRST, ALWAYS THINK OF IT THIS WAY, IF IT SLIPS OR FALLS WHERE WILL YOU BE. ALWAYS STAY CLEAR.
ITEMS THAT SHOULD BE REPLACED DURING INSTALLATION.
1. Many Times a Radiator Looks Acceptable. But the Truth of the Matter is the Tiny Little Tubes that the Coolant Flows through can be Partially Restricted and Cause Overheating & Engine Damage. You’ve made a Considerable Investment in an engine-Protect It! We recommend replacing the original Radiator with a 4 core Heavy Duty Radiator.
2. HOSES AND CLAMPS: HOSES CAN COLLAPSE, LEAK, OR **** AIR INTO SYSTEM, REPLACE ALL HOSES. CAUTION LOWER RADIATOR HOSE MUST CONTAIN A COIL SPRING INSIDE IT OR IT CAN COLLAPSE AT HIGHWAY SPEED AND STARVE BLOCK FOR COOLANT.
3. FAN SHROUD HELPS THE FAN PULL COOL AIR THROUGH THE RADIATOR, CHECK FOR CRACKS OR MISSING PIECES.
4. RADIATOR CAP --- MOST MODERN ENGINES REQUIRE A 14 LB. CAP. FOR EVERY LB. OF PRESSURE THAT YOU RAISE YOUR COOLING SYSTEM YOU RAISE YOUR BOILING POINT 2 DEGREES. EXAMPLE NORMAL BOILING POINT IS 212 DEGREES WITH A 14 LB. CAP YOUR BOILING POINT NOW BECOMES 240 DEGREES.
5. FAN AND OR FAN CLUTCH---- THIS IS IMPORTANT FOR PROPER COOLING. AN EASY WAY TO CHECK TO SEE IF THE FAN IS PULLING THE PROPER AMOUNT OF AIR THROUGH THE RADIATOR, PLACE A PIECE OF NEWSPAPER ON THE FRONT OF THE RADIATOR IF THE FAN IS WORKING PROPERLY IT WILL PULL THE NEWSPAPER TIGHTLY AGAINST THE RADIATOR.
6. REPLACE FAN BELTS AND CHECK PULLEYS FOR CRACKS OR DAMAGE, A BROKEN $ 5.00 BELT COULD WASTE A $5,000 ENGINE.
7. MOTOR MOUNTS, A BROKEN OR SAGGED MOUNT CAN CAUSE SERIOUS VIBRATIONS.
8. CHECK EXHAUST SYSTEM FOR ANY RUSTED OUT PARTS.
9. CHECK CLUTCH DISC, PRESSURE PLATE, THROW OUT AND PILOT BEARING FOR WEAR.
10. CHECK AUTOMATIC TRANS FOR LEAKS, BROKEN MOUNTS, OR LEAKY MODULATOR.
11. DRIVESHAFT--- CHECK UNIVERSAL JOINTS FOR WEAR
12. Look Over any Special Sensors or Switches. Replace as Necessary
READ MORE...---==
ID w/tags all electircal connectors 9take pis too)
ID all vacuum lines and components that need to be removed;
ID and bag all parts small parts, bolts, nuts and washers
for vac line diagrams see my site @
http://www.broncolinks.com/index.php?index=907
5.0 Parts Break-Out Diagram, Internal & External w/ Nomenclature
5.8 Parts Break-Out Diagram, Internal w/ Nomenclature
ETC.
---
Also, Jeff at the
Bronco Graveyardhas offered a 2% discount to members of The BroncoZone for on line orders. To get your discount, enter the discount code BZMEMBER. Also you must include your BroncoZone User Name with the order.
One more..Forgot to mention soon in your profile, include your year, engine, trans, Xfer case & locking hub type (auto or manual) and any major mods such as body or suspension lift, etc. or in any question post. You'll get more accurate replies


