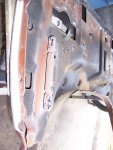
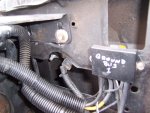
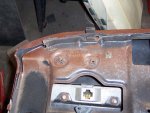
new bronco owner

Disclaimer: Links on this page pointing to Amazon, eBay and other sites may include affiliate code. If you click them and make a purchase, we may earn a small commission.

hifonic200

New member
Joined
May 11, 2011
Messages
8
Reaction score
0
whats up...

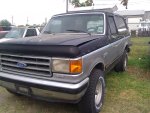
new to board, new to bronco ownership

bought a 1989 fixer upper so I will be crusing the site for answers

couple things i need to address first off to get it inspected

the windsheild wipers are acting up, they turn on and the delay works...most of the time, but it seems like they have a mind of their own, also the washer fluid does not squirt out when the button is pushed

how likley is it to be the module? I was reading it could be that or the actual pump...just seeing which of the two was more common

I need to replace all the seals on bottom of the windows, but I read the aftermarket ones dont fit good, where is the best place to buy these where they will fit good and not cost a fortune?

also need to replace the door bushings that keep the doors open

my 4x4 does not engage, nothing happens when the button is pushed, but i printed up a troubleshooting guide from here and plan on doing that soon

After all the mechanical stuff is fixed I plan on giving her a paint job, new custom bumpers and some racks....along with a new interior


miesk5

96 Bronco 5.0
Staff member
Moderator
Joined
Oct 18, 2005
Messages
9,078
Reaction score
1,037
Location
Floating in the Pacific
yo, Welcome!

Windshield Wiper

It may be that WS governor. Some info;

Interval Governor Repair in an 89; "... The only tools you'll need are a quarter inch nut driver and a soldering iron. Disconnect the big red connector from the back of the wiper switch. The interval governor is a little black plastic box just to the left of the fuse box (behind the headlight and wiper switches). There is one bracket on the bottom rear of the module box and a single ***** attaches it to the dash. Remove the ***** and pull the module forward out of the dash compartment. Disconnect the black cable connector at the module. It looks almost identical to thee red connector at the wiper switch. Take the module assembly to a suitable work bench with plenty of light. Two screws hold the cover on. One of the screws also holds down the short cable assembly coming out of the box. Remove the two screws and carefully lift the PC board assembly out of the plastic box. Inspect the backside of the PC board. At one corner of the board is a large plastic relay and next to it is a heatsink with a special power resistor connected to the bottom of it. On my PC board, solder connections were broken on the heatsink and resistor leg. Carefully inspect all the other connections on the board for cracks. These are cheap, single-sided PC boards and the solder connections can break very easily, because there is no plating through the holes that the components go through. if you have an eye loupe or a magnifying glass, use them to carefully inspect all the connections. If any connections are broken, simply take some regular 60/40 electronic solder wire (the kind with a flux core) and solder any of the faulty solder connections. Of course, I also inspected the top (component) side of the board to make sure there were no burned components. On my board, the components looked fine. When finished, put the board back in the box and re-install. I did this and voilà! The delay works perfectly, and so do low and high speed wipers. I guarantee this is a common problem with these wiper modules. With those cheap solder connections, and the board rattling around in the dashboard for 20 years, this is the kind of thing that usually goes wrong. Hope this helps everyone. It was really pretty simple..."

Source: by rusheadcarerra

wipers.jpg

Wiper switches & governor pics by Steve83

Wiring Diagram in 87-89 & F Series Source: by miesk5 at broncolinks.com/gallery

TSB 99-8-15 Door Trim Panel Removalby Ford via Steve83

Windshield Wiper Motor TSB 95-8-2 for 87-94 Bronco & F Series

More Windshield Wiper LINKs in my site under;

Electrical

Windshield Wiper

===============

Window Seals;

door-windows.jpg

by Ford via Steve83

Window Regulators, Weatherstrip & Vent Parts Break-Out Diagram in 80-96

Source: by Steve83 (Steve, That dirty old truck) at SuperMotors.net

Our sponsor here Jeff's Bronco Graveyard reportedly has good fitting seals

=====================

re; door bushings that keep the doors open?

Mean the Striker Bolt/Bushing on B poillar?

or in the hinge?

Pin & Bushing Replacement in an 89 Source: by Tim C (TnTbronco2, Trail Truck, Street Truck, Crazed, Broke, OoG) at SuperMotors.net

=================

4x4 does not engage

Did you print ths one out?

Four Wheel Drive (4X4) General Information, Operation & Troubleshooting TSB 92-1-8 for Bronco, F Series & Ranger (COMPLETE); Includes Electric Shift On The Fly (ESOF) Troubleshooting & Hub Operation; same for 87-96; exc for that in 87; power from Fuse 6 (15 amp) to "ELECT SHIFT CONTROL MOD" WHT-PPL and CB 12 (30amp) to "ELECT SHIFT CONTROL MOD" BLK-WHT; SEE A7 and A8 in the 4x4 diagram, it shows those two wires BLK-WHT as BK/W from SHIFT MODULE to P1 BATTY and and WHT-PPL as W/P to P2 Source: by Ford via Chilton

If indicator lights come on, then hit the shift motor w/rubber hammer and then read about the issues with it (such as the travel stops) in my site @ http://www.broncolinks.com/index.php?index=70

 
Last edited by a moderator:
OP
OP
H

hifonic200

New member
Joined
May 11, 2011
Messages
8
Reaction score
0
awesome, thanks for all that info

I removed the washer motor last night, its fried and needs to be replaced

Ill do that and check that circuit board tonight.....one project off the list

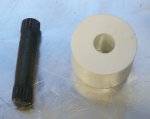
the bushing I refered to for the door is actually a roller it looks like....im assuming its what is supposed to keep resistance on the hinge to keep the door open o(or where ever you put it) mine dont touch anything and the door freely swings whereever it wants

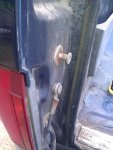
by researching that door bushing i realized why my tailgate rattles and squeeks so much, looks like the strikers are supposed to have a plasic sleeve on them...mine do not

8096HINGEROLLER.jpg

IMG_20110508_180842.jpg

IMG_20110430_155010.jpg


Seabronc

New member
Joined
May 22, 2004
Messages
7,315
Reaction score
35
Location
North of NYC
the bushing I refered to for the door is actually a roller it looks like....im assuming its what is supposed to keep resistance on the hinge to keep the door open o(or where ever you put it) mine dont touch anything and the door freely swings whereever it wants

by researching that door bushing i realized why my tailgate rattles and squeeks so much, looks like the strikers are supposed to have a plasic sleeve on them...mine do not
The roller presses against a flat piece of spring metal attached to the hinge. From your description I would assume that the flat spring metal is broken off. I had that happen to one of mine recently. You can replace the hinge or the hinge spring http://broncograveyard.com/bronco/i-34383-upper-door-hinge-spring-repair-kit.html . The part is not expensive, but getting the hinge off requires getting the fender out of the way or taking the door off the hinges. Either method is a bit of work and will require adjusting the door after you have done the replacement, (mark their position before removing the bolts, it will make adjustment easier). If you take the door off the hinges you would be better off getting someone to help with the door and some way to support it while removing the bolts. I took the fender off since it was easier as a one man job and I could leave the door in place while I changed the hinge which I picked up from a local auto parts re-cycler for $5.00. If you opt for the fender removal I'll give you more information on that later.

You can buy the bushings for the striker or replace the entire striker with a new one with bushings already on it. It's a little tricky getting the large washer off the striker bolt, but it can be done. Again a local friendly auto parts re-cycler is an option for the parts.

Good luck,

:)>-

 
OP
OP
H

hifonic200

New member
Joined
May 11, 2011
Messages
8
Reaction score
0
your right....the flat spring was there but was pressed against the hinge

I pried it back to the spot it should be but it has no spring left in it and just bent back when the door was opened

so looks like i will be removing fenders now...

The roller presses against a flat piece of spring metal attached to the hinge. From your description I would assume that the flat spring metal is broken off. I had that happen to one of mine recently. You can replace the hinge or the hinge spring http://broncograveyard.com/bronco/i-34383-upper-door-hinge-spring-repair-kit.html . The part is not expensive, but getting the hinge off requires getting the fender out of the way or taking the door off the hinges. Either method is a bit of work and will require adjusting the door after you have done the replacement, (mark their position before removing the bolts, it will make adjustment easier). If you take the door off the hinges you would be better off getting someone to help with the door and some way to support it while removing the bolts. I took the fender off since it was easier as a one man job and I could leave the door in place while I changed the hinge which I picked up from a local auto parts re-cycler for $5.00. If you opt for the fender removal I'll give you more information on that later.

You can buy the bushings for the striker or replace the entire striker with a new one with bushings already on it. It's a little tricky getting the large washer off the striker bolt, but it can be done. Again a local friendly auto parts re-cycler is an option for the parts.

Good luck,

:)>-
 

miesk5

96 Bronco 5.0
Staff member
Moderator
Joined
Oct 18, 2005
Messages
9,078
Reaction score
1,037
Location
Floating in the Pacific
yo,

As for what Fred advised and your TG/door Striker Bolt/Bushings

Watch out for the Dorman HELP brand stuff now....the driver/passenger door striker kit w/ bushings, 38445 are not fffin good..bushing diameter is way off and striker frame is off as well....it will bolt-in, but aligning it for a no-rattle fit is efffin a waste of time and possible damage to passenger or driver. the Dorman HELP tail gate striker bushings pn 38424 are a good fit & the door bushings driver/passenger bushings are incl. in this kit & fit better than the 38445 part! Made from urethane thermoplastic. assortment contains 2 each of the following sizes: 1/2" I.D. x 5/8" and 1/2" I.D. x 1"; or get them from a Ford dealer for more $ but better quality

Source: by miesk5 at Ford Bronco Zone Forums

and that door hinge bushing is in the Link I posted previously; hinge?

Pin & Bushing Replacement in an 89 Source: by Tim C (TnTbronco2, Trail Truck, Street Truck, Crazed, Broke, OoG) at SuperMotors.net

some excerpts from Tim's hinge work

door_hinge_repair_31203_042.jpg

Upper bushings were wasted, worn all the way thru the side...I didnt cut these, they were like this

door_hinge_repair_31203_047.jpg

door_hinge_repair_31203_054.jpg

that stiker Bolt screws into a Captive Nut

striker bolt nut pic.JPG

Captive Nut pic by miesk5

Captive Nut Plate; "...the strike bolt is a T50 (like the seat belt bolts). A cordless impact is invaluable. I also recommend some padded prybars to lift/slide the door without chipping the paint. As you can see in the pic under #1, you'll need a few extensions & a ratchet to break & set the bolts. All of the nut plates in the body are loose (for adjustments), but captive (they shouldn't fall if the fastener is removed), but anything can happen. If one falls, just remove the interior trim panel & retrieve it. To reinstall the strike bolt nut plate, you'll need to remove the bedside panel & peel the butyl (tar) pad away. The plate itself will be behind the shoulder reel on the floor, or on the bag of wadding crammed in down there..."

dooralignment.jpg

Source: by Steve83

and da striker;

door_hinge_repair_31203_051.jpg

Striker is all chewed up

Before removing the assy, I use a grease pen or painter's tape to outline the assy so replacement will be in relatively same position, close door slowly when closing to ensure latch engages correctly.

Door Alignment; Click Next to view more info Source: by Steve83 (Steve, That dirty old truck) at SuperMotors.net


Attachments

  • striker bolt nut pic.JPG
    striker bolt nut pic.JPG
    28.3 KB · Views: 1
OP
OP
H

hifonic200

New member
Joined
May 11, 2011
Messages
8
Reaction score
0
so for the tailgate strikers, do you reccomend replacing the whole thing or just putting new bushing on the exsisting striker

what is the "tricky" part of removing the washer....im sure i will understand when i get into it

yo,

As for what Fred advised and your TG/door Striker Bolt/Bushings

Watch out for the Dorman HELP brand stuff now....the driver/passenger door striker kit w/ bushings, 38445 are not fffin good..bushing diameter is way off and striker frame is off as well....it will bolt-in, but aligning it for a no-rattle fit is efffin a waste of time and possible damage to passenger or driver. the Dorman HELP tail gate striker bushings pn 38424 are a good fit & the door bushings driver/passenger bushings are incl. in this kit & fit better than the 38445 part! Made from urethane thermoplastic. assortment contains 2 each of the following sizes: 1/2" I.D. x 5/8" and 1/2" I.D. x 1"; or get them from a Ford dealer for more $ but better quality

Source: by miesk5 at Ford Bronco Zone Forums

and that door hinge bushing is in the Link I posted previously; hinge?

Pin & Bushing Replacement in an 89 Source: by Tim C (TnTbronco2, Trail Truck, Street Truck, Crazed, Broke, OoG) at SuperMotors.net

some excerpts from Tim's hinge work

door_hinge_repair_31203_042.jpg

Upper bushings were wasted, worn all the way thru the side...I didnt cut these, they were like this

door_hinge_repair_31203_047.jpg

door_hinge_repair_31203_054.jpg

that stiker Bolt screws into a Captive Nut

View attachment 10777

Captive Nut pic by miesk5

Captive Nut Plate; "...the strike bolt is a T50 (like the seat belt bolts). A cordless impact is invaluable. I also recommend some padded prybars to lift/slide the door without chipping the paint. As you can see in the pic under #1, you'll need a few extensions & a ratchet to break & set the bolts. All of the nut plates in the body are loose (for adjustments), but captive (they shouldn't fall if the fastener is removed), but anything can happen. If one falls, just remove the interior trim panel & retrieve it. To reinstall the strike bolt nut plate, you'll need to remove the bedside panel & peel the butyl (tar) pad away. The plate itself will be behind the shoulder reel on the floor, or on the bag of wadding crammed in down there..."
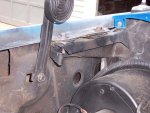
dooralignment.jpg

Source: by Steve83

and da striker;

door_hinge_repair_31203_051.jpg

Striker is all chewed up

Before removing the assy, I use a grease pen or painter's tape to outline the assy so replacement will be in relatively same position, close door slowly when closing to ensure latch engages correctly.

Door Alignment; Click Next to view more info Source: by Steve83 (Steve, That dirty old truck) at SuperMotors.net
 

Seabronc

New member
Joined
May 22, 2004
Messages
7,315
Reaction score
35
Location
North of NYC
As far as replacing the bushings, the large washer doesn't just slide off. Basically you need to get it to catch on the threads and then unthread it.

Removing the fender: If you have air tools this goes faster

1. you need to support the hood in an open position with some sort of brace like a broom handle because you need to unbolt the hood spring, (one is not enough to hold the weight of the hood).

2. open the door and remove the rear fender bolt, (just above the bottom hinge).

3. remove the bolt on the bottom of the fender just ahead of the door, (lay on your back for this one).

4. remove the small screws along the edge holding the inner fender well to the fender (you will see them).

4a.there is a bolt possibly 2 that hold the inner plastic well to the side of the fender to give it strength, (you almost have to stick your head under there to find them, but you should be able to feel them with your hand).

5. remove the light bezels and grill ( to get them out of the way).

6. remove the bolts at the bottom front of the fender that hold it to the front bottom deflector (2).

7. remove the anything attached to the fender under the hood.

8. remove the top bolts on the inside of the fender that attach it to the radiator support (not the ones on top).

9. remove the two bolts that attach the front of the fender to the radiator support (this one is a little of a PITA).

10. remove the bolt that attach the hood hinge to the fender (here is where you need to support the hood first or the hood will hurt you).

11. remove the two bolts on the top of the fender that hold it to the top fender support.

12. If I haven't forgotten anything the fender will now come off.

Now you can get at the hinge bolts to remove and repair/replace it.

Before replacing the fender, make sure the door is adjusted so it closes properly, (it will tend to settle toward the back when you remove and replace the hinge, don't open the door until you have the new/repaired hinge back in place). After you put the hinge back on, have someone lift up on the back edge a little while you tighten the bolts. Then check that the door closes smoothly without having to slam it. If it closed nicely before you changed the hinge then don't mess with the position of the striker, adjust the hinge position until it closes nicely).

Then have fun putting the fender back on.

I'll go out and take some pictures of the bolt positions and update this post with them.

If you just remove the door and change the hinges, adjustment becomes a real problem because you can't get at the hinge bolts that attach it to the A-post with the door and fender in place. So PITA as it is I'd recommend removing the fender.

Once you have done it you can do the whole fender removal hinge replacement and replacement of the fender in about 2 to 3 hours.

Good luck,

:)>-

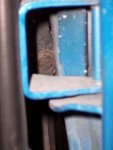
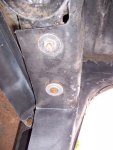
Picture 1 rear fender bolt accessed by opening door

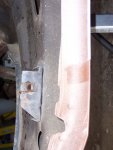
Picture 2 the location as seen on a removed fender

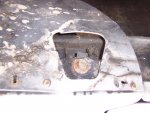
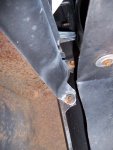
picture 3 bottom fender bolt just ahead of door

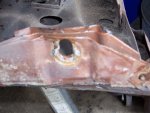
picture 4 same location on a removed fender

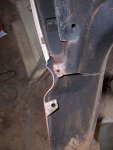
picture 5 screws and bolts along edge of fender attaching inner well to fender

picture 6 bolts attaching inner well to fender looking up while on your back in front

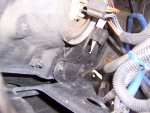
picture 7 bolts holding deflector to fender

picture 8 location on a removed fender

picture 9 bolts holding front of fender to radiator mount

picture 10 same location as seen on a removed fender

picture 11 bolt location on fender where it attaches to top of radiator mount

picture 12 same location on removed fender

picture 13 hood braced to keep it from falling when removing hinge bolt (This is a cargo bar, purchased it for $20.00 at Home Depot

picture 14 hinge bolt and last two fender mounting bolts

This is for an 80 - 86 but nearly the same for 87 - 96

Good luck,

:)>-

edited 5/18/2011 at 1800 EST

Fender Removal 003.jpg

Fender Removal 015.jpg

Fender Removal 005.jpg

Fender Removal 016.jpg

Fender Removal 007.jpg

Fender Removal 008.jpg

Fender Removal 009.jpg

Fender Removal 021.jpg

Fender Removal 013.jpg

Fender Removal 018.jpg

Fender Removal 012.jpg

Fender Removal 019.jpg

Fender Removal 011.jpg

Fender Removal 010.jpg

 
Last edited by a moderator:

Members online

No members online now.

Forum statistics

Threads
22,667
Messages
136,905
Members
25,368
Latest member
digs
Top