You are using an out of date browser. It may not display this or other websites correctly.
You should upgrade or use an alternative browser.
You should upgrade or use an alternative browser.
Excursion body swap
- Thread starter Tiha
- Start date
Disclaimer: Links on this page pointing to Amazon, eBay and other sites may include affiliate code. If you click them and make a purchase, we may earn a small commission.
L\Bronco
Well-known member
LOOKING GREAT!!
Cheers
Cheers
L\Bronco
Well-known member
Hey Tiha,
I just saw the bit about the door handles, when I was at the dealership, they came paint to match. Its a huge pain.
How are the ones in the original truck? If you are going the same color, you could swap them, do a light scuff and clearcoat them. Save a lot of heartache and woe.
Just a thought.
Cheers
Asked my son to look it up, he said the same, paint to match.I just saw the bit about the door handles, when I was at the dealership, they came paint to match. Its a huge pain.
hard part is, I know I should take them out to paint them. But I don't want to. LOL.
So haven't decided that part yet.
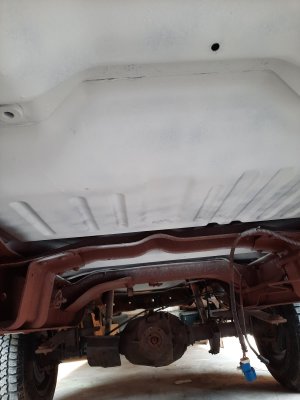
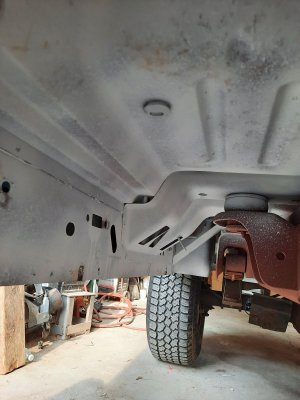
I was sand blasting and priming under the truck last night. What a miserable job. But that should be the worst. I get through this then the rest is just time consuming.
Another night as productive as last night and I might be ready to paint the underbody.
Once it was too dark to work under the truck I started scuffing again. Every little bit helps.
paul rondelli
Active member
Dam.... that thing is going to a beast.
Doing some of the more tedious stuff. Still scuffing a little bit everyday. There are some door jambs ready to go.
Trying to focus underneath. Frame and body mostly primed. Frame is primed pretty well. The body has some spots where the primer is not sticking as well as I think it should.
Going to do some more sand blasting and descaling in a few areas then try to prime again. Make sure it is solid.
really wanted to paint the underside first. Less chance of overspray drifting out onto anything important.
I can kind a see we will have to do like one door jamb and inside of door and stop. Clear coat and move onto the next one on the next night. Just takes too long to do it all based on weather, day light, and cure times.
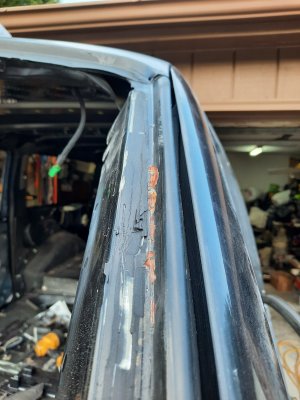
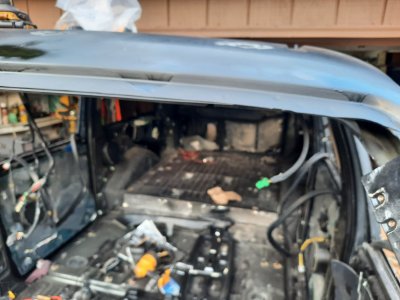
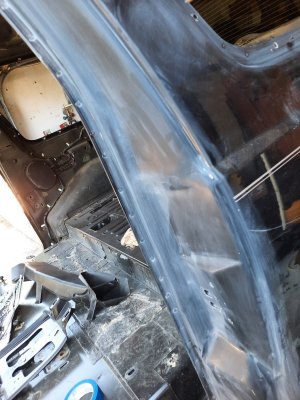
The windshield frame looked really solid but as we started cleaning it up with a wire brush on a drill we kept finding rust had creeped under the paint and urethane windshield sealer. Looks like we will end up stripping most of it.
The spray you see on there is a rust converter treatment. I don't know if that stuff really works or not, but really it is all we got. It smells like battery acid when you spray it. So it has potential right?
We will end up sanding most of it off. If we see any rust appear we will wire brush that spot and spray it again. Then we just use a normal bare metal primer before paint.


L\Bronco
Well-known member
Wow, that is a ton of work!
You guys are making great headway though!
Looks fantastic!
You guys are making great headway though!
Looks fantastic!
wyo58
Member
We always used a scotchbrite pad the red ones. get bucket of water and put a few drops of dawn dish soap ( no more than a few drops ). keep dipping the pad in the water to ruff up the areas to cut in, just act like you are washing it real hard. Also keep replacing the pads to make sure you getting into the original paint. As for what to use: either of them can be use as for the most part the sun does not get at it (doors closed usually), I prefer the enamel myself but it is harder to work with. as always make sure you wipe the areas to be painted with a good quality paint prep solvent right before painting it. Also be aware that if the enamel has a catalyst/hardener then it has isocyanates or cyanide in it protect yourself! Looks like a great start to a good project!
Have never scuffed wet, I should try it.We always used a scotchbrite pad the red ones.
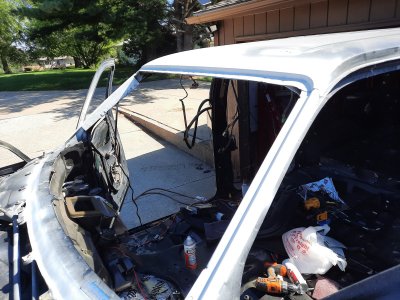
Got most of it scuffed now. That job is just one of those when you always worry it is never scuffed enough. Was going to start painting last night but it was super windy.
Windshield frame is ready for paint as well finally. We may end up stripping the entire roof. Seems like you just start getting a good feathered edge and another rust spot appears through the primer.
L\Bronco
Well-known member
Looking great Tiha!
Lots of work, but, it will be so worth it in the end.
Great job!
Cheers
Lots of work, but, it will be so worth it in the end.
Great job!
Cheers
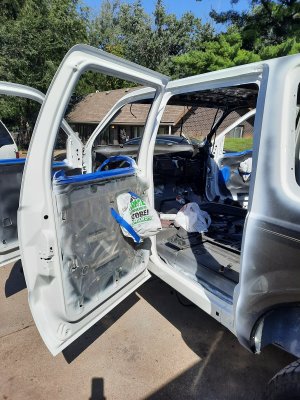
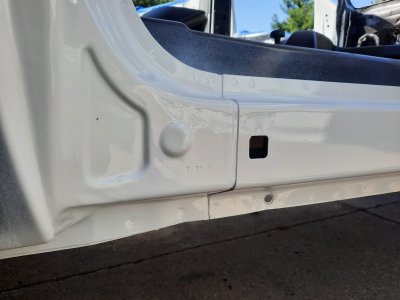
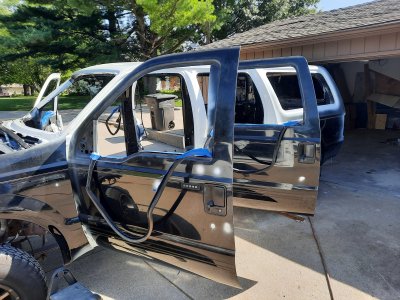
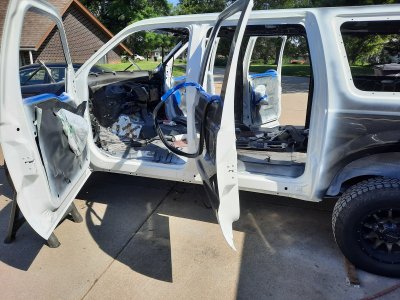
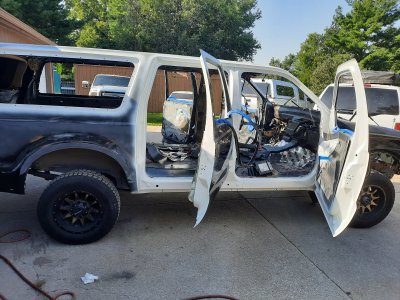
got far enough to try and cut some of the edges in this weekend.
Used base/clear.
Far enough that we could start putting glass back in it, door latches, weatherstripping. Need to do the outside of the window frames on the doors. Also need to do the tailgate area.
But I ran out of clear coat. Thought I had close to a gallon, but I only had about half.
Progress nonetheless.
Still need to paint under the body. My daughter has or had a white Jetta, I have a quart of acrylic enamel left from her car after one of the times she wrecked it. LOL. I think I am going to use it up under the body. See how it turns out before I go to the effort of base/clear under there.
At least this was a big step towards getting started on the interior again.
Supposed to be super hot this week. Probably will not get anything done.


L\Bronco
Well-known member
Looking great Tiha!
Doesn't seem like we were making progress, but finally saw some results yesterday.
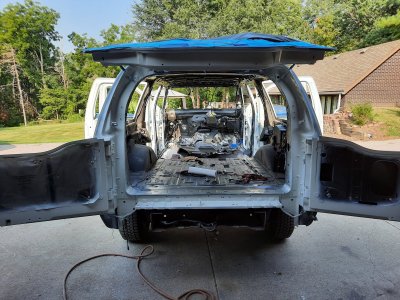
My son has been working on the roof, we pretty much have to strip it. So many rust pits everywhere. That is always fun with the ribs, working from a ladder, and the shear size of it.
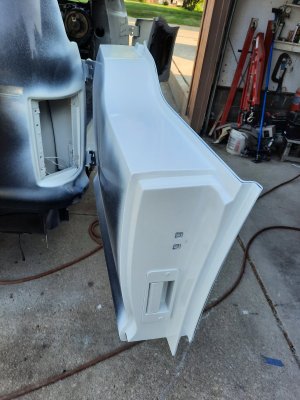
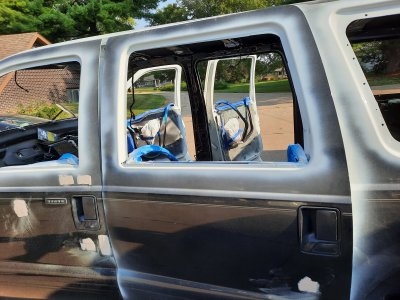
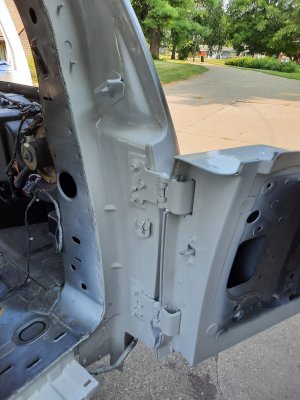
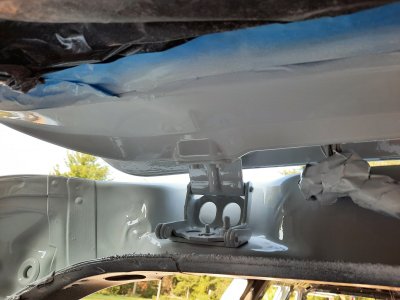
But got the outside of the door window frames done. Also the rear hatch/tailgate area. that was the worst. Took forever. Hardest to scuff. Hardest to paint. So far.
You can see some spots of bondo. Don't worry, those are not over paint. LOL After I washed the truck I spent some time walking around it and marking dings. Went and ground them out, filled it with bondo. Quick easy fixes. I run over them with some 80 grit first by hand. Then I will block with 120 grit. When I am getting close to bare metal I will swap to something finer like 220. Then hit is with primer and see how it looks. It is really easy to go too far with the first sanding and then have to go back and fill again just to get the scratches.
Have some on the other side of the truck already sanded. Bondo and primer shrink. So letting it sit a couple days before I go back and block them again.
Now I think we are going to focus on getting weather stripping back in. Doors adjusted. Glass back in. Some more sound deadening inside. We should be able to start putting door panels back on. If I can find a windshield it can go in.


L\Bronco
Well-known member
Looks fantastic Tiha!
Great work!!
Cheers
Great work!!
Cheers
paul rondelli
Active member
Good Lord my freind. You have put many man hours into her. At a shop rate ... you would probably be around 10 grand in labor already.
Another big weekend. Got a lot of time consuming stuff done. My son came down and even though it was 100 degrees everyday we got a lot done.
Glass side windows are back in. We used seam sealer when we installed them rather than the usual tar stuff.
All the weather stripping is back in. We picked the best pieces for this donor and his current truck. It has all the little plugs back in. Little rubber snubbers.
Kind of funny, we were ready to run the windows up and my son hooked the battery charger up to the battery cables. Put all the window switches back in, then we realized it was impossible to turn the key on. LOL Now steering column. So we had to go around to each door one by one and jumper to the motor wires to get them closed.
He used kilmat inside the doors and on the inside of the doors. Installed new speakers as he went as well.
When you close the door it is a solid thud. Sounds amazing. We may still add gym foam over the top, or underneath the door panels. We need to see how much space we have there first.
For installing the weather stripping I ordered a bunch of new push pins off amazon and ebay. I got like 200 of them. Different types and brands. They are supposed to be 3/16" but only about 40 out of everything I bought were actually the correct advertised size. But that was enough.
Used weatherstrip adhesive under every piece as well. They should stay in place better and longer than the factory.
The door weather stripping from the donor was in really good shape. The doors shut great. But I haven't done the paper test yet. Where you close the door on a piece of paper and make sure there is resistance, meaning the weatherstripping is making good contact.
If that fails we will add surgical tubing inside the door weather stripping. I did it on my bronco. Made a huge difference in road and wind noise.
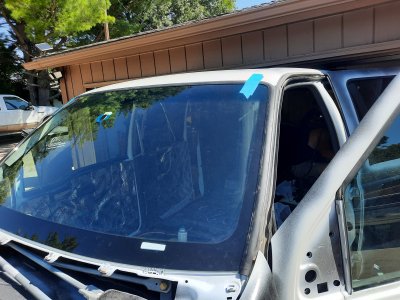
Picked up a new windshield last friday. But there was 2 big dents right at the top of the frame I just could not ignore. So we pulled them and filled them.
Then of course I had to repaint the top of the frame because the windshield trim extends onto the roof about a 1/2 inch.
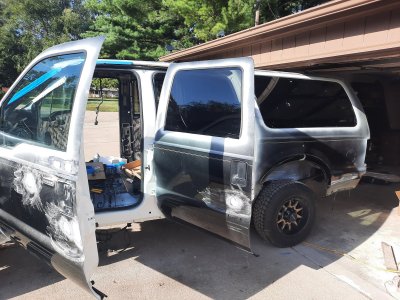
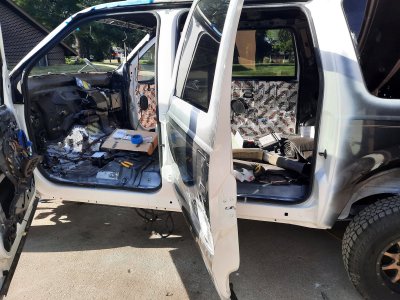
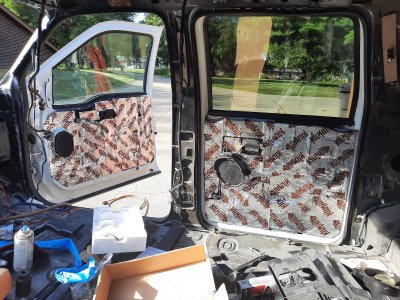
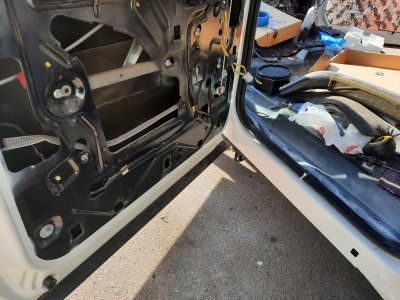
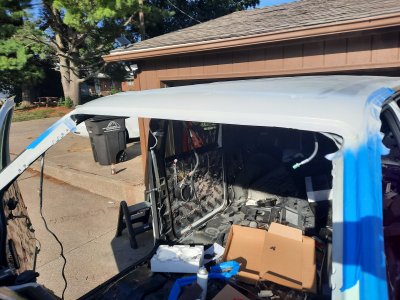


All the latches and guides, weather stripping in the rear hatch/tailgate area was a pain. They don't make the tailgate weather stripping anymore. His current truck was much better shape than the donor. So we installed that for now. It is just across the bottom that it is torn.
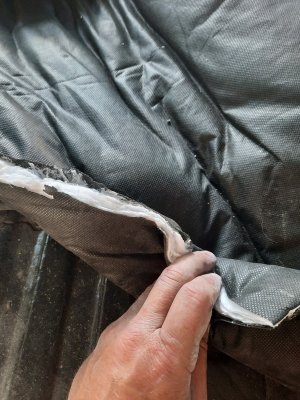
Next are pictures of the Thinsulate stuff. We stuffed every void we could with it. No echo chambers. It is of course great for sound and temperature insulation. The gym foam is better but this is easier to work with in the void areas. It is supposed to be water proof and so we hope it is.
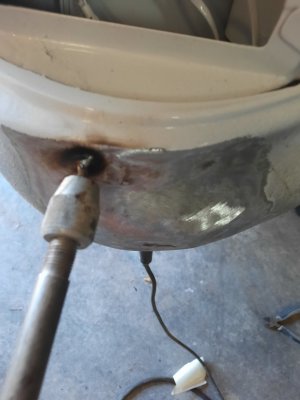
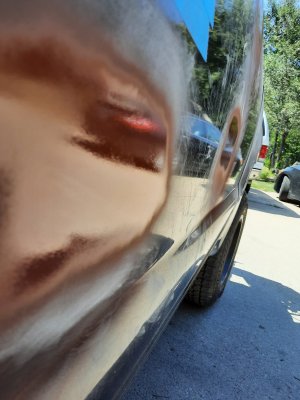
Now the cab is sealed up I can focus on bodywork. Not a great picture for orientation, but this is under the LR tail light. There was 4 big dents. Probably from jackknifing trailers.
I use a bolt in my slide hammer, tack it in the dent, Then yank it out using a body hammer to work the outside of the dent. Simple and effective.
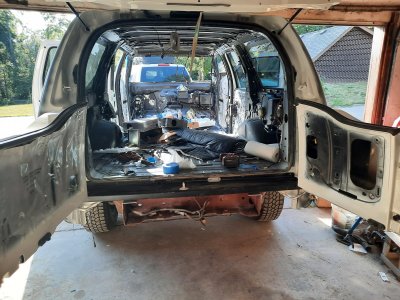
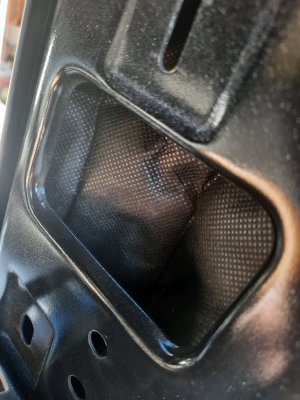
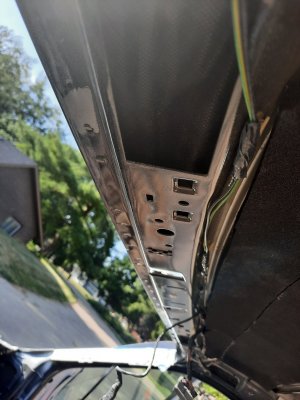


With the windshield in I can focus on bodywork now.
I have 2 goals right now. Get the interior sealed up so it can stay clean and dry.
Paint the body before the weather turns and gets way more difficult.
This thing will be bright white so really bodywork doesn't have to be perfect, but I still try.
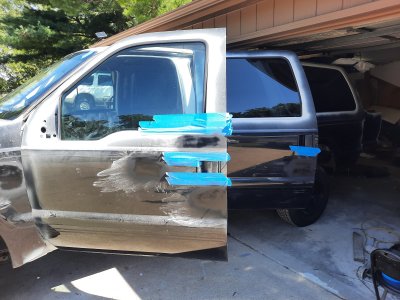
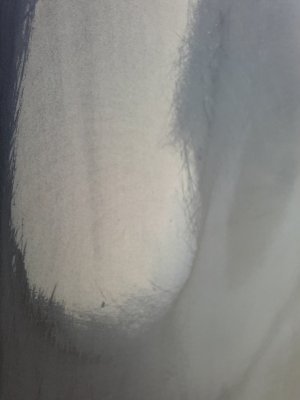
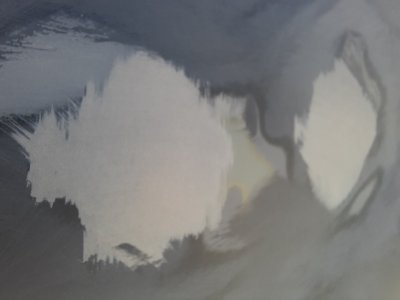
For the little dings I grind the center to bare metal with a small disc on the drill and then fill it with bondo.
Originally the bondo goes onto the paint as well, but first step I sand it with like 80 grit to get it close. Just using folded paper and my fingers.
Then I will use a block with 120 and get it closer.
Last step is using a block with 220 paper.
You can see the exact area I ground out appear out of the bondo. Then it is just a matter of sanding until it has a nice feather to it.
I am sure it is not the proper way, but is quick and easy.
Tried to take a decent picture, but next step is a nice wet coat of primer. Then look across it and see if you can see your work.
If you can, then you need more work.
If not then I will hit it with a block and 320 at some point. The rest of the truck will get a DA run over it before paint.
Spray can primers are horrible anymore. You have to make sure they say fast drying. Otherwise they just clog the sand paper.
Used to be called lacquer primer, or primer surfacer, and they still make surfacer primers, but they don't dry right.


Okay last post on this for a while. I am going to be busy for a couple weeks. Not sure when we will get back to this.
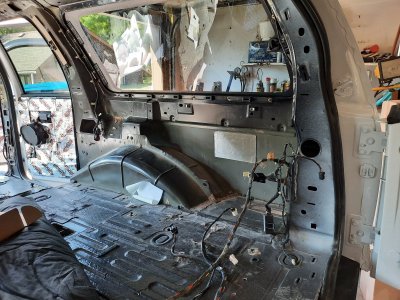
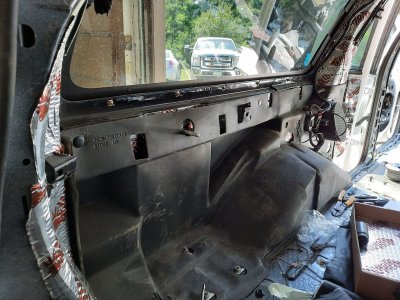
Sound deadening the rear quarters. What a difference when just taping on the side of the truck.
Kind of the same setup. Kilomat, then gym foam or Thinsulate under the factory cover. If there is room we will add more between the factory cover and the interior trim panels.
Just tapping on the outside of the truck, even with the interior still out, compared to the other trucks. Night and day difference.
I have a decibel meter at work. We are going to try and remember to do some testing in his old truck and in the new truck when it is done.
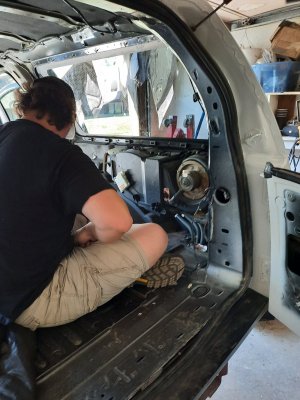
Pulling the rear heat and AC out, we debated, glad we did it.
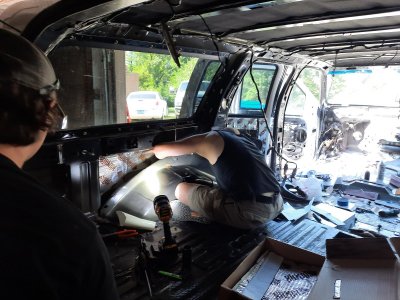
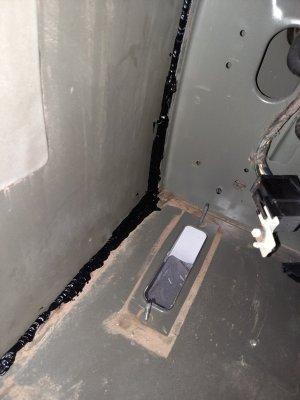
4th picture, we found the right rear 1/4 panel torn loose from the floor. Probably from whatever accident happened back there, but we could see daylight. not only did it let it noise and dirt, but a mouse can certainly get through there.
Used the left over urethane from the windshield to seal it up. If you have ever used window weld from 3m. That is a great adhesive for just about anything.
After gluing it up it got covered with kilomat. Should be sealed for life now.


L\Bronco
Well-known member
Looking Good!!
Nice work!!
Cheers
Nice work!!
Cheers
Similar threads
- Replies
- 0
- Views
- 183
- Replies
- 18
- Views
- 1K
