Hi everyone, I'm back... turns out the Explorer didn't blow a gasket, was a combination of failed EGR valve, failed EGR Solenoid, failed ECM, leaky vapor recovery system, leaky intake gaskets, it was a mess! All told here:
https://www.explorerforum.com/forums/threads/2001-explorer-5-0-p0174-code.500961/
Back to the Bronco... the R-134a A/C installation is complete and the air is ice-cold!


Research revealed one replacement approach, swapping from a donor vehicle without opening the system:
https://www.supermotors.net/registry/21191/71804
My plan of removing and replacing all the components worked very well as everything is in the engine compartment and not blocked by anything else. Replacing all the components Removal was easy, had the R-12 removed first, then the old condenser - PB Blaster on the fittings helped disassembly - had to remove the grill, loosen the upper radiator fasteners, then the condenser fasteners (more PB Blaster on the lowers), tilt the radiator towards the engine and lift out. This video covers that:
Hoses were simple, the large connection to the accumulator was a little challenging, but it broke loose with the heat gun. The pressure switch had gunk all over it, which wasn't present anywhere else, a sign that it was leaking and I replaced it with a new one.
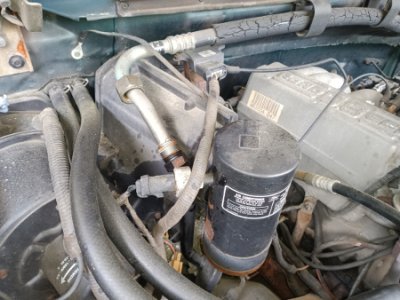
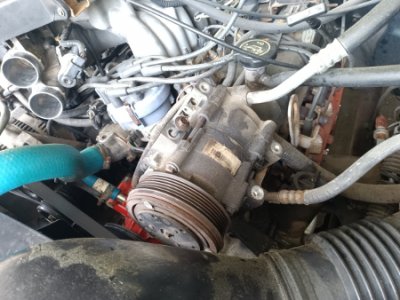
Pull back the serpentine belt tensioner and undo the serp belt from the compressor, which then simply unbolts from its mount. The dirt on the compressor is indicative of leaks.
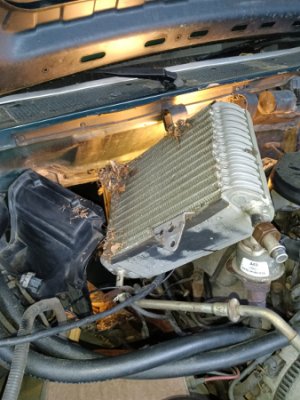
Removing the evaporator was somewhat difficult due to the butyl sealant, removed the screws and pried apart with a paint scraper. Scraped off the bulk of the sealant from the cover, then cleaned off with mineral spirits. The evaporator pulled right out, you can see where leaves had gathered. (organic matter which stayed wet in the Explorer caused the evaporator to corrode and lead, best to try and clean regularly (yeah, right), or prevent them from getting in with screening of some kind.
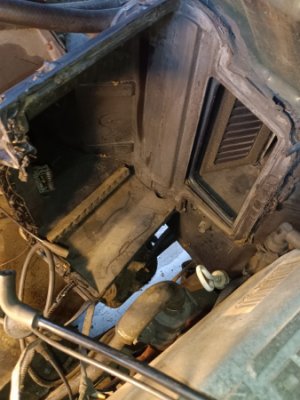
Installation is the reverse of disassembly, as they say. The new condenser didn't want to line up with the old holes, had to swap the longer upper bolts for the lower ones to get them to thread into the clips.
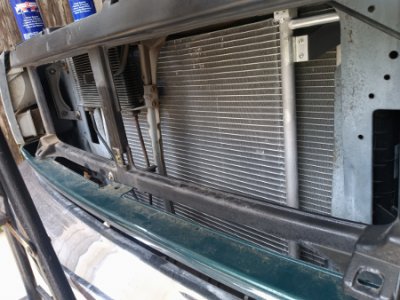
I put all the components in place and then worked on the connections to minimize the chance of any dirt intrusion and moist air exposure to the accumulator. While making the new connections, ensured good lubrication of the new o-rings with PAG YF46 Oil; used Teflon tape on the collar nut threads to prevent seizing down the road (no Teflon tape beyond the threads). Again, the evaporator was the most difficult to put in as the new one seemed to be just a bit larger than the original and didn't want to go into place. With a little coaxing and a couple of clamps, I was able to close the housing and get the screws back in. The upper connection had to be bent upward about 15-20 degrees in order to have it line up with the connector on the accumulator (used a box end wrench to carefully make this adjustment, a little at a time until the connections lined up).
At one point I considered flushing and re-using the old evaporator, though upon inspection there was what appeared to be dirt and sand (not metal flakes or 'black death') that filled up the tube where the orifice tube lives. Attempted to clean out the dirt, but then the orifice tube wouldn't come out and broke apart as I tried to remove it. Of note, the old evap had a bracket for the accumulator to bolt to, which the new one didn't have, the holder for the accumulator was fastened into place with the housing fastener - that combined with the connections to the evap seemed to keep the accumulator firmly in place anyway.
My mechanic evacuated the system (I asked him to draw a vacuum for at least an hour) and then charged it with R-134a. The Motorcraft compressor came with 7 oz of PAG Oil in it, which is the spec amount for the system. I had an additional container of PAG Oil which I used to lubricate the rings. (Going back through replies above, it seems I forgot about using mineral oil).
There are left and right air deflectors that attach to the top of the back of the front grill that I determined were missing from watching the video, luckily I scored a set for $5 at a salvage yard. I did pick up a heater core, though it's not affected by the work above so I'm holding on to that if and when I need it.
Still need to go back and seal the evap housing. I did discover that the condensate drain tore at some point, which is inside the cabin. I have a plan to repair that by inserting a thin wall tube with sealant so it will drain on the other side of the firewall (there is also a FSB that recommends attaching an elbow to the drain end so the condensate doesn't run back down the tube into the cabin). Right now, the condensate drains out the bottom of the evap housing onto the frame, which is less than optimal, but works for the moment.
Another related project is insulating the evap housing akin to what this kid does (although I'm looking for a thicker insulation than used in this video:
Installation mostly complete! Next up, drain repair, sealing, insulating and new plugs and wires.


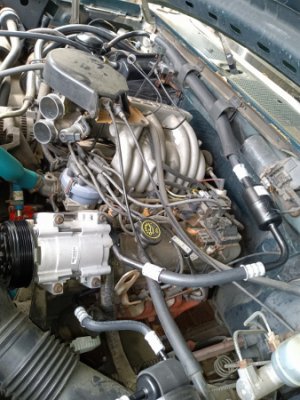
 Its winter, the perfect time to tackle the Air Conditioning. The A/C in this vehicle is an original R12 system, working, will cool on a cool day. As I will have to convert from R12 to R134a, I've decided to replace the whole kit and caboodle (probably even the heater core). Already had the system pumped out, currently researching parts - any recommendations on a compressor? I have an FX-15 in place, the FS-10 replaces it for R134a, I'm leaning toward the Motorcraft unit on RockAuto, though I'm tempted by the FourSeasons at less than half the cost. RA has all the parts, as well as a R134a rated condenser, which will provide greater heat transfer and greater cooling capacity. Replacing everything will eliminate any old oils and residues. Once install is complete, I'll have my mechanic pump it out and charge it. That's the plan.
