I decided to try my hand at making my own brake lines for my 84 Bronco with F-350 axles. Bought a kit from JEG's with 25' of 3/16" steel line, assorted fittings and a tool kit:
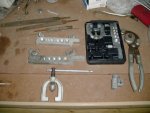
I also had an older set of single-flare tools, clamps, tubing bender and cutter, various files, etc.
The JEG's tool kit came with instructions on how to use the special dies/ adapters to make a double-flare in the hard line:
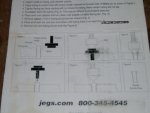
After measuring the length of line I needed, I used the cutting tool:
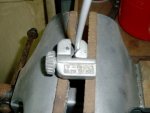
The bench vise was used to hold shorter lengths of line, while rotating the cutting tool and tightening the ****. The line clamp was also held in the vise for better leverage and control of the tools:
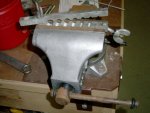
After cutting, I used a wire wheel on the bench grinder to remove the powder-coating from the end of the brake line. I then placed the line in the vise, deburred and chamferred the end of the line with a file, and de-burred the inside of the line with a 7/64" drill bit held with vise grips:
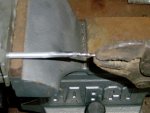
This step is critical in getting a good flare started, and will take some practice. By placing the line on the vise, or the line in the clamp then in the vise, allows you to use both hands to work the end into shape.
Place the line in the clamp, and set the depth using the adapter;
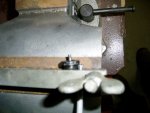
**** with oil and insert the adapter into the end of the line, and place the flaring tool so the anvil pushes the adapter into the end and makes the mushroom:
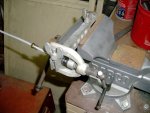
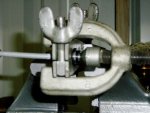
Be sure you put the fitting on the line and slide it back from the work BEFORE making the flare. Try to keep the tool as straight/ aligned so it makes an even flare and doesn't go off-center.
Tighten the tool until the adapter bottoms out on the clamp, then remove the tool. The vise makes this much easier than holding the clamp in one hand and tightening the tool with the other. I used the older tool instead of the one from JEG's.
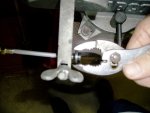
After removing the flaring tool, I used pliers to remove the adapter from the line:
Place the flaring tool back on the line and tighten it to finish the line. This step folds the lip on the end back over inside the mushroom part (Step 8 in instructions):
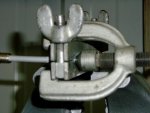
It took me several tries to get a good end made, as the tool and die tend to crawl off to one side. This makes the end crooked and the flare to be off-center. After some help from Roadkill, I can make 3 out of 4 good ones now. The quality of the JEG's anvil tool and clamp is far inferior to the old set I used, which my Dad has had for about 50 years (don't know the brand). Removing the powder-coating about an inch form the end of the line helps to keep it from slipping in the clamp. Using a few drops of oil on the both sides of the die helps to get a smoother flare. it's much easier to buy pre-made hard lines with the fittings in place, and shape them with the bending tool.
JSM84
(few more pics to add of good and bad flares)

I also had an older set of single-flare tools, clamps, tubing bender and cutter, various files, etc.
The JEG's tool kit came with instructions on how to use the special dies/ adapters to make a double-flare in the hard line:

After measuring the length of line I needed, I used the cutting tool:

The bench vise was used to hold shorter lengths of line, while rotating the cutting tool and tightening the ****. The line clamp was also held in the vise for better leverage and control of the tools:

After cutting, I used a wire wheel on the bench grinder to remove the powder-coating from the end of the brake line. I then placed the line in the vise, deburred and chamferred the end of the line with a file, and de-burred the inside of the line with a 7/64" drill bit held with vise grips:

This step is critical in getting a good flare started, and will take some practice. By placing the line on the vise, or the line in the clamp then in the vise, allows you to use both hands to work the end into shape.
Place the line in the clamp, and set the depth using the adapter;

**** with oil and insert the adapter into the end of the line, and place the flaring tool so the anvil pushes the adapter into the end and makes the mushroom:


Be sure you put the fitting on the line and slide it back from the work BEFORE making the flare. Try to keep the tool as straight/ aligned so it makes an even flare and doesn't go off-center.
Tighten the tool until the adapter bottoms out on the clamp, then remove the tool. The vise makes this much easier than holding the clamp in one hand and tightening the tool with the other. I used the older tool instead of the one from JEG's.
After removing the flaring tool, I used pliers to remove the adapter from the line:

Place the flaring tool back on the line and tighten it to finish the line. This step folds the lip on the end back over inside the mushroom part (Step 8 in instructions):

It took me several tries to get a good end made, as the tool and die tend to crawl off to one side. This makes the end crooked and the flare to be off-center. After some help from Roadkill, I can make 3 out of 4 good ones now. The quality of the JEG's anvil tool and clamp is far inferior to the old set I used, which my Dad has had for about 50 years (don't know the brand). Removing the powder-coating about an inch form the end of the line helps to keep it from slipping in the clamp. Using a few drops of oil on the both sides of the die helps to get a smoother flare. it's much easier to buy pre-made hard lines with the fittings in place, and shape them with the bending tool.
JSM84
(few more pics to add of good and bad flares)
Last edited by a moderator:
