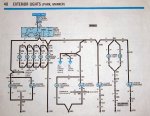
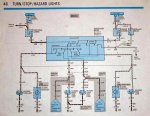
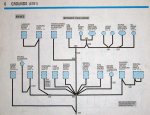
I have an 86 Eddie Bauer Bronco have changed bulbs all the way the around the vehicle, have checked w/ tester for power in all the sockets, and still can't get driver side turn signal and driver rear side brake light to work. Hazards in front work and passenger side brake light and turn signal works but driver side turn and brake light does not. I am not electrically inclined and could use any help I could get. :blink:
You are using an out of date browser. It may not display this or other websites correctly.
You should upgrade or use an alternative browser.
You should upgrade or use an alternative browser.
Brake lights
- Thread starter wchampmd
- Start date
Disclaimer: Links on this page pointing to Amazon, eBay and other sites may include affiliate code. If you click them and make a purchase, we may earn a small commission.
Seabronc
New member
desert4wheeling
New member
This is similar to what happened on my 1986 bronco. My brake light slowly quit working on the driver's side. At first I was able to jiggle the turn signal switch lever and it would come back on. Then it quit completely. The problem ended up being the turn signal switch. It had a broken contact in the column so the circuit was never complete on the driver's side. I had to replace my turn signal switch to fix the problem. It was a fairly easy job to do (although I am locksmith, have done many columns, and have good tools) and the switch was about $50. Autozone has one of those HELP! kits available to fix them problem but it didn't work for me and I wasted money trying that fix. If HELP! makes a repair kit for it it must be a fairly common problem. I am bringing this up because I also had this same turn signal/brake light related problem on a 1987 bronco that I had as well. Good luck!
Broncosaurus!
New member
Yeah I put in the HELP switch and the ***** that holds it in place seemed to strip out and now my turn signals don't work nor does one of my brake lights, I chose to park it and buy a toyota, which ironically has just committed suicide with its electrical system.
Nearly one month later have not had a lot of time to tinker with the wiring. Tried testing the back up light and Brake lights and I do get reading on my tester in the wiring harness. I do have passenger side blinker and passenger side brake lightd working. The front flashers (caution lights)do work.Anymore suggestions.
JLasvegas
Member
- Joined
- May 25, 2008
- Messages
- 204
- Reaction score
- 0
my brake lights sometimes wont work until I use my turn signal then they will work so im assuming its in the turn signal switch, which works fine on the drivers side but I must manually hold it down on the passenger side when using it
BroncoJoe19
Active member
No doubt you have a problem with your switch.
Are you asking a question?
If so, please give a more detailed explanation of what does and does not happen with your brake lights.
Are you asking a question?
If so, please give a more detailed explanation of what does and does not happen with your brake lights.
Seabronc
New member
check for 12 Volts at the bulb when the brake light or turn signal is in operation. If you have 12V there, then I would suspect the ground connection is bad at C123.
 >-
>-
JLasvegas
Member
- Joined
- May 25, 2008
- Messages
- 204
- Reaction score
- 0
I know that my turn signal switch is faulty and thats the culprit because if I wiggle the lever on the turn signals and set it just right the brake lights work perfect but if i move it a little only the drivers side works
so how hard is the turn signal switch to change out on an 85
so how hard is the turn signal switch to change out on an 85
Yo J!I know that my turn signal switch is faulty and thats the culprit because if I wiggle the lever on the turn signals and set it just right the brake lights work perfect but if i move it a little only the drivers side works
so how hard is the turn signal switch to change out on an 85
Following is from Brian:
"...My Bronco is an 88, but this should apply to 80-91 broncos.
When I purchased my Bronco a few weeks ago the turn signal switch would not lock on a right turn. Minor annoyance is all, except for the fact that I'm also trying to teach two teenage boys how to drive. I'd rather they keep both hands on the wheel while turning a corner so I decided to spend the $35-40 to replace the switch. The neighborhood Autozone had it in stock, to my surprise so last weekend I undertook trying to replace it.
You DO NOT have to disassemble your steering column to run the wire connector for the new switch. I wasted a good 3 hours trying to figure out how to disassemble my steering column when it wasn't necessary. I found a diagram in my Haynes that mentioned in a side note that you actually remove the connector from the wires. Wish I had found that a few hours ago.
Step 1: Remove sterring wheel. - (Note: If there are no notches on the steering wheel and steering shaft to help you line them back up later, use a white grease pen to mark them.) This is a simple operation but you do need the right tools. on my '88 (with cruise) there are two screws holding the center cover of the steering wheel on and three wires. The wires are simple disconnects once you have the cover off, and you cannot put them back on the wrong way. Just take a second to look at them before you start yanking so you know where that one ground wire is supposed to hook up. Once you have the center cover off you need a steering wheel puller to get the wheel off the splines holding it to the steering shaft.
Step 2: Remove the old switch. - First find the switch connecter at the bottom end of the steering column. You can look at your new switch to see what it looks like, but it should be a gray connector with two rows of pins that is curved (crescent shaped?). Disconnect the connector. You can either disassemble the connector (see Step 3 below) or do what I did and cut it off. Don't cut it too short as you can still use it as a wiring guide in Step 3.
The switch takes up almost the entire diameter of the steering column. There are two screws holding the switch down just to the left of center (under the switch locking cam arms). The switch arm itself screws into the switch mechanism so get yourself a small wrench or a crecent wrench to loosen it then unscrew it. There is one more ***** that holds a wire on the right side by the ignition. Keep this ***** and the two holding the switch down.
Step 3: Install new switch. - This is where we get fancy. First, either draw a diagram of the connector on the new switch or compare it to your old switch to verify the wire colors are the same. We will be pulling all of the wires off the connector so you need to know how it goes back together.
If you look at the face of the connector there is a piece of plastic that runs between the two sets of pins (mine was orange). You can pull this piece of plastic out by poking something small into the hole on the side of the connector (I used a multimeter probe) to pop it up enough to get your fingers on it. It pulls out pretty easily. Once you pull that piece out it is pretty simple to pull the wires out of the connector. You may need to use a small probe to loosen the prongs that hold the wires in, but without the center plastic piece this is very simple.
Here's the hardest part of the whole operation. Tape the wire ends together to keep them from getting hung up (I used masking tape) then feed the wires back through the steering column. There is a little metal loop about a third of the way down that the wires run through. It is a good idea to hit that loop as it helps keep the wires from rubbing in the wrong place. Getting the wires through the metal loop and also down the rest of the column is pretty tight. It might be easier to use electrical tape on the wire ends and leave a long pigtail of it to help guide it. As soon as you can get a hold of the ends under the dash it makes it a little easier to pull it through.
Using your earlier diagram or the old connector (with cut wires?) reinsert all of the wires into the connector and replace the center plastic piece to hold them all in. You might need the probe again for this piece as you have to make sure the little prastic prongs all end up on the correct side of the plastic piece or it will not hold in the wires.
***** the wire back down on the right side. The connect on the end of this wire had a small plastic cover to protect the connector as it is just a small piece of flat copper. Remove that cover and ***** the connector in place by the ignition. Then replace the switch itself and ***** those two screws under the cam arms. ***** the switch arm back in place.
Connect the connector under the dash. Here's a tip. If your horn comes on while plugging this back in, you got your wiring diagram reversed. (Don't ask!) If all is quiet after connecting, this is a good time to test the switch.
Step 4: Replace Steering Wheel: - This is very simple. There is a notch on the steering wheel and a notch on the end of the shaft to help line it up (at least on my '88 there was). Alternately you hopefully marked it so you can line it back up. Once it is lined up and started on the splines of the shaft put the nut back on and ***** it down. I used my cordless drill-driver for this (with a socket adapter and a large socket). Then it just took about another half turn or so with the wrench to finish it off. Replace your wires, put the cover back on, and replace the two screws that hold the cover in place.
All done but the fun part. Go drive it..."
by
Brian "Puk" V
---
try Auto Zone for their Loan-A-Tool Program to pull wheel
JLasvegas
Member
- Joined
- May 25, 2008
- Messages
- 204
- Reaction score
- 0
very cool info, thanks alot
Similar threads
- Replies
- 2
- Views
- 261
- Replies
- 1
- Views
- 257
- Replies
- 0
- Views
- 1K

