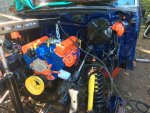
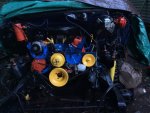
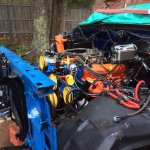
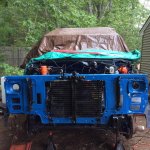
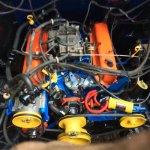
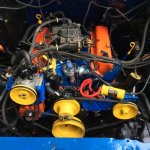
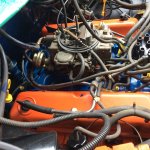
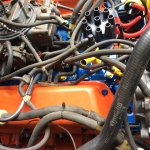
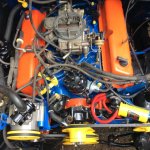
****** 351 Windsor 4V ready to go into 1984 Bronco XLT. To Emission or

Disclaimer: Links on this page pointing to Amazon, eBay and other sites may include affiliate code. If you click them and make a purchase, we may earn a small commission.

Joined
Sep 19, 2016
Messages
60
Reaction score
27
I've spent the last 2 months completely rebuilding my 84' XLT in my redneck garage (next to my house in the shade ALL day). The old engine was weary and engine compartment oily and grimy. It has new cab mounts, all new body mounts with frame savers, floor pans, rocker panel, and a rear cross sill. New fenders et. al. I used purple clean to completely clean the frame and engine bay and now its brand new ford blue paint. I went paint crazy... orange, black, yellow, ford blue, and navy blue. It's been a fun summer.

Gentlemen, I have a zero mile re-manufactured 351 Windsor 4V with the stock 4bbl motorcraft holley 4180C. The question is... should I keep the emissions or remove it?

I want this truck to hum. It has all new parts on the engine except if I keep emissions, I'll need a smog pump, both cat's and an air supply tube which I can buy today for $366 total.. Hint... don't be a retired engineer at 60 like me. All the other emission components are cleaned and ready to reinstall. I've been an avid reader of BroncoZone for years as my go to knowledge base. Emissions has been a topic with mixed advice. But there are experts that can reveal the truth... please, wise masters of the bronco?

If I just say no to emissions, what goes, what stays, what gets plugged. Thank you.


miesk5

96 Bronco 5.0
Staff member
Moderator
Joined
Oct 18, 2005
Messages
9,078
Reaction score
1,037
Location
Floating in the Pacific
Yo MaineBroncoBeast,

Welcome to the Zone, officially!

I believe in keeping emission parts on. Been to Los Angeles and other cities where Smog is awful at times.

So, I like to see a Bronco restored with minor Modifications.

If you decide to strip the emissions, info @ http://broncozone.com/topic/25185-bronco-project-mechanical-issues/

See post #18

Post pics when you can.

 
OP
OP
M
Joined
Sep 19, 2016
Messages
60
Reaction score
27
Hello SC,

I thought you would say that and I was hoping to hear from you. I purchased the magnaflow direct fit 3 way cat and pipes, the air tube, and smog pump. I have previously viewed vacuum diagrams here looking for the EMISSION calibration code of my Bronco. It is 4-64G-R02. It has an engine code of W1 EK408AA indicating timing 10 degrees. I have a VIN number 1FMEU15H1ELA44945.

Would you know of a vacuum diagram for this engine? It is missing from my Bronco. I want to double check the vacuum lines on re-installation. I have a Chiltons manual #8576 with a vacuum diagram 4-64H-R00 for 1984 Bronco 5.8L which appears to be correct. I'll post before/after pics of my rebuild. Hoping to put the engine in today when the oil pan arrives (with 1 piece rubber gasket).

Thank you.


Seabronc

New member
Joined
May 22, 2004
Messages
7,315
Reaction score
35
Location
North of NYC
Welcome to the Zone!!  Sounds like a nice truck.  In NYS there is no emissions inspection on a truck that old so only left the components for good cold start and run characteristics and the evaporative emissions (fuel tank venting and purge). If you are in California, I don't think you can get away with leaving any of it off.

So here is the original vacuum diagram and the modified one I eventually ended up with.

:)>-

1985 351W VCV System small.jpg

Rosies Vacuum System.JPG

 
OP
OP
M
Joined
Sep 19, 2016
Messages
60
Reaction score
27
Thank you... I'm in Winterport, Maine and the Bronco is registered as an antique (25 years old or more) and I never need another inspection... lol. I also have a 2010 Ford Focus and a 2003 Honda CRV so I don't drive the Bronco that much.

I put the engine in today and got it aligned and bolted up. I put in new engine mounts. I'll do electrical and emissions hookup tomorrow. I put in new passenger area carpet, redid the interior ceiling fabric, dashboard cover. The engine has a new distributor, coil, fancy plug wires, plugs. New timing cover, oil pan, pump, etc. I stripped the front end down to the frame and firewall. Every engine component, bracket, pulley, bolt, and nut has been cleaned and painted. New front end body parts and light assemblies, fenders, quarter panels. I put in a new brake booster and master cylinder... There's more but you get the idea. I put on new ATV tires that are badass.

I started this spring with plans to build an off-grid home on my property a half mile up a small mountain with vista views of Penobscot bay. I used the Bronco to clear and access the site as it has large granite boulders everywhere so the short wheel base and high clearance (20" from bottom of frame to ground) is perfect. I named it Bronco Builder Beast and I did a bunch of work on it. Then one day I backed up to my construction pile and the flexplate went. I do everything myself so I replaced it and a week later I backed up to the pile again and this time it went wankle wankle and threw a bearing. So... new engine! I secretly wanted one anyway. Then I inspected the body mounts and down the rabbit hole I went... Bought a mig welder and some new tools and went to town. That was in July. LOL. It's nearly done, just about a week to go. I was very happy to get the engine in today.

2016-09-21 15.17.06.jpg


miesk5

96 Bronco 5.0
Staff member
Moderator
Joined
Oct 18, 2005
Messages
9,078
Reaction score
1,037
Location
Floating in the Pacific
Yo MaineBroncoBeast,

Awesome work!

Hope to see more pics, especially of the emission parts such as Secondary Air injections crossover tube, valves, etc.

 
OP
OP
M
Joined
Sep 19, 2016
Messages
60
Reaction score
27
Hello SC,

Here's an update of the engine being fitted out.

I do have the heat pipe in the back of the engine that attaches to exhaust ports on each side and that port into a check valve. The check valve is attached to a large vent tube that runs over to one side of the MTA and the other side to the air pump. The MTA goes out of the bottom into a short large vent tube into a check valve. I replaced all of those components trying to get the engine quiet. After a while I saw that the air pump was froze up and the hot air tube was gone. The port on the exhaust pipe for the hot air tube was welded up and both cats have cracks.

I had a couple questions.

Does the hot air tube connect at the output of the check valve via a large rubber vent tube? And does the cat side of the hot air tube connect to the exhaust port with a small U-bolt?

Now that I fitted the air pump pulley and other pulleys, I see that I need to add a second pulley onto the alternator to run the air pump. Is that right? I'll be looking for it tonight !

I got the air pump for $102, the hot air tube for $84, and a Magnaflow direct fit pipes and 3 way cat for $200. All at Amazon. That's the very last expense.

Thanks for the kind words...

File Sep 24, 6 57 45 PM.jpeg


miesk5

96 Bronco 5.0
Staff member
Moderator
Joined
Oct 18, 2005
Messages
9,078
Reaction score
1,037
Location
Floating in the Pacific
Yo,

I will look for info on your questions, but I doubt that it will bend this Sunday morning, so hopefully others will help.

I am Al. Never made SC rank except for here...lol.


miesk5

96 Bronco 5.0
Staff member
Moderator
Joined
Oct 18, 2005
Messages
9,078
Reaction score
1,037
Location
Floating in the Pacific
Yo,

Some info, but not on your questions;

vacuum line diagram, EGR vacuum solenoid overview & testing, & TAD/TAB VALVES overview and depiction in 84 F 150 5.8

Following 84 Bronco 5.8 bay pic, but not much...

http://www.supermotors.org/getfile/226331/fullsize/engine%20bay.jpg by devracer

Thought I had more info sources, but the site with the pics are Long gone... time flies...

BTW, grand dad had a farm in Union... still remember being in the sauna and watching dad and gd run out and jump in snowbank!

 
OP
OP
M
Joined
Sep 19, 2016
Messages
60
Reaction score
27
Back in June, I looked up your vacuum diagram from this site, the same one you posted above. I had it on my Ipad Air and went over the entire engine. I learned a lot then and discovered both front and back manifold vacuum trees. There were missing vacuum caps on both. I found vacuum lines with cracks/leaks and some unplugged. I took lots of high def pictures for the reassembly and used tape to mark both sides of each connection. I kept large groupings of emission lines together for easier cleaning, inspection, and replacement when it all goes back together. I made individual sketches of the circuits also to bridge the schematic layout and all those abbreviations. The only emission parts missing were the seized air pump, exhaust air tube, and cracked cats. After I capped the ports and fixed some leaks, I rebuilt the carp. The carp was missing a bunch of small important parts. I found one on ebay for $50 that had the hot air choke assembly and all the missing parts I needed. After I rebuilt it, it ran the best it ever did. Until the flexplate and then the engine failed. I paid $500 for the truck in 2005. It had major charging and starting issues all stemming from a horribly worn flexplate that would hang the starter and cause the cables to overheat, the batteries to drain, the alternator contacts to melt apart, etc. I finally figured it all out and replaced the flexplate about 6 years ago.

Today I got the carpet cut in, the seats back in, doors on, all the brake and transmission lines connected. I cleaned and painted the front inner wheel wells and suspended the radiator support from the engine lift (with everything attached) for cleaning and painting. The magnaflow system comes Wednesday and I should have it all buttoned up by then. I had to get a new exhaust heat riser too. That was very hard to find. I plan to start the truck with everything working in stock condition. I do have all the measurement tools to tweak the timing and tune the engine and a code reader. Tomorrow, I'll get the radiator support cleaned and painted and reinstalled, the fenders and wheel wells installed, and the hood back on.

As for my questions, I'm pretty sure the hot air tube connects as I thought. I have a Chilton's mega manual and I saw the diagram. The air pump does run off the alternator from a double grooved pulley.

Union is a very nice small country town. Used to ride the back country roads.

Dinner time!

 
OP
OP
M
Joined
Sep 19, 2016
Messages
60
Reaction score
27
Hello SC,

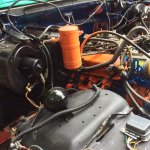
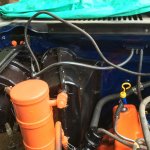
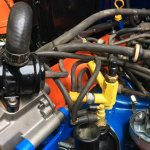
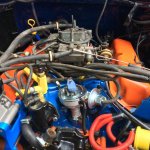
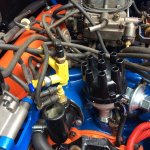
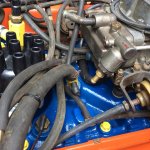
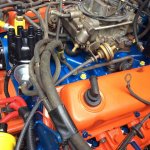
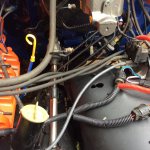
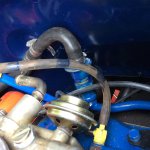
I took these this afternoon. I have the electrical all connected with just the fender well stuff to clean up. The emissions are hooked up and here are some photo's.

I used to have 3 connections on the firewall 3 port vacuum tree. Now, it seems just 2. The vacuum diagrams don't translate well to actual engine locations.

I took the distributor vacuum advance from the base plate long skinny outlet.

Please let me know if anything looks off.

2016-09-30 17.30.54.jpg

2016-09-30 17.31.11.jpg

2016-09-30 17.31.38.jpg

2016-09-30 17.32.05.jpg

2016-09-30 17.33.11.jpg

2016-09-30 17.33.39.jpg

2016-09-30 17.35.19.jpg

2016-09-30 17.36.22.jpg


Seabronc

New member
Joined
May 22, 2004
Messages
7,315
Reaction score
35
Location
North of NYC
Need some time to really study your connections.  I think I see at least one problem, but don't have time until tomorrow to comment.

:)>-

 
OP
OP
M
Joined
Sep 19, 2016
Messages
60
Reaction score
27
Thank you SeaBronc.

I'll have my Ipad outside with me today working on the truck so I'll check back often. I can post more pictures if you need them. I respect and appreciate your knowledge. I've put a lot of time and cash into my Bronco and want it to be connected properly.

Edit Update: I put together the diagram below for better graphics and abbreviations in one pic. I'm following it now and everything is going very well. Started with the heat riser exchange tube to the 3-way vacuum tee to the yellow VCV not in the thermostat housing. Now I can easily see VCV's hookup's. I'll post updated pics of the engine emissions.

VACUUMDIAGRAM.jpg

 
Last edited by a moderator:
OP
OP
M
Joined
Sep 19, 2016
Messages
60
Reaction score
27
Here are the updated pics of the emissions and vacuum lines. I found a number of problems and once I figured out what every questionable component was, it was quick and easy. It's nice having the Ipad outside to google these parts. I even read some of your (SeaBronc) posts that clued me in on a few things (light bulb moment).

Please, if you have time give it a look over. I will post a very nice final report (the old and ugly to resurrection) when the key turns and it starts.

2016-10-01 12.34.07.jpg

2016-10-01 12.34.49.jpg

2016-10-01 12.35.15.jpg

2016-10-01 12.35.30.jpg

2016-10-01 12.35.40.jpg

2016-10-01 12.35.48.jpg

2016-10-01 12.36.52.jpg

2016-10-01 12.37.28.jpg


Seabronc

New member
Joined
May 22, 2004
Messages
7,315
Reaction score
35
Location
North of NYC
Ok, looks good.  I can't spot anything in the new pictures that looks like it needs to be changed.  By the way, the 3 way vacuum Tee on the fire wall should have a line from there to the transmission shift control valve located on the right rear of the transmission.  It doesn't necessarily have to be connected at the Tee, could be connected to any main vacuum source.  Put a filtered cap on the driver side valve cover, should be available at a parts store.  My personal preference is to connect the PCV to a base plate port under the rear of the carb.  Again, a personal preference is to put the large vacuum tree at the rear of the intake, I think it makes a cleaner installation.  I used a small tree on the front to hook up the Air cleaner stuff.  Being in a cold Winter climate, it will be good to hook up the heat tube from the passenger side manifold to the Air Cleaner Diverter Valve. There is a shroud that mounts on the passenger side manifold, but I don't know where you would be able to find one except in a junk yard.

I see you have a new master cylinder, probably don't need to say this, but did you  bench bleed it prior to installation?  Not an easy thing to do by hand, but it makes bleeding the brake system a lot easier.  It clears all the air out of the master cylinder prior to doing the brake bleed procedure.

:)>-

P.S.

I love the diagram you cleaned up.  FYI, I have stolen it and added to my collection of bronco pictures.  If you want to add your name to the bottom, that would be good. ie. By MaineBroncoBeast.

 
Last edited by a moderator:
OP
OP
M
Joined
Sep 19, 2016
Messages
60
Reaction score
27
I thought you would like the emissions diagram.

Thank you for providing it... it was exactly what my 1984 Ford Bronco XLT 5.8L H.O. 351 Windsor has for emissions. The calibration code on the valve cover is 4-64G-R02.

I think switching the vacuum trees is a good idea. The pvc connects to the front base plate driver side large port. I don't have a back base plate port, just a small manifold vacuum tree in front of the EGR. Are you saying to connect the pvc to the larger port of the rear manifold vacuum tree? That would be better and much cleaner.

I put the transmission shift control valve vacuum line to the back manifold vacuum tree but it makes better sense to put it on the firewall 3-way tee and away from the heat.

I do have the oil filler cap and breather... the new valve cover for that side didn't have the cut-outs for the cap, just a round hole for the grommet. I'm going to take the valve cover off and do the cut-outs.

I do have a bench bleeder kit for the master cylinder and will do that just before take-off.

I have all the exhaust stuff new... exhaust manifolds, pipes, 3-way cat, heat riser valve, exhaust hot air tube to cat, and air pump. It's all connected and like you said, it's cold in the winter!

I got the distributor in and the fenders on. There are so many problems when a truck doesn't have body mounts. Both front cab mounts that hold the body to the frame were completely rusted away. The body was sitting on the frame. I welded frame savers on every one of the 8 body and 2 radiator frame mounts. Now that I have all new ones installed, I'm looking forward to a great ride. I welded in new front cab mounts, floor pans, rocker panels, and fabricated the corner cab mounts and rear sill plate.


Seabronc

New member
Joined
May 22, 2004
Messages
7,315
Reaction score
35
Location
North of NYC
No, I'd leave the PVC hooked where it is if you don't have a port in the back.  I would move the large tree to the back and the small single one to the front just as it shows in the vacuum diagram.  Again, it is personal preference, it gets the brake vacuum boos hose out of the way.  

Forget the breather cap!!  I forgot that fitting you have on there hooks a short tube to the side of the air cleaner, sorry about that.  Hope I didn't have you cut up your intake.  

After you run a bit, check the vacuum hose at the tranny to make sure there is no tranny fluid in it,  If so, you will need to change the vacuum Modulator (shift control valve).  A common problem is the diaphragm in the modulator going bad and the engine sucking the tranny fluid out via the vacuum line.  

I hear you on the body mounts.   I replaced mine and had to use a carbide blade to cut the bolts on all but 1.  Also, had to add the frame savers to the set over the rear wheels.

Looks like you have this pretty much sowed up.  I had a ton of body work to do on mine.  You can see what I did by clicking on my Supermotors link.  That's where I keep a lot of the pictures of my different projects.  The first go around with body work was a quick and dirty to get it on the road, the second go around had the truck off the road for about a year and a half.  Rather than welding on the body panels, I used industrial grade epoxy, which a lot of body shops use now.

Believe it or not, the final painting was done with shaker cans.  I was going to use a regular spray gun, but I backed myself into a corner by painting my front fenders with shaker cans and then couldn't get an exact match from a paint store so I just kept going   :eek: /emoticons/[email protected] 2x" width="20" height="20" />   .  AutoZone loved me, I was their biggest spray can customer  :)) .  It took a little more in rubbing it out though.  Live and learn  b-( .

If you have time, it would be neat to have my other vacuum diagram cleaned up the way you did the first one.

:)>-    

 
Last edited by a moderator:

Members online

No members online now.

Latest posts

Forum statistics

Threads
22,627
Messages
136,746
Members
25,299
Latest member
Jprince
Top