My Bronco Project.

Disclaimer: Links on this page pointing to Amazon, eBay and other sites may include affiliate code. If you click them and make a purchase, we may earn a small commission.

GrandpaKenof15

New member
Joined
Jan 16, 2016
Messages
59
Reaction score
0
Location
North Carolina
   It seemed I posted twice, so I will edit it and make a short list of what I have found so far. The bronco has been sitting since May and only started once in a while but not driven. First thing was a new battery, but when shifted into drive the motor choked out. just like if you pushed a lawnmower into deep thick grass, quit suddenly. It did this several times, but it would shift after it ran for a while and got good and warm. There is an oil leak and I noticed anti freeze on the shop floor as well. All the fluids need to be changed out, including the differentials and transfer case along with the tranny. While putting the new tires on I notice a lot of endplay in both rear axles. Rear window don't work, and I haven't been able to get to test 4wd yet. Door panels loose at bottom and driver mirror dances as you ride down the road. already repaired dash instrument bezel. waiting on new rear window switch to arrive. The column shifting indicators don't line up and I have to push up on the shifter to crank it. Smog system has to go. A large bundle of wires cut hanging out the back under bumper. The seats don't seem to the right ones cause they don't fold up when slid forward. That's just the start of it, like I said it will be a project but hopefully it will be drivable in the very near future. at least before the next snow storm.

Ken

 
Last edited by a moderator:
OP
OP
GrandpaKenof15

GrandpaKenof15

New member
Joined
Jan 16, 2016
Messages
59
Reaction score
0
Location
North Carolina
  Well as I said in my intro thread I would be moving that conversation down here. But first a little history about my B3000 which is what I call my *** ford. It has the ford 3.0L V6, Which on the Ranger Station web site I found out it is also called the Vulcan. It is designed to last 300k plus. all metric and no carb version ever made. As I did with the Mazda I am going to do with My bronc, I will comb this web site and soak up all the Tech savy I can and My bronc will shine out for all my work.

  My madza I got it back in '99 with 140k on it. It was good and strong, but found out the tranny ain't what it should be. I have pulled loads that would make some trucks cringe, but it kept pulling. At 447k I burnt an exhaust valve, and here is where all the years of study and ideas take shape. I had my S10 to drive, which I don't like too cause that is what my grandsons call Papa's hotrod. That is my cruising vehicle and It is fixing to find a new home cause I am in need of a retirement ride like a Lincoln town car or a cadiliac deville, not much on mopars. American muscle is my car love, no like the rice burners.

 Anyway, I pulled the mazda down to the block and had to find another set of heads. It took 3weeks, one of which was shear cleaning. This motor had never been opened before, all original and can you imagine the crud I had to clean and scrape. I cost me about 1k to do the top end, and would have cost another 1k to do the bottom if I would have had it. So just did the top and I got pics that I will share later in my albums. I am just giving an idea of what I am going to do to the bronco from the experience from the mazda. Been doing this for close to 40 yrs and it took this long to get to do it for myself and enjoy what I am doing.

 After I got it down and cleaned the block I checked for the ridge in cylinders and there was none, 447k miles and no ridge, this surprised me cause I had never saw that before. Then I noticed the cylinders were lined with steel alloy sleeves, cool. So I went to work on the rest. Got a set of heads, throttle body, pushrods, rocker arms, and a few other items off a 96 ranger. Took a set of injectors out of a 92 Lincoln. Went home and went to work. The heads went to machine shop to be checked and surfaced, and the intake, heads and plenum all got cleaned and I polished the ports. Now that is a job if you do it by hand as I did. After all that was ready, I went to work on the lifters, and these are roller lifters. I put them in berrymans b12 cleaner and let them soak for 3days. then painstakingly took each one apart and cleaned them. Brought a couple home for junkyard to practice with. after That I rebuilt the injectors. You can get the kits from ebay for about $20 or so. Soaked them in berrymans for a couple of days and got them ready. opened up the airbox and modified it to a coldair intake, already modified the exhaust. and got it all together. But I upgraded the ignition to iriudium plugs, 8mm wires, msd streetfire coil, and topped it of with a crane fireball six ignition control box.

 And it purrs like a kitten at idle and roars like tiger when you hit the gas. And this is my work truck. The injectors that I took out were 13-14lb and the ones from the Lincoln were 18.5lbs. So this will give an idea what I plan for the bronco. I wish it was warm weather but it ain't so I am doing the little things I can till I can stay out in the garage for longer periods.

 So far I got new shoes on the bronco (tires), have been collecting the parts and fluids for the bronc and been busy on ebay looking for accessories to make her look good. I just finished repairing the instrument bezel cause the tabs for the window switch were busted and the three holding pins at the top were broke off and the light switch had to replaced, In which I am still waiting on the new rear window switch I bought on ebay.  Almost ran out of epoxy, and that was a trick to do. I know this thread is long but here as I complete a project and if I find something that isn't posted on how to fix I will post it with pictures. The fixes I will describe in the tech section so I can keep this thread as a journal. I am open to any and all suggestions and ideas no matter how crazy they sound. Thanks for being here and thanks for all the input and tech notes you guys have posted.

Ken 


Seabronc

New member
Joined
May 22, 2004
Messages
7,315
Reaction score
35
Location
North of NYC
I merged your 2 posts to keep them in the same thread.  We eill enjoy hearing from you on the progress.

:)>-


Seabronc

New member
Joined
May 22, 2004
Messages
7,315
Reaction score
35
Location
North of NYC
   It seemed I posted twice, so I will edit it and make a short list of what I have found so far. The bronco has been sitting since May and only started once in a while but not driven. First thing was a new battery, but when shifted into drive the motor choked out. just like if you pushed a lawnmower into deep thick grass, quit suddenly. It did this several times, but it would shift after it ran for a while and got good and warm. There is an oil leak and I noticed anti freeze on the shop floor as well. All the fluids need to be changed out, including the differentials and transfer case along with the tranny. While putting the new tires on I notice a lot of endplay in both rear axles. Rear window don't work, and I haven't been able to get to test 4wd yet. Door panels loose at bottom and driver mirror dances as you ride down the road. already repaired dash instrument bezel. waiting on new rear window switch to arrive. The column shifting indicators don't line up and I have to push up on the shifter to crank it. Smog system has to go. A large bundle of wires cut hanging out the back under bumper. The seats don't seem to the right ones cause they don't fold up when slid forward. That's just the start of it, like I said it will be a project but hopefully it will be drivable in the very near future. at least before the next snow storm.

Ken
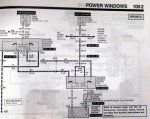
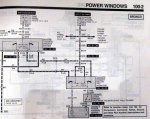
If you have to push the shift up to start it, the problem is probably the neutral safety switch on the tranny is out of adjustment.  The bundle of wires cut could have something to do with why your rear window doesn't work.

92 Tailgate.jpg

Power Distribution 047.jpg

Power Distribution 048.jpg

 
Last edited by a moderator:

Seabronc

New member
Joined
May 22, 2004
Messages
7,315
Reaction score
35
Location
North of NYC
Yes, you have to remove the steering column shroud.  You will find a nylon thread that wraps from the right side to the left under the steering column.  On the left side where it is attached it can be adjusted.  Be very careful pulling the shroud.  Remove the ***** in the bottom of it, spread it open while pulling up and out being very careful not to hook on the nylon tube that the thread goes through in order to get to the indicator.

:)>-

 
Last edited by a moderator:
OP
OP
GrandpaKenof15

GrandpaKenof15

New member
Joined
Jan 16, 2016
Messages
59
Reaction score
0
Location
North Carolina
Thanks Seabronc, I will remember that when I get to work on it this weekend. The dash bezel fix did well. will take a pic or two to show the mod later.

 
OP
OP
GrandpaKenof15

GrandpaKenof15

New member
Joined
Jan 16, 2016
Messages
59
Reaction score
0
Location
North Carolina
Well the new rear window switch came in yesterday. Now I can put the dash back together. Going to take a couple of pictures of the fix in case some one else has the same problem.

hopefully I get to work on this weekend if I don't have to work. The switch I found on ebay for $35.  Company called the switch Doctor.

 
OP
OP
GrandpaKenof15

GrandpaKenof15

New member
Joined
Jan 16, 2016
Messages
59
Reaction score
0
Location
North Carolina
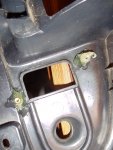
Well I got the dash fizxed today and the new switch worked. Now the rear window works. With the dash insert out I found the indicator adjustment and got that fixed. The pillar trim was broke and that got epoxied and now that is fixed. Now I took the door panels off and the horror of what I found in the driver door was one I have never witnessed. I believe I might have to find a new door. All I can find is F150s. I hope the doors will interchange. Whoever had this prior to the last owner had the mechanical skill of a goat. I hope I can reshape the inner frame and weld it back together, plus I will need a new panel as well.


Seabronc

New member
Joined
May 22, 2004
Messages
7,315
Reaction score
35
Location
North of NYC
Doors are a direct replacement.  The only changes across the 80 - 96 range was the wing window insert section and the door panels.  If it is in that bad of condition, I'd go with the door replacement and keep the skin as spare metal if needed for a body repair.

:)>-

 
Last edited by a moderator:
OP
OP
GrandpaKenof15

GrandpaKenof15

New member
Joined
Jan 16, 2016
Messages
59
Reaction score
0
Location
North Carolina
well the fun continues, I have to pull the grille and headlights to replace the grille mounting support.

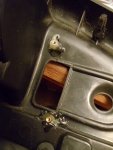
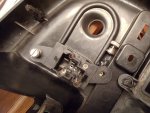
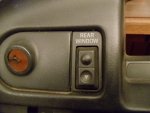
But here are the pics of the dash fix and the left door inner frame.

20160129_171548.jpg

20160129_171616.jpg

dash1.jpg

dash2.jpg

dash3.jpg

dash4.jpg


Seabronc

New member
Joined
May 22, 2004
Messages
7,315
Reaction score
35
Location
North of NYC
Well I found a couple of f150's. Any idea how to remove the header support for the headlights and grille.
How about posting a picture of what you are doing.  If you are talking about the radiator support, you will most likely have to cut the bolts because they will most likely be rust welded.  You will need a carbide blade to cut them though, they are number 8 bolts.

http://www.supermotors.net/registry/media/855416

:)>-

 
OP
OP
GrandpaKenof15

GrandpaKenof15

New member
Joined
Jan 16, 2016
Messages
59
Reaction score
0
Location
North Carolina
Nope. The header assembly. Just got back from junkyard or the poorboys part supply, LOL.

Anyway the assembly is the part that holds the headlight assemblies and the grille. Just got one and cost me $80,that included both headlight assemblies. Plus the speakers for the rear panels. Took them out of the doors of a 2000 explorer. If you have to go and get what I did today, make sure you take a can of PB Blaster. Rusty bolts are a pain in the backside. Now to gok out and put the passenger side back together. Will post pictures of parts and progress. And the fun continues.


Seabronc

New member
Joined
May 22, 2004
Messages
7,315
Reaction score
35
Location
North of NYC
Local friendly auto part recyclers are the best place for getting parts you need.  Most of the parts you can only find there.  With the exception of the rear 1/4 panels and a few floor repair panels, that 83 of mine was all parts from local junk yards. 

F150 dash, F250 hood,

81 Bronco grill (liked the grill style without the big Ford oval),

F150 doors, 85 Bronco tilt steering column, mirrors,

86 head liner and cap liner, under hood fuse panel from an Aerostar minivan (replaced fusible links with fuses),

Saginaw power steering pump with a V-belt pulley from a 79 E350,

Electric fan from a Lincoln Mark VIII, 3G alternator from a Lincoln Mark VIII,

Overhead console from a 96 Eddie Bauer Bronco,

Rocker panels, lower door posts from donor Broncos,

Tail gate and tub support from a 95 Bronco, Interior trim from an 85,

Front fenders off a F250,

Front seats from a 2000 something Ford Excursion (they are a little big and required some mounting modifications)

etc. etc.,

It truly could be called a Bronkostien. but "It's ALIVE"

:)>-

 
Last edited by a moderator:
OP
OP
GrandpaKenof15

GrandpaKenof15

New member
Joined
Jan 16, 2016
Messages
59
Reaction score
0
Location
North Carolina
I heard that. The place I use the most is called Pull A Part. WWW.pullapart.com

Several here in the southeast. Won't be long till I get the interior done. Never thought about seats from excursion or an expedition . will look into it.

 
OP
OP
GrandpaKenof15

GrandpaKenof15

New member
Joined
Jan 16, 2016
Messages
59
Reaction score
0
Location
North Carolina
Well, the interior is a slow process. Now to add insult to injury, I let the rear window down to open tailgate, and now it won't go up. I need to extend the glass to clean, check and **** the regulator to improve the up and down movement but I also found the wiring to the key switch is not connected. Can't find any broken wires, now how do you jump the latch switch so I can move the glass so I can remove the works so I can replace all the seals.


Seabronc

New member
Joined
May 22, 2004
Messages
7,315
Reaction score
35
Location
North of NYC
Remove the panel, locate the wires to the motor along the bottom edge, find connector and use a jumper to your battery or a 12V drill battery.  One way is up and reverse the wires for down.

92 Tailgate.jpg

 
OP
OP
GrandpaKenof15

GrandpaKenof15

New member
Joined
Jan 16, 2016
Messages
59
Reaction score
0
Location
North Carolina
I think window motor is bad. buying a new one today. trying to find new rollers as well. how do you move glass when down and motor don't work.


Members online

No members online now.

Forum statistics

Threads
22,516
Messages
135,940
Members
25,117
Latest member
danno
Top