1973 EB Build.... GenThree

Disclaimer: Links on this page pointing to Amazon, eBay and other sites may include affiliate code. If you click them and make a purchase, we may earn a small commission.

genthree

Member
Joined
Aug 11, 2013
Messages
160
Reaction score
9
Location
Medford, OR
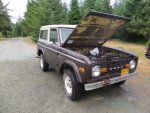
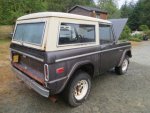
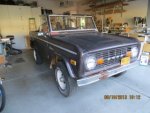
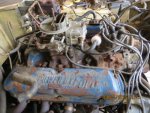
This truck has been in our family since I purchased it after high school is 1986.  When I went to college my dad bought it from me because I couldn't afford the gas....   My dad used it for a daily driver until about 10 years ago.  It has been his "farm truck" since then.  Hauling wood, pulling stumps, etc..... My 16 year old son and I are going to pull it out of the bushes next weekend and rebuild it.  Passing it on to the third generation.  We won't do a full restoration, because he wants to drive it and would rather not spend all of time on it right now.  

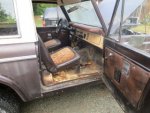
We are going to start off pretty simple.  Get it running and clean it up....  Not much body rust that can't be sanded off, a little cancer in the tail gate, window frame and floor boards, but we can live with it for now. 

We will start with cleaning the tanks and inspecting fuel system, clean and inspect brakes and lines, replace the entire ignition system, replace all of the fluids in the engine and drivetrain, drain and flush radiator, clean and inspect wheel bearings and hubs.

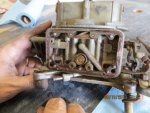
It has a Holley 4bbl on it that will need to be rebuilt.  We will be trailering it home next weekend.  I will post some pictures when we get it.....

I have wanted to do this for a VERY long time and now I can sell the project to my wife as a "bonding" opportunity for her "boys".

BTW, I live about 5 miles from Tom's Broncos......  I am sure we will spend some time with those guys....

Thanks in advance for the help and guidance!!!

Patrick 


Seabronc

New member
Joined
May 22, 2004
Messages
7,315
Reaction score
35
Location
North of NYC
Enjoy!  Post some pictures as you go.  If it's in the budget, I'd replace that Ford 4180 carb with a remanufactured one or a Holley 4160.  Rebuild kits don't address all of the problems with old carbs, a reman puts all components back to factory specs.  If you do rebuild, get a gallon bucket of carb cleaner and let the parts soak in it for a few days.

Good luck,

:)>-

 
OP
OP
genthree

genthree

Member
Joined
Aug 11, 2013
Messages
160
Reaction score
9
Location
Medford, OR
Seabronc-  let the parts sit in the carb cleaner disassembled or just drop the whole carb in it?


miesk5

96 Bronco 5.0
Staff member
Moderator
Joined
Oct 18, 2005
Messages
9,071
Reaction score
1,019
Location
Floating in the Pacific
yo Patrick,

Welcome!

Place the parts in the carb cleaner, disassembled

Holley Performance Products Frequently Asked Questions

http://www.holley.com/TechService/FAQ.asp

Rebuild & Return
RbldRtrn.gif

If you're searching for a leader in reliable, quality restoration of classic muscle car carburetors, then look no farther than the Holley Custom Shop.

This specialty service transforms tired, worn-out O.E.M. muscle carbs back to their original condition. And because this is a "custom" service, each order is personally followed through from start to finish by one of the factory technicians.

Not only are Holley carbs restored, but Rochesters, Motorcrafts and Carters, too. Engineering parts lists are uncompromisingly followed to the letter. In some remote cases where an O.E. part may no longer exist, an O.E. "equivalent" is used in its place.

You can be assured that your carburetor will remain in good hands. Even before any work begins, two or three close-up photos are taken of each carb from different angles so that it can be easily identified at any time during its stay at the Custom Shop. Many more precautions as well are taken to ensure your order stays together. Here are some other important reasons why the Custom Shop's restoration process stands out in customer satisfaction:

  • Inspection of carbs for metal fatigue, slightly-stripped threads, hair-line cracks and worn-out throttle lever bushings.
  • Cadmium Chromating of steel parts (clips, fasteners, linkages, etc.) for O.E. looks and corrosion protection.
  • Black oxidizing of base plates on Rochester 2-BBL carbs.
  • Chemical and vibratory cleaning of all carburetor castings.
  • Testing of subassemblies-chokes, vacuum secondaries, float bowls, metering blocks-to verify performance before final assembly takes place.
  • Replacement of gaskets, diaphragms, power valves and needle/seat assemblies.
  • Flow-stand testing of all carburetors to confirm correct metering of air/fuel volumes.
Before a carb is sealed in a carton and returned, all paperwork is enclosed; this is your proof that the work was performed by Holley and that the carb has passed all of the factory's quality standards as prescribed by the O.E. manufacturer.
NOTE: Prices are based on rebuildable cores (no damaged castings, stripped threads or missing parts.) Damaged or missing parts will be repaired or replaced and a charge will be added based on replacement value. Contact the Custom Shop for specific price information.


ENJOY & GL!

http://www.holley.com/CustomSpeedShop/

 
OP
OP
genthree

genthree

Member
Joined
Aug 11, 2013
Messages
160
Reaction score
9
Location
Medford, OR
Thanks.  Soaked it all in carb cleaner and rebuilt it.  Can't wait to try to fire it up!!  BTW, it Oregon they don't sell carb cleaner to anyone under 18, my son is only 16....  

If I fill the float chamber to the sight hole is that enough gas to "prime" the fuel system?  Will the fuel pump catch up?  The whole system is dry.  


Bully Bob

TOP GUN
Moderator
Joined
May 23, 2004
Messages
3,844
Reaction score
12
Location
Boulder City, Nevada (Las Vegas area)
It might be safer & easier to run a length of hose fr. the "out" ****** on pump to a catch can.

Disconnect the ignition & run the starter 'til fuel exits the hose. Stop & look for any leaks in the whole fuel

system. Reset hoses & ignition & good to go.

It could "catch-up" but likely stall a few times.

Once it's running, check for leaks again while system is under pressure.

BTW..,  you'll notice,

I moved your topic to the "TECH SUPPORT"  slot as this has been on going, not just intro.

 
Last edited by a moderator:
OP
OP
genthree

genthree

Member
Joined
Aug 11, 2013
Messages
160
Reaction score
9
Location
Medford, OR
First thing I should have done, was to check the position of the new fuel selector switch that I installed :wub: .  Didn't matter how long I would have cranked fuel was NEVER going to get there....  Blew air from the supply side of the fuel pump and couldn't blow back to the tank, turned the selector valve and BINGO!!!  Then I plugged the filler next with a rag and hit it with my air compressor and cranked it a couple times and got fuel to the new filter on top of the engine.  A few more cranks and it came to life, and that is one of the best sounds in the world....  

Then I had a beer.  You see I am not a mechanic, and much of my family was staring at my project with just a bit of skepticism.....  WOOHOO!!!  Now onto the drivetrain and brakes....

 
OP
OP
genthree

genthree

Member
Joined
Aug 11, 2013
Messages
160
Reaction score
9
Location
Medford, OR
Just to bring you guys up to date....

I have been working on brakes for the past two weeks....  I have replaced all of the lines (hard and flexible), also all of the hardware and pads at all four corners....  Being 6 miles from Tom's is certainly an advantage.  FYI, the SS break line kit is a perfect fit.  With all of the work we did on the engine, I can not WAIT to drive it.....  The drivelines all look pretty good, I will grease them up and see how they do.  Fuel gauge is acting ******* so we will have to replace that down the road and the aux tank has a leak in it (if anyone has one I am interested).  Roll bar is next then we are going to do a 6 point and a 2.5" lift to run 33" tires.  I just bought a new plasma cutter for the guys at work, with some opportunity to practice on some of the Bronco parts....

Hopefully in a couple of weeks and I let the boys start driving it to school.....


Bully Bob

TOP GUN
Moderator
Joined
May 23, 2004
Messages
3,844
Reaction score
12
Location
Boulder City, Nevada (Las Vegas area)
Good job..!

".....Fuel gauge is acting crappy"

Oil, temp, & fuel gauges are powered by a 6v regulator on the back of the inst. panel.

If it (regulator) is bad/lose wire, etc...., all 3 gauges would act up.

Clean the ground wire(s)  connection to both tank senders.., short the sender wire to ground (just temporally)

The gauge should move all the way to full. (move the switch to read signal fr. ea. tank)

If so.., the gauge is good.

"...aux tank has a leak in it"

Where..? These can be patched with epoxy or new seals.

Even the 2.5 lift may req. some steering geometry tweeking (mine did) for perfect roadability.

Get the 11pak springs for a comfortable ride & great articulation.

             ----- BTW..,  Where's all the pictures..? -----

 
Last edited by a moderator:
OP
OP
genthree

genthree

Member
Joined
Aug 11, 2013
Messages
160
Reaction score
9
Location
Medford, OR
 I am not smart enough to post pictures using the icon above, I don't know what the URL of my picture is....

We drove it last night for the first time, ran great!!!  A little "spongy" when it came to stopping, probably some more bleeding of the brakes is required.  I will post some pictures shortly....


Seabronc

New member
Joined
May 22, 2004
Messages
7,315
Reaction score
35
Location
North of NYC
When you reply, click on "More Reply Options".  That will bring up a buttpn that says "Browse" which will allow you to select the pictures on your computer that you want to share.  Please keep them sized no larger than 1024 x 768 so they are viewable and don't bog bown someone witha slow connection.

:)>-

 
OP
OP
genthree

genthree

Member
Joined
Aug 11, 2013
Messages
160
Reaction score
9
Location
Medford, OR
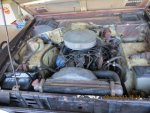
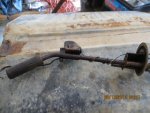
Here are some pics of where we started and some of our process.

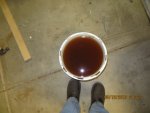
The bucket picture is what we drained out of the fuel tank, lots of fun stuff in that....  The picture of the carb will show some of the sediment that made it;'s way in there....

The fuel filter in picture 9 is new, there was nothing in line....

Pic 10 is the repainted powersteering unit...

IMG_1346.JPG

IMG_1351.JPG

IMG_1353.JPG

IMG_1355.JPG

IMG_1413.JPG

IMG_1420.JPG

IMG_1445.JPG

IMG_1448.JPG

IMG_1460.JPG

IMG_1484.JPG

 
OP
OP
genthree

genthree

Member
Joined
Aug 11, 2013
Messages
160
Reaction score
9
Location
Medford, OR
Bad night on the Bronco tonight....  Ordered an EZ Wiring harness...  Preparing for it I started opening up the dash....  Windshield totally disintegrated...  Bolts rusted frame has major holes and the hinge is welded on so we had to chisel out the hinge....

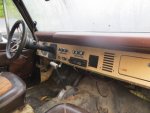
Dash dissolved, turns out the vehicle is 40 years old and so was the dash :(( !!!

We will run down to Toms when the wiring is done and pick ourselves up a new one I guess....

Looking forward to the wiring project, I have my son and a 16 yr old Russian foreign exchange student who are both pretty wide-eyed at the entire project.  It is actually the best part of the project, showing them that even though it looks rough, you can rip it apart and put it back together.  

I am absolutely having a BLAST!!!

For some reason it won't let me post pictures....


Members online

No members online now.

Latest posts

Forum statistics

Threads
22,516
Messages
135,945
Members
25,119
Latest member
Sgariffo
Top