1983 Restoration

Disclaimer: Links on this page pointing to Amazon, eBay and other sites may include affiliate code. If you click them and make a purchase, we may earn a small commission.

Seabronc

New member
Joined
May 22, 2004
Messages
7,315
Reaction score
35
Location
North of NYC
Well, I'm nearly done with a year and 1/2, when time permitted restoration of my 1983 Bronco. Since we have recently been talking about what it takes to do the body mounts and what a PITA it is, I thought I would start sharing some of the pictures, starting with the last major thing I did. In fact I just finished these up tonight.

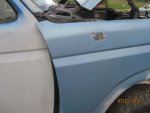
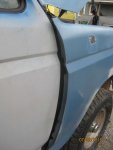
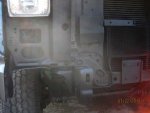
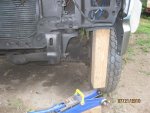
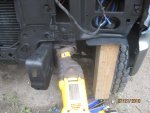
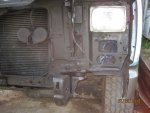
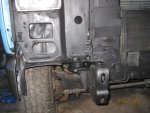
Much to my pleasant surprise, this didn't take long, but then maybe I learned something about doing it when I did the other 8. Total time from decision to do it to finish was about 4 hours. That included re-aligning the fenders. I already had the grill and front fender off in order to prep and paint the lower cowl piece, and it is probably why I decided to do this. The mounts were so crushed from 27 years of use that the radiator support was actually resting on the frame. I had to loosen the fenders to allow me to jack the support up high enough to get my new Polly mounts in place. I removed the rear bolt that is accessed by opening the door, the bolt at the bottom rear of the fender and the two bolts at the top just behind the hood attachment. This allowed me to swing the fender out a bit and also allowed me to jack the front of it up without crushing against the front edge of the door. Having done all that meant that I had to realign the fender after replacing the mount, not difficult and in fact it seemed easier to make the adjustment than before the mounts were replaced.

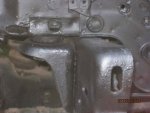
If you are thinking of doing this, I suggest that you remove the front fender and grill. That makes access to the mounts extremely easy. Also, they were so rusted, no amount of PB Blaster or any other like product could have loosened them so you could get it apart with a socket or air wrench. First I removed the rear fender bolts and jacked up enough on the radiator support to take the pressure off the mount. Then I made two cuts, one at the bottom of the crushed mount (this dropped off the bottom section) and one at the top after cutting the rubber part off (that freed the top section). After that I raised it a little more to get the poly mount and it's sleeve in, (checking to make sure that I was not crushing the back edge of the fender against the door edge). I used a large fender washer between the bottom poly section and the bolt head and a lower retainer, ( http://www.lmctruck.com/icatalog/fd/full.aspx?Page=36 , P/N 40-2032) that I had left over from doing the other mounts. I shaved just a little off one side of the retainer to allow it to fit next to one of the radiator supports and act as a lock to keep it from turning and coming loose from vibration. After doing the mount, I re-aligned the fender.

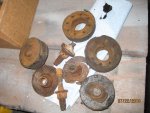
The final picture is of the old mounts.

Pictures attached

Good luck,

:)>-

Radiator Supports 006.jpg

Radiator Supports 007.jpg

Radiator Supports 004.jpg

Radiator Supports 005.jpg

Radiator Supports 001.jpg

Radiator Supports 002.jpg

Radiator Supports 003.jpg

Radiator Supports 008.jpg

Radiator Supports 009.jpg


Justshootme84

Rest in Peace Friend! Never forgotten..
Moderator
Joined
Feb 20, 2004
Messages
4,209
Reaction score
11
Location
Palacios, TX
SB, where did you get your new poly's? And did they come with all the hardware needed? I have been searching for years (literally) trying to find the hardware for a set of Daystar poly's I bought from RMS. As you've discovered, the original mounts have the rubber molded around the metal sleeve, which is hexshaped internally. The rubber part has a smaller, round portion that goes thru the frame mount, with a inner metal ring for support.

My solution was to re-locate the front mounts to the top of the frame using the smaller, bottom bushing between the core support and frame. JSM84


miesk5

96 Bronco 5.0
Staff member
Moderator
Joined
Oct 18, 2005
Messages
9,071
Reaction score
1,019
Location
Floating in the Pacific
yo SB!

nice job and pics!

Between JSM and you, the body mt/core support info is being filled-in w/vital info!

 
OP
OP
Seabronc

Seabronc

New member
Joined
May 22, 2004
Messages
7,315
Reaction score
35
Location
North of NYC
SB, where did you get your new poly's? And did they come with all the hardware needed? I have been searching for years (literally) trying to find the hardware for a set of Daystar poly's I bought from RMS. As you've discovered, the original mounts have the rubber molded around the metal sleeve, which is hexshaped internally. The rubber part has a smaller, round portion that goes thru the frame mount, with a inner metal ring for support.

My solution was to re-locate the front mounts to the top of the frame using the smaller, bottom bushing between the core support and frame. JSM84
I used the same hardware that is used for position #3 in the LMC catalog, only reversed. From the bottom up: upper retainer on the bottom with the small poly piece, large poly piece between the radiator support and the frame, lower retainer with built in hex nut on inside of the radiator support. I have p/n 40-2040 on order to replace the fender washer I used temporarily between the bolt head and the small poly section.

:)>-

 
Last edited by a moderator:
OP
OP
Seabronc

Seabronc

New member
Joined
May 22, 2004
Messages
7,315
Reaction score
35
Location
North of NYC
JSM, it just occurred to me why you asked that question. My mounting brackets do not have the hex cutout, it is like an elongated oval which the ****** on the new poly body mount cushion fits into just fine., the The reversed lower retainer fits on top when about a 3/8" slice is cut off the side. The bolt is inserted from the bottom vs the top as the other mounts. So the order is Bolt with large fender washer, small poly section, mounting bracket, Large poly section, radiator mount, modified lower retainer PN 40-0232.

:)>-


Justshootme84

Rest in Peace Friend! Never forgotten..
Moderator
Joined
Feb 20, 2004
Messages
4,209
Reaction score
11
Location
Palacios, TX
SB, the style of frame mounting bracket that both you and I have on the 83-84 Bronco should have a round hole that the smaller, bottom section of the upper bushing fits inside of. This is opposed to the hex-shaped hole on 86/87 and up brackets. In both styles, if the hole is worn, oblong or enlarged, you will get alot of movement at the bushings. The original mount for your's and mine still have a hex-shpaed metal sleeve or insert, but that has the rubber bushing molded around it at the factory .Again, the outer, bottom part of the OEM bushing is rounded to fit in the frame bracket. Another point is that this inner sleeve is threaded for the bolt that comes from above, to further reduce movement and complicatge removal after many years of corrosion.

Your solution of using a different bushing and hardware sounds like it will work, as long as it doesn't allow the bushing to move around. I quickly discovere with my Shaker hood that the whole front clip moves a helluva lot if the bushings and mounts are not secured, and still moves to some degree even then. JSM84

 
OP
OP
Seabronc

Seabronc

New member
Joined
May 22, 2004
Messages
7,315
Reaction score
35
Location
North of NYC
SB, the style of frame mounting bracket that both you and I have on the 83-84 Bronco should have a round hole that the smaller, bottom section of the upper bushing fits inside of. This is opposed to the hex-shaped hole on 86/87 and up brackets. In both styles, if the hole is worn, oblong or enlarged, you will get alot of movement at the bushings. The original mount for your's and mine still have a hex-shpaed metal sleeve or insert, but that has the rubber bushing molded around it at the factory .Again, the outer, bottom part of the OEM bushing is rounded to fit in the frame bracket. Another point is that this inner sleeve is threaded for the bolt that comes from above, to further reduce movement and complicatge removal after many years of corrosion.

Your solution of using a different bushing and hardware sounds like it will work, as long as it doesn't allow the bushing to move around. I quickly discovere with my Shaker hood that the whole front clip moves a helluva lot if the bushings and mounts are not secured, and still moves to some degree even then. JSM84
The shape in the mounting bracket appears to be by design as they are both identical. If you look at the last picture of the old bushings you can see the shape pressed into the rubber. The way the new piece fit, it would only allow forward and back motion if any, not side to side. The sleeve molded into the new poly mount seems to fit pretty snugly. I dropped the idea of using a top retainer in place of the shoulder washer I have there now as it is too big. Due to the way the front clip is tied together, i don't think I will have a problem with front to back motion, but only time will tell. I haven't had it on the road yet so we will see what happens :unsure:

:)>-

 
Last edited by a moderator:

Justshootme84

Rest in Peace Friend! Never forgotten..
Moderator
Joined
Feb 20, 2004
Messages
4,209
Reaction score
11
Location
Palacios, TX
I found a pic of the old hardware and new poly's:

http://www.supermotors.net/getfile/280084/fullsize/84coresupportbushing1.jpg

The metal sleeve part with the hex shape looks the same as your's in the last pic. My ? is what do the new ones look like? The only way I could use the red daystar poly's was with the old hardware and sleeves. I was able to recover one but had to cut apart the other. Your's look really bad!!! JSM84

 
OP
OP
Seabronc

Seabronc

New member
Joined
May 22, 2004
Messages
7,315
Reaction score
35
Location
North of NYC
I found a pic of the old hardware and new poly's:

http://www.supermotors.net/getfile/280084/fullsize/84coresupportbushing1.jpg

The metal sleeve part with the hex shape looks the same as your's in the last pic. My ? is what do the new ones look like? The only way I could use the red daystar poly's was with the old hardware and sleeves. I was able to recover one but had to cut apart the other. Your's look really bad!!! JSM84
You are right, mine were garbage. Off hand I can't remember the manufacturer name of the polys but I got the kit from Jeff's. The mount has a steel sleeve that goes down through the center and protrudes about 1/8th inch. That 1/8th inch sleeve rests inside the hole in the mounting bracket, they are different than the ones you have. Unfortunately I am not where I can get a picture of it. The diameter of the sleeve is the same as the width of the hole in the bracket. I'll try to remember to take a picture of the poly when I get home in two weeks.

:)>-

 
Last edited by a moderator:

Members online

No members online now.

Latest posts

Forum statistics

Threads
22,516
Messages
135,945
Members
25,119
Latest member
Sgariffo
Top