fuse & wiring question

Disclaimer: Links on this page pointing to Amazon, eBay and other sites may include affiliate code. If you click them and make a purchase, we may earn a small commission.

wilsbronco

New member
Joined
Oct 3, 2007
Messages
25
Reaction score
0
I am having electrical issues with my '81. The root cause, I think, is water coming from a windshield leak. The result was 3 blown fuses, a brown wire melted onto a red one near the fuse panel (both going to a 30 amp fuse). After drying out, replacing fuses, separating the wires and covering over bare wire showing on the brown one, I have headlights that work, no turn signals all the way around, the rear driver's side taillights stuck as if the brakes are on, including the backup light being on (even with ignition off) and the rear passenger's light just "on". No intentional brake lights. For even more fun, when I put the right blinker on the indicator flashes inside as well as having the open door buzzer go on and off with the blinks. I obviously have more issues behind the dash. I'd like to replace the brown wire that was bad and had the breaks I covered over (that was a very temp. repair to see if that was the only issue or not) as a minimum.

What I really need is 2 things, first the layout of the fuse panel so I know what the blown fuses were attached to. Second, help in getting the dash off enough to see what I'm doing back there. I've taken the cowl off from below the steering wheel and the instrument trim panel piece (mostly, I think I need to pull off part of the steering column piece to get it all the way off?). Any advice on the best way to tackle without taking off more than I have to??


Seabronc

New member
Joined
May 22, 2004
Messages
7,315
Reaction score
35
Location
North of NYC
If you really want to open it up so you have light and can see what is going on, I'd suggest taking the dash cover off. There are two screws at each defroster opening and several along the underside of the front. That includes the ones holding the instrument bezel and the radio bezel. That will open it up to see from the top as well as give you the light you need while playing snake to look up from under.

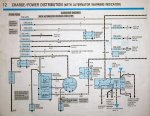
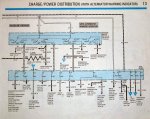
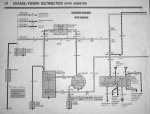
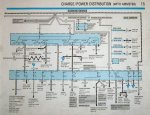
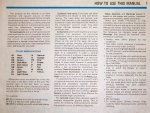
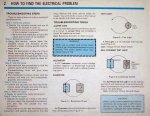
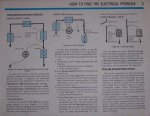
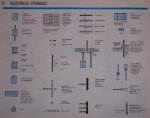
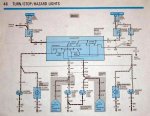
I'm attaching a few diagrams from an 83 EVTM that I have on my computer, I have the 81 EVTM but from scanning it, this area hasn't changed much at all. How big was that brown wire? The brown wires go mainly to the marker lights, (those that are on when the light switch is in the first detente. With all the other problems, you may have a short in the wiring for the turn signals.

Hope these help. You can usually get an 81 EVTM from eBay, here is a link to a seller I have gotten stuff from before and had no problems, http://cgi.ebay.com/ebaymotors/1981-FORD-B...QQsspagenameZWD

It includes all the diagrams I am attaching and more. You will find it invaluable for electrical and vacuum problems.

If you run into something that doesn't seem to agree with the diagram, let me know and I'll check the 81 for differences.

Be careful taking the shroud off the steering column, there is a small line attaching the indicator to the shift portion of the column. Spread it open by hand and slide it up and out, watch that you don't hook onto that line.

Good luck,

:)>-

PG11.jpg

PG12.jpg

PG13.jpg

PG14.jpg

PG15.jpg

PG1.jpg

PG2.jpg

PG3a.jpg

PG4.jpg

PG48.jpg

 
Last edited by a moderator:

barrett86

New member
Joined
Oct 30, 2007
Messages
106
Reaction score
0
Location
Spokane, Washington
sounds like my bronco when i first bought it, well after a year and a half of replacing almost every wire, and most of the mechanical, body parts, i have no problems. all i can say trying no to be a smarta$$ is have fun. lol.

 
OP
OP
W

wilsbronco

New member
Joined
Oct 3, 2007
Messages
25
Reaction score
0
Thanks so much for the diagrams! They're exactly what I need. The brown wire was probably a 12 or 14 guage. At least that's the way it looked from my vantage point. It was going into fuse 1, which apparently was only suppose to be a 15 amp instead of the 30 (the proper fuse might have reduced the damage). It had 30's in both the 1 and the 5 spot (both blew) ... previous owner might have had problems he thought he was "fixing". I wouldn't doubt that the brown wire has more issues that I couldn't see or get to. I did find a wire under the stearing column with a break in the insulation as well, so there may be several wires that I need to replace.

I'll be attacking it tomorrow at daylight ... Thanks for the help!

 
OP
OP
W

wilsbronco

New member
Joined
Oct 3, 2007
Messages
25
Reaction score
0
I've gotten the dash off and the fuse panel itself so that I can have easier access to the back. This brought out a new question. There's a flasher relay on the BACK of the fuse panel at the same spot as the flasher relay on the front. Kind of surprised me when I flipped the thing over to see what I had. Not exactly the most user friendly location. Is this a spare or an active relay?? The brown wire that I KNOW I have to replace is coming off of fuse 4 (looked like 1 from the front). No other obvious issues yet. There's got to be more under that lovely black tape. Aren't ya'll jealous of all the fun I'm about to have tracing this cobweb??


Seabronc

New member
Joined
May 22, 2004
Messages
7,315
Reaction score
35
Location
North of NYC
I've gotten the dash off and the fuse panel itself so that I can have easier access to the back. This brought out a new question. There's a flasher relay on the BACK of the fuse panel at the same spot as the flasher relay on the front. Kind of surprised me when I flipped the thing over to see what I had. Not exactly the most user friendly location. Is this a spare or an active relay?? The brown wire that I KNOW I have to replace is coming off of fuse 4 (looked like 1 from the front). No other obvious issues yet. There's got to be more under that lovely black tape. Aren't ya'll jealous of all the fun I'm about to have tracing this cobweb??
The rear one is hazard and the front one is turn signal.

Good luck,

:)>-

 
OP
OP
W

wilsbronco

New member
Joined
Oct 3, 2007
Messages
25
Reaction score
0
First off, thanks again for all the advice so far! I have some things fixed, others ... well, I have a new question anyway. The rear driver's side backup light is getting 12V across its terminals at all times. Passenger side is not. Can someone tell me physically what the route of that wire is? I know it should end up at the backup light switch (where might that be physically located??) I seem to follow it under the back to the passenger side area and then forward. Are the two sides separated at the front or at the back?

fyi, I've ordered the EVTM, thanks for that tip! Hasn't come in yet tho ...

Thanks again!


Seabronc

New member
Joined
May 22, 2004
Messages
7,315
Reaction score
35
Location
North of NYC
First off, thanks again for all the advice so far! I have some things fixed, others ... well, I have a new question anyway. The rear driver's side backup light is getting 12V across its terminals at all times. Passenger side is not. Can someone tell me physically what the route of that wire is? I know it should end up at the backup light switch (where might that be physically located??) I seem to follow it under the back to the passenger side area and then forward. Are the two sides separated at the front or at the back?
fyi, I've ordered the EVTM, thanks for that tip! Hasn't come in yet tho ...

Thanks again!
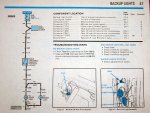
Here is the diagram. By now I hope you have received the EVTM and have already seen that both lights are powered by a common lead . I believe you were having issues due to possible shorts. Hope you are well on your way to resolving them.

Good luck,

:)>-

PG47.jpg

 
Last edited by a moderator:

Members online

No members online now.

Forum statistics

Threads
22,632
Messages
136,788
Members
25,318
Latest member
Baltimore773
Top