Crash Pad

Disclaimer: Links on this page pointing to Amazon, eBay and other sites may include affiliate code. If you click them and make a purchase, we may earn a small commission.

hoghappy

New member
Joined
Apr 12, 2006
Messages
71
Reaction score
0
Location
The Heart of Dixie
Ok...I was lucky enough to find a good used one on Ebay today and now I need help on how to replace the thing. Thanks

Robert
 

bart6180

New member
Joined
Jan 23, 2006
Messages
39
Reaction score
0
Location
elyria,ohio
take a screwdriver or something and pop the old one off, it's just a series of clips on the backside of the bumper,that'll pop when you either hit the tabs or just pry the old one off, than the new one will just snap into th existing holes

 
OP
OP
hoghappy

hoghappy

New member
Joined
Apr 12, 2006
Messages
71
Reaction score
0
Location
The Heart of Dixie
take a screwdriver or something and pop the old one off, it's just a series of clips on the backside of the bumper,that'll pop when you either hit the tabs or just pry the old one off, than the new one will just snap into th existing holes

I am refering to the crash pad on the dash...is that what you meant by bumper?

Robert


miesk5

96 Bronco 5.0
Staff member
Moderator
Joined
Oct 18, 2005
Messages
9,071
Reaction score
1,019
Location
Floating in the Pacific
Ok...I was lucky enough to find a good used one on Ebay today and now I need help on how to replace the thing. Thanks

Robert
Is this what you need to replace?

Pad, Instrument Panel Depiction, PN 0482, 92-96 by miesk5

http://www.supermotors.org/vehicles/regist...a.php?id=330284

If so, here is the info - for my 96; IT IS same for your year.

Instrument Panel Pad Removal:

Remove radio using Radio Removing Tool T87P-19061-A or equivalent. it is a U shaped item; use a bent Coat hanger or buy it from Wally Mart, etc. for under $5.

see here;

Radio Removal Tool, Ford Information & pic http://www.etoolcart.com/browseproducts/Fo...l-LIS11770.HTML

& Radio Removal Info for 92-95 by installdr.com http://www.installdr.com/InstallDocs/FLM/PDF/356037.pdf

Remove glove compartment door finish panel (06036).

Note: If the door and bin assembly is forcibly removed from the hinges, the keeper feature located on the back side of each hinge is designed to break away without harming normal operation.

Depress right and left tabs on side of glove compartment door finish panel (06036) and rotate the door and bin assembly until the keeper feature engages, holding the assembly in the open and fully down position.

If necessary to remove the complete door and bin assembly, pull down and out on the door and bin assembly. Wedge and rotate the blade of a flat-head screwdriver between each hinge and tension tab.

(glove compartment Installation

Position bottom of door assembly on instrument panel.

Rotate door assembly to a closed position. Right and left tabs should be in the opening stop position)

Using the radio and glove box door opening, remove the seven nuts retaining instrument panel pad (04282).

Remove the instrument panel pad from vehicle.

---

Installation

Follow removal procedures in reverse order.

 
Last edited by a moderator:
OP
OP
hoghappy

hoghappy

New member
Joined
Apr 12, 2006
Messages
71
Reaction score
0
Location
The Heart of Dixie
Thanks dude....I got it replaced this weekend. I thought maybe removing the ashtray would give me some access....but it didn't. It is just as your instructions say...except let me add that it was a bear to get the seven nuts off those bolts. You will need to use a very small ratchet and plan for a fight. You have very little room to move the ratchet (only one click at a time on some of them) and the bolts are long and the nuts are tight all the way off. I ran the nuts on and off the replacement part a few times before I installed it, to help with finger tightening...it helped a lot. Over 1 hour to get the old pad off...but only 15 minutes to get the replacement back on. I will be adding pics to this post later. I also had a tough time getting the after market CD player out of my dash.

 
OP
OP
hoghappy

hoghappy

New member
Joined
Apr 12, 2006
Messages
71
Reaction score
0
Location
The Heart of Dixie
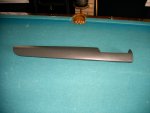
Ok here are some pics. The first 3 are of the new replacement pad showing the 7 bolts.

bronco_crash_pad_001.jpg

bronco_crash_pad_002.jpg

bronco_crash_pad_003.jpg

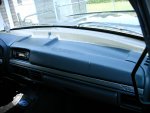
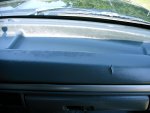
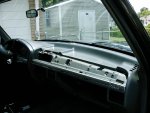
These are of the original pad, note the crack and it is also badly sun faded.

bronco_crash_pad_004.jpg

bronco_crash_pad_005.jpg

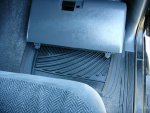
This is a pic of the glove box, note the hinges at the bottom...they press out with a simple push of the fingers. Do that first then slide it up and out at the top...don't force it.

bronco_crash_pad_006.jpg

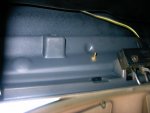
Next is a pic from under the dash, note the length of the bolts.

bronco_crash_pad_007.jpg

Here is a pic after the pad and cd player were removed.

bronco_crash_pad_008.jpg

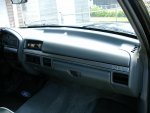
Finally, the finished product.

bronco_crash_pad_010.jpg

One other note here to prevent future dash cracking (no I don't work for these people) I have used "Armor-All "for many years on all my vehicles and never ever had a dash to fade or crack. It is good stuff. I have taken a faded, about to crack dash, back to almost new with this stuff. Just be sure to use it generously several times the first time and as needed after that.

Robert


Members online

No members online now.

Forum statistics

Threads
22,520
Messages
135,977
Members
25,124
Latest member
Fryman22
Top